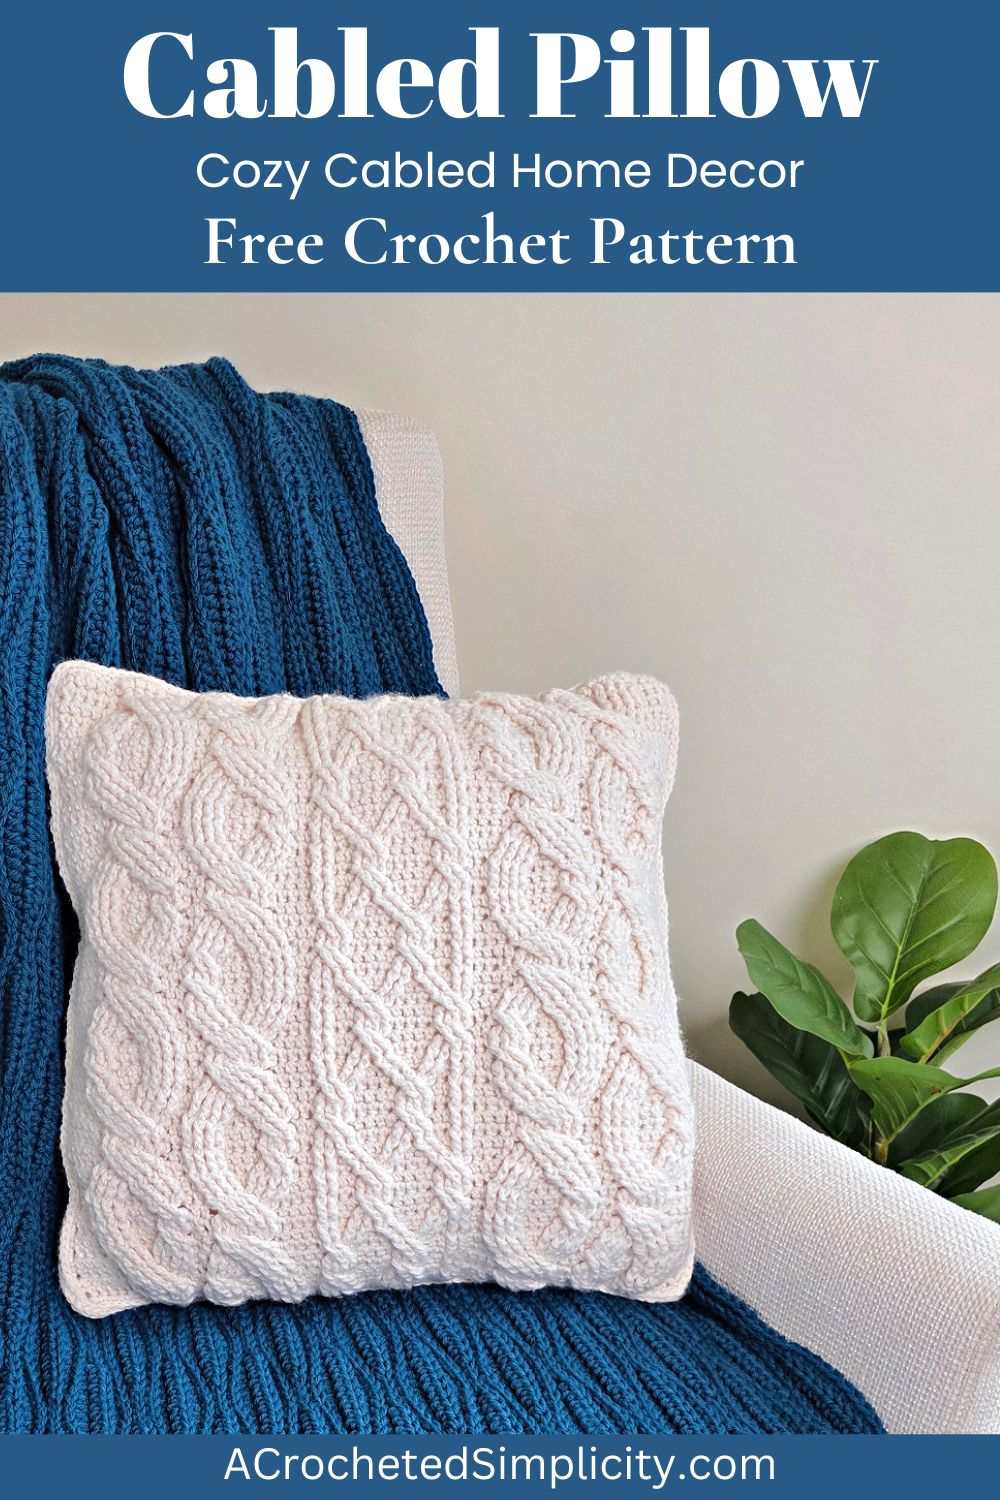
Cozy Cabled Crochet Pillow
You’ve just finished decorating your living room and you’ve been searching around the marketplace for some accent pillows but you can’t seem to find the right color. Or your friend has moved into their new home and you want to gift them something meaningful that screams sophistication. This cabled crochet pillow is just what you need!
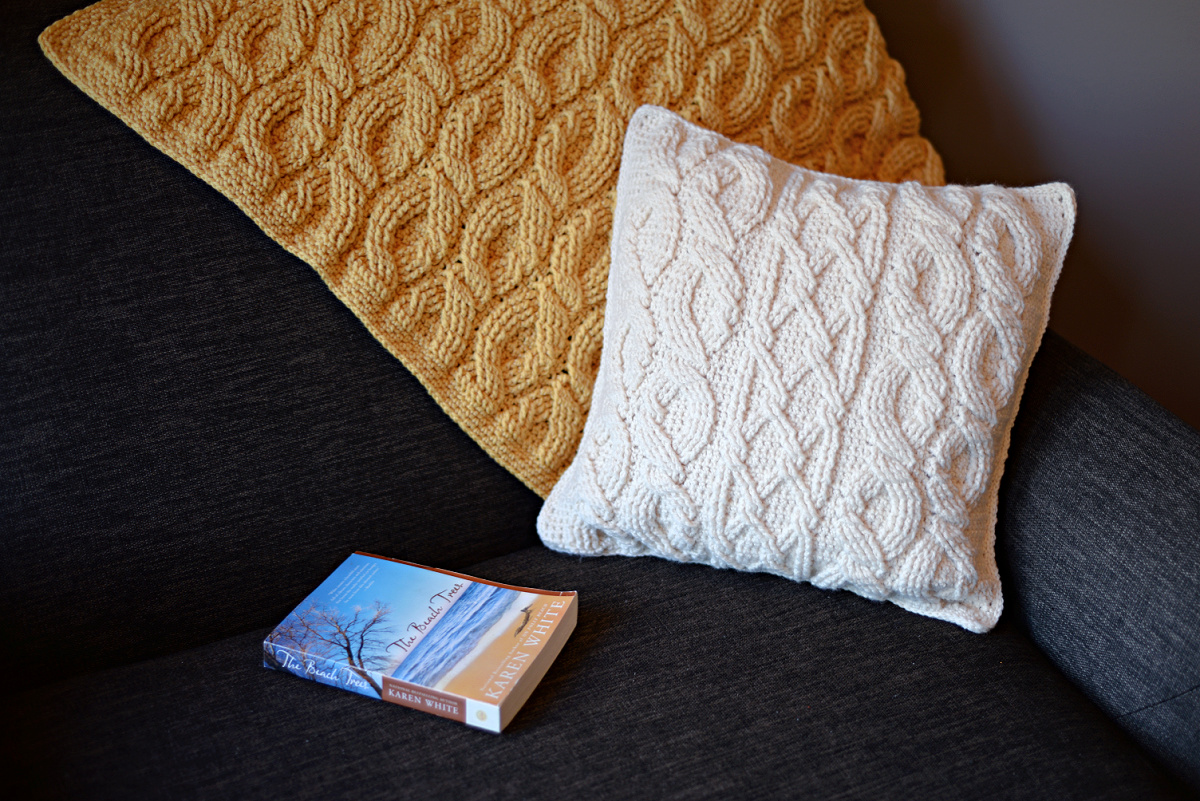
Make this pattern in a nice neutral shade so that you can use it all year round as you change the decor for every holiday and season. Or crochet it up in a bolder, brighter color to add pops of vibrance in any space. The choice is yours when it comes to handmade.
You’ll find the cabled crochet pillow pattern free below, or you can find an ad-free printable PDF (including all photo tutorials) on Ravelry, or on Etsy (aff).
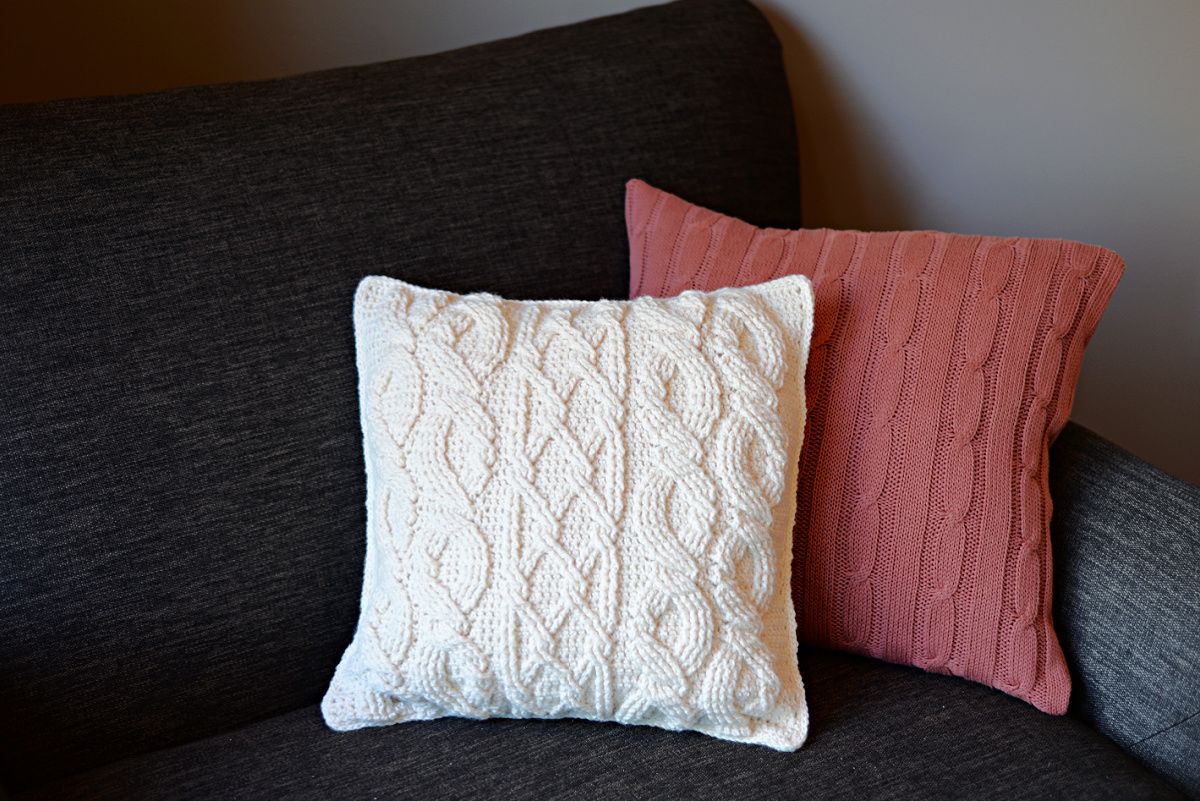
There are two types of cables featured in this cabled crochet pillow with thicker cables on the sides and thinner, more intricate ones in the center. This allows you to practice placement and see how to achieve different results from similar stitches and techniques. Once you master this, you’ll be able to use them as you like in projects of your own design.
Related: If you love the cable design on this crocheted pillow, make sure to check out my Cascading Cable Crochet Blanket.
Skills & Techniques You’ll Use
This cable crochet pillow pattern combines crochet post stitches on a background of extended single crochet stitches (ext sc).
Crochet skills you’ll practice:
- Front post double crochet (fpdc)
- Front post treble crochet (fptr)
- Front post double treble (fpDtr)
- Extended single crochet (ext sc)
How to Crochet a Cable Pillow
Crochet cables are one of many fun ways to add texture and design to a crochet pillow. Cable designs range from very basic crochet cables that only move upward, to more intricate cable designs that move inward and outward as they move upward.
Many crocheters are intimidated by cable stitches at first, but after working a few rows, they soon discover that they’re easier than they thought!
I would classify this cabled crochet pillow pattern as an intermediate cable design.
It is made with two panels, one cabled panel for the front and one solid panel for the back. Each panel is crocheted back and forth in rows and a single crochet edging is added to make them easier to seam together.
After both panels are made, you’ll join them together with a slip stitch. While joining the cabled and solid panels together, you’ll insert the pillow form and then complete the slip stitch seam to secure it.

How To Get The
Cabled Crochet Pillow Pattern
Option 1: Scroll down for the free cable crochet cushion pattern right here in this blog post.
Option 2: Purchase the ad-free printable PDF from one of my shops:
Yarn
For the Cozy Cabled Crochet Pillow Pattern, I chose Lion Brand Yarns Wool Ease Worsted in Fisherman. I could have used a gradient yarn, but knew that the definition of the crochet cables would get lost in the color changes of the yarn. That’s why I ended up with this pristine shade.
This yarn is machine-washable and highly-durable, ideal for cushions that have to sit out a lot. It is also readily available in a variety of colors and if you have some shades in your stash already, this is a great project to use them up. The fiber content of this yarn makes it hold its shape well, which is important for cabled crochet patterns.

Every day during March, a new, permanently free crochet pattern will be released. The PDF version of the pattern will also be available for free download through 10am Eastern on the day after it is featured. You can make these projects to keep, for gifts, or to donate to charity while chatting with other crocheters and sharing your projects to win giveaway prizes!
Visit Underground Crafter to learn more about the prizes, enter the giveaway, and to get links to each International Crochet Month Blog Hop pattern as it is released.

Click the graphic above to download your FREE PDF for a LIMITED TIME ONLY. Free PDF download promotion valid until 10:00am EST on March 7, 2026.
How to Style a Cable Crochet Cushion
- Living Room: Place it on your sofa or an armchair for a chic yet inviting look to sit back and relax.
- Bedroom: Layer it with the rest of your pillows for added warmth and a luxurious aesthetic.
- Reading Nook: Pair it with a comfy chair, a good book, and a cup of tea for the ultimate cozy corner.
- Seasonal Decor: Use crochet pillows in warm, earthy tones for fall and winter or light pastels for spring and summer.
Cozy Cabled Pillow – Free Crochet Pattern
The cable crochet pillow pattern is free below, but if you love to work offline, I’ve got a couple other great options for you.
Purchase the ad-free, printable PDF, (including all photo tutorials) on Ravelry, or on Etsy (aff).
This post contains affiliate links.
Materials
- Yarn: Worsted Weight / 4 / Yarn, Lion Brand Yarns Wool Ease Worsted was used for the pillow shown in the photos.
- Yardage & Color: Fisherman: #620-099 (6 balls / 920 yards)
- Crochet Hooks: G/6/4.00mm; E/3.50mm; or size needed to obtain gauge (My favorite crochet hooks are the Clover Amour Crochet Hooks, I’ve never had an ache in my hand since switching).
- Measuring Tape
- Scissors
- Yarn Needle
- (4) Locking Stitch Markers
- (1) 14″ Square Pillow or 16″ Square Pillow Form (or Poly-fil)
Abbreviations (US Terms)
- ch(s): chain(s)
- sl st: slip stitch
- st(s): stitch(es)
- sc: single crochet
- ext sc: extended single crochet
- bpdc: back post double crochet
- fpdc: front post double crochet
- fptr: front post treble crochet
- fpDtr: front post double treble
- RS: Right Side
- Rnd: round
Experience Level
- Intermediate
Gauge
- In ext sc: 24 sts = 5″; 16 rows = 4.5″
Sizes
- Fits a standard 14″ or 16″ square pillow form.
- See pillow form notes below.
Special Stitches
- Extended Single Crochet (ext sc): Insert hook into stitch indicated, yo, pull up a loop, yo, pull thru 1 loop on hook, yo, pull thru remaining two loops on hook.
- Front Post Treble Crochet (fptr): yo 2 twice, insert hook from front to back to front around the post of the designated stitch, yo, pull up a loop, (yo, pull thru 2 loops) 3 times.
- Front Post Double Treble Crochet (fpDtr): yo 3 times, insert hook from front to back to front around the post of the designated stitch, yo, pull up a loop, (yo, pull thru 2 loops) 4 times.
- Forward Cable A (FWD Cbl A): Skip next 4 post sts, fpDtr around next 4 post sts, working in front of fpDtr just made, fpDtr around each skipped post st.
- Forward Cable B (FWD Cbl B): Skip next 2 post sts, fptr around next 2 post sts, working in front of fptr just made, fptr around each skipped post st.
Pattern Notes
- Turning chains are not included in stitch count.
- The first stich of each row is worked in the same stitch as the turning chain.
- Yarn Notes: Lion Brand Yarns Wool Ease Worsted (80% Acrylic, 20% Wool / 197 yds / 180 m / 85 g / 3 oz) was used for the sample shown in the photos. Another comparable worsted weight yarn may be used as long as gauge is met.
- Yardage & Color:
- Fisherman: #620-099 (6 balls / 920 yards)
- Please Read the “Important Notes” below before beginning. These notes go over how the stitches are worked in this pillow so that the cables move horizontally outward and inward.
- Choosing Pillow Inserts: This pattern was designed to fit both a 14″ and 16″ pillow form. If you prefer a looser fitting pillow cover, choose a 14″ pillow form. If you prefer a tighter fitting pillow cover, choose a 16″ pillow form.
- Construction Notes: This cabled crochet pillow is made with two panels, one cabled panel and one solid panel. Each panel is crocheted back and forth in rows and a single crochet edging is added. After both panels are made you’ll join them together with a slip stitch. While joining the cabled and solid panels together, you’ll insert the pillow form and then complete the slip stitch seam.
Important Notes
Keep these notes in mind while working your cabled pillow. They will help you with proper stitch placement, especially when your cables are moving horizontally, outward and inward.
- Unwritten Rule of Post Stitches: When working post stitches, you always skip over the top loops of 1 stitch behind each post stitch. If you do not skip over those top loops, you’ll end up increasing your overall stitch count. **I believe that most of us do this without even thinking about it, but when it comes to using the post stitches to create cables that move, we forget about that little tidbit.
- Pay REALLY close attention to wording, it is very literal. The pattern always says “fpXX around next post st“. Except for Row 2 (which is the first row of post sts) you will work EVERY post st around a post st from the previous row (not around an ext sc). In short, make sure to work EVERY post st from Row 3 or later, around the post of a post st from the previous row and your cables will be where they need to be.
- To achieve proper movement of cables, you may be working into BOTH the top loops of a post stitch and around it. Watch wording carefully and make sure to always skip the top loops of 1 stitch behind every post st.
- To maintain cable movement and stitch count, there are also times when you will not be working into an ext sc. Count stitches and pay special attention to wording.
Cabled Crochet Pillow – Written Pattern
Cabled Panel Instructions (Make 1)
Row 1 (RS): With yarn & a 4.00mm crochet hook, ch 73, *switch to 3.50mm hook, working into the back hump of the foundation ch, ext sc in the 2nd ch from your hook, ext sc in each ch across. Turn. (72 sts)
Important Row 2 Tip: Row 2 of the Cabled Crochet Pillow is the cable set-up row. If you’re struggling with knowing exactly where the post of the stitch is that you need to work a post stitch around, make sure to check out my 2 Tips for Proper Post Stitch Placement. There is a quick video and a photo tutorial that will not only help you with the Cozy Cabled Crochet Pillow pattern, it will help you with all other crochet cable patterns.
Row 2: Ch 1, ext sc in next 2 sts, * bpdc around next 4 sts, ext sc in next 4 sts, bpdc around next 4 sts, ext sc in next 2 sts, bpdc around next 8 sts *, ext sc in next 4 sts, bpdc around next 2 sts, ext sc in next 2 sts, bpdc around next 4 sts, ext sc in next 4 sts, bpdc around next 4 sts, ext sc in next 2 sts, then work from * to * once more, then ext sc in last 4 sts. Turn. (72 sts)
Row 3: Ch 1, ext sc in next 4 sts, *FWD Cbl A, ext sc in next 2 sts, FWD Cbl B, ext sc in next 4 sts, fpdc around next 4 post sts *, ext sc in next 2 sts, fpdc around next 2 post sts, ext sc in top of next post st, fpdc around same post st as last ext sc worked and around next post st, skip next st, ext sc in next 2 sts, skip next st, fpdc around next 2 post sts, ext sc in top of same post st as last fpdc worked, ext sc in top of next post st, fpdc around same post st as last ext sc worked and around next post st, skip next st, ext sc in next st, fpdc around next 2 post sts, ext sc in next 4 sts, then work from * to * once more, then ext sc in last 2 sts. Turn. (72 sts)
Row 4: Ch 1, ext sc in next 2 sts, * bpdc around next 4 sts, ext sc in next 4 sts, bpdc around next 4 sts, ext sc in next 2 sts, bpdc around next 8 sts *, ext sc in next 4 sts, bpdc around next 2 post sts, skip next st, bpdc around next 2 post sts, ext sc in top of same st as last bpdc worked around, ext sc in next 2 sts, ext sc in top of next post st, bpdc around same post st as last ext sc worked and around next post st, skip next 2 sts, bpdc around next 2 post sts, ext sc in top of same post st as last bpdc worked, ext sc in next st, bpdc around next 2 post sts, ext sc in next 2 sts, then work from * to * once more, then ext sc in last 4 sts. Turn. (72 sts)
Row 5: Ch 1, ext sc in next 3 sts, * skip next st, fpdc around next 4 post sts, ext sc in top of same st as last fpdc worked, ext sc in top of next post st, fpdc around same post st as last ext sc worked and around next 3 post sts, skip next st, ext sc in next st, ext sc in top of next post st, fpdc around same post st as last ext sc worked and next 3 post sts, skip next st, ext sc in next 2 sts, skip next st, fpdc around next 4 post sts, ext sc in the top of the same st as the last post st worked *, ext sc in next 2 sts, fpdc around next 2 post sts, ext sc in next 2 sts, FWD Cbl B, ext sc in next 4 sts, FWD Cbl B, ext sc in next 3 sts, then work from * to * once more, then ext sc in last 2 sts. Turn. (72 sts)
Row 6: Ch 1, ext sc in next 3 sts, * ext sc in top of next post st, bpdc around same post st as last ext sc made and around next 3 post sts, skip next 2 sts, bpdc around next 4 post sts, ext sc in top of same st as last post st worked around, ext sc in next st, skip next st, bpdc around next 4 post sts, ext sc in top of same st as last post st worked around, ext sc in next 2 sts, ext sc in top of next post st, bpdc around same post st as last ext sc made and around next 3 post sts, skip next st *, ext sc in next 2 sts, bpdc around next 4 post sts, ext sc in next 4 sts, bpdc around next 4 post sts, ext sc in next 2 sts, bpdc around next 2 post sts, ext sc in next 3 sts, then work from * to * once more, then ext sc in last 2 sts. Turn. (72 sts)
Row 7: Ch 1, ext sc in next 2 sts, * FWD Cbl B, ext sc in next 4 sts, fpdc around next 4 post sts, ext sc in next 2 sts, FWD Cbl A *, ext sc in next 4 sts, fpdc around next 2 post sts, ext sc in next 2 sts, FWD Cbl B, ext sc in next 4 sts, FWD Cbl B, ext sc in next 2 sts, then work from * to * once more, then ext sc in last 4 sts. Turn. (72 sts)
Row 8: Ch 1, ext sc in next 4 sts, * bpdc around next 8 post sts, ext sc in next 2 sts, bpdc around next 4 post sts, ext sc in next 4 sts, bpdc around next 4 post sts *, ext sc in next 2 sts, bpdc around next 4 post sts, ext sc in next 4 sts, bpdc around next 4 post sts, ext sc in next 2 sts, bpdc around next 2 post sts, ext sc in next 4 sts, then work from * to * once more, then ext sc in last 2 sts. Turn. (72 sts)
Row 9: Ch 1, ext sc in next 2 sts, * FWD Cbl B, ext sc in next 4 sts, fpdc around next 4 post sts, ext sc in next 2 sts, FWD Cbl A *, ext sc in next 4 sts, fpdc around next 2 post sts, ext sc in next st, skip next st, fpdc around next 2 post sts, ext sc in top of same post st as last fpdc worked around, ext sc in top of next post st, fpdc around same st as last ext sc worked and around next post st, skip next st, ext sc in next 2 sts, skip next st, fpdc around next 2 post sts, ext sc in top of same post st as last fpdc worked around, fpdc around next 2 post sts, ext sc in next 2 sts, then work from * to * once more, then ext sc in last 4 sts. Turn. (72 sts)
Row 10: Ch 1, ext sc in next 4 sts, * bpdc around next 8 post sts, ext sc in next 2 sts, bpdc around next 4 post sts, ext sc in next 4 sts, bpdc around next 4 post sts *, ext sc in next 2 sts, bpdc around next 2 post sts, ext sc in next st, ext sc in top of next post st, bpdc around same post st as last ext sc worked and around next post st, skip next 2 sts, bpdc around next 2 post sts, ext sc in same post st as last bpdc worked around, ext sc in next 2 sts, ext sc in top of next post st, bpdc around same post st as last ext sc worked and around next post st, skip next st, bpdc around next 2 post sts, ext sc in next 4 sts, then work from * to * once more, then ext sc in last 2 sts. Turn. (72 sts)
Row 11: Ch 1, ext sc in next 2 sts, * ext sc in top of next post st, fpdc around same post st as last ext sc worked and around next 3 post sts, skip next st, ext sc in next 2 sts, skip next st, fpdc around next 4 post sts, ext sc in top of same st as last post st worked, ext sc in next st, skip next st, fpdc around next 4 post sts, ext sc in top of same st as last fpdc worked, ext sc in top of next post st, fpdc around same post st as last ext sc worked and around next 3 post sts, skip next st *, ext sc in next 3 sts, FWD Cbl B, ext sc in next 4 sts, FWD Cbl B, ext sc in next 2 sts, fpdc around next 2 post sts, ext sc in next 2 sts, then work from * to * once more, then ext sc in last 3 sts. Turn. (72 sts)
Row 12: Ch 1, ext sc in next 2 sts, * skip next st, bpdc around next 4 post sts, ext sc in top of same st as last bpdc worked, ext sc in next 2 sts, ext sc in top of next post st, bpdc around same post st as last ext sc worked and around next 3 post sts, skip next st, ext sc in next st, ext sc in top of next post st, bpdc around same post st as last ext sc worked and around next 3 post sts, skip next 2 sts, bpdc around next 4 post sts, ext sc in top of same st as last bpdc worked *, ext sc in next 3 sts, bpdc around next 2 post sts, ext sc in next 2 sts, bpdc around next 4 post sts, ext sc in next 4 sts, bpdc around next 4 post sts, ext sc in next 2 sts, then work from * to * once more, then ext sc in last 3 sts. Turn. (72 sts)
Row 13: Ch 1, ext sc in next 4 sts, * FWD Cbl A, ext sc in next 2 sts, fpdc around next 4 post sts, ext sc in next 4 sts, FWD Cbl B *, ext sc in next 2 sts, FWD Cbl B, ext sc in next 4 sts, FWD Cbl B, ext sc in next 2 sts, fpdc around next 2 post sts, ext sc in next 4 sts, then work from * to * once more, then ext sc in next 2 sts. Turn. (72 sts)
Row 14: Ch 1, ext sc in next 2 sts, * bpdc around next 4 post sts, ext sc in next 4 sts, bpdc around next 4 post sts, ext sc in next 2 sts, bpdc around next 8 post sts *, ext sc in next 4 sts, bpdc around next 2 post sts, ext sc in next 2 sts, bpdc around next 4 post sts, ext sc in next 4 sts, bpdc around next 4 post sts, ext sc in next 2 sts, work from * to * once more, then ext sc in last 4 sts. Turn. (72 sts)
Row 15: Ch 1, ext sc in next 4 sts, *FWD Cbl A, ext sc in next 2 sts, fpdc around next 4 post sts, ext sc in next 4 sts, FWD Cbl B *, ext sc in next 2 sts, fpdc around next 2 post sts, ext sc in top of next post st, fpdc around same post st as last ext sc worked and around next post st, skip next st, ext sc in next 2 sts, skip next st, fpdc around next 2 post sts, ext sc in top of same post st as last fpdc worked, ext sc in top of next post st, fpdc around same post st as last ext sc worked and around next post st, skip next st, ext sc in next st, fpdc around next 2 post sts, ext sc in next 4 sts, then work from * to * once more, then ext sc in last 2 sts. Turn. (72 sts)
Row 16: Ch 1, ext sc in next 2 sts, * bpdc around next 4 sts, ext sc in next 4 sts, bpdc around next 4 sts, ext sc in next 2 sts, bpdc around next 8 sts *, ext sc in next 4 sts, bpdc around next 2 post sts, skip next st, bpdc around next 2 post sts, ext sc in top of same st as last bpdc worked around, ext sc in next 2 sts, ext sc in top of next post st, bpdc around same post st as last ext sc worked and around next post st, skip next 2 sts, bpdc around next 2 post sts, ext sc in top of same post st as last bpdc worked, ext sc in next st, bpdc around next 2 post sts, ext sc in next 2 sts, then work from * to * once more, then ext sc in last 4 sts. Turn. (72 sts)
Row 17: Ch 1, ext sc in next 3 sts, * skip next st, fpdc around next 4 post sts, ext sc in top of same st as last fpdc worked, ext sc in top of next post st, fpdc around same post st as last ext sc worked and around next 3 post sts, skip next st, ext sc in next st, ext sc in top of next post st, fpdc around same post st as last ext sc worked and next 3 post sts, skip next st, ext sc in next 2 sts, skip next st, fpdc around next 4 post sts, ext sc in the top of the same st as the last post st worked *, ext sc in next 2 sts, fpdc around next 2 post sts, ext sc in next 2 sts, FWD Cbl B, ext sc in next 4 sts, FWD Cbl B, ext sc in next 3 sts, then work from * to * once more, then ext sc in last 2 sts. Turn. (72 sts)
Row 18: Ch 1, ext sc in next 3 sts, * ext sc in top of next post st, bpdc around same post st as last ext sc made and around next 3 post sts, skip next 2 sts, bpdc around next 4 post sts, ext sc in top of same st as last post st worked around, ext sc in next st, skip next st, bpdc around next 4 post sts, ext sc in top of same st as last post st worked around, ext sc in next 2 sts, ext sc in top of next post st, bpdc around same post st as last ext sc made and around next 3 post sts, skip next st *, ext sc in next 2 sts, bpdc around next 4 post sts, ext sc in next 4 sts, bpdc around next 4 post sts, ext sc in next 2 sts, bpdc around next 2 post sts, ext sc in next 3 sts, then work from * to * once more, then ext sc in last 2 sts. Turn. (72 sts)
Row 19: Ch 1, ext sc in next 2 sts, * fpdc around next 4 post sts, ext sc in next 4 sts, FWD Cbl B, ext sc in next 2 sts, FWD Cbl A *, ext sc in next 4 sts, fpdc around next 2 post sts, ext sc in next 2 sts, FWD Cbl B, ext sc in next 4 sts, FWD Cbl B, ext sc in next 2 sts, then work from * to * once more, then ext sc in last 4 sts. Turn. (72 sts)
Row 20: Ch 1, ext sc in next 4 sts, * bpdc around next 8 post sts, ext sc in next 2 sts, bpdc around next 4 post sts, ext sc in next 4 sts, bpdc around next 4 post sts *, ext sc in next 2 sts, bpdc around next 4 post sts, ext sc in next 4 sts, bpdc around next 4 post sts, ext sc in next 2 sts, bpdc around next 2 post sts, ext sc in next 4 sts, then work from * to * once more, then ext sc in last 2 sts. Turn. (72 sts)
Row 21: Ch 1, ext sc in next 2 sts, * fpdc around next 4 post sts, ext sc in next 4 sts, FWD Cbl B, ext sc in next 2 sts, FWD Cbl A *, ext sc in next 4 sts, fpdc around next 2 post sts, ext sc in next st, skip next st, fpdc around next 2 post sts, ext sc in top of same post st as last fpdc worked around, ext sc in top of next post st, fpdc around same st as last ext sc worked and around next post st, skip next st, ext sc in next 2 sts, skip next st, fpdc around next 2 post sts, ext sc in top of same post st as last fpdc worked around, fpdc around next 2 post sts, ext sc in next 2 sts, then work from * to * once more, then ext sc in last 4 sts. Turn. (72 sts)
Row 22: Ch 1, ext sc in next 4 sts, * bpdc around next 8 post sts, ext sc in next 2 sts, bpdc around next 4 post sts, ext sc in next 4 sts, bpdc around next 4 post sts *, ext sc in next 2 sts, bpdc around next 2 post sts, ext sc in next st, ext sc in top of next post st, bpdc around same post st as last ext sc worked and around next post st, skip next 2 sts, bpdc around next 2 post sts, ext sc in same post st as last bpdc worked around, ext sc in next 2 sts, ext sc in top of next post st, bpdc around same post st as last ext sc worked and around next post st, skip next st, bpdc around next 2 post sts, ext sc in next 4 sts, then work from * to * once more, then ext sc in last 2 sts. Turn. (72 sts)
Row 23: Ch 1, ext sc in next 2 sts, * ext sc in top of next post st, fpdc around same post st as last ext sc worked and around next 3 post sts, skip next st, ext sc in next 2 sts, skip next st, fpdc around next 4 post sts, ext sc in top of same st as last post st worked, ext sc in next st, skip next st, fpdc around next 4 post sts, ext sc in top of same st as last fpdc worked, ext sc in top of next post st, fpdc around same post st as last ext sc worked and around next 3 post sts, skip next st *, ext sc in next 3 sts, FWD Cbl B, ext sc in next 4 sts, FWD Cbl B, ext sc in next 2 sts, fpdc around next 2 post sts, ext sc in next 2 sts, then work from * to * once more, then ext sc in last 3 sts. Turn. (72 sts)
Row 24: Ch 1, ext sc in next 2 sts, * skip next st, bpdc around next 4 post sts, ext sc in top of same st as last bpdc worked, ext sc in next 2 sts, ext sc in top of next post st, bpdc around same post st as last ext sc worked and around next 3 post sts, skip next st, ext sc in next st, ext sc in top of next post st, bpdc around same post st as last ext sc worked and around next 3 post sts, skip next 2 sts, bpdc around next 4 post sts, ext sc in top of same st as last bpdc worked *, ext sc in next 3 sts, bpdc around next 2 post sts, ext sc in next 2 sts, bpdc around next 4 post sts, ext sc in next 4 sts, bpdc around next 4 post sts, ext sc in next 2 sts, then work from * to * once more, then ext sc in last 3 sts. Turn. (72 sts)
Row 25: Ch 1, ext sc in next 4 sts, * FWD Cbl A, ext sc in next 2 sts, FWD Cbl B, ext sc in next 4 sts, fpdc around next 4 post sts *, ext sc in next 2 sts, FWD Cbl B, ext sc in next 4 sts, FWD Cbl B, ext sc in next 2 sts, fpdc around next 2 post sts, ext sc in next 4 sts, then work from * to * once more, then ext sc in next 2 sts. Turn. (72 sts)
Row 26: Ch 1, ext sc in next 2 sts, * bpdc around next 4 post sts, ext sc in next 4 sts, bpdc around next 4 post sts, ext sc in next 2 sts, bpdc around next 8 post sts *, ext sc in next 4 sts, bpdc around next 2 post sts, ext sc in next 2 sts, bpdc around next 4 post sts, ext sc in next 4 sts, bpdc around next 4 post sts, ext sc in next 2 sts, work from * to * once more, then ext sc in last 4 sts. Turn. (72 sts)
Row 27: Ch 1, ext sc in next 4 sts, *FWD Cbl A, ext sc in next 2 sts, FWD Cbl B, ext sc in next 4 sts, fpdc around next 4 post sts *, ext sc in next 2 sts, fpdc around next 2 post sts, ext sc in top of next post st, fpdc around same post st as last ext sc worked and around next post st, skip next st, ext sc in next 2 sts, skip next st, fpdc around next 2 post sts, ext sc in top of same post st as last fpdc worked, ext sc in top of next post st, fpdc around same post st as last ext sc worked and around next post st, skip next st, ext sc in next st, fpdc around next 2 post sts, ext sc in next 4 sts, then work from * to * once more, then ext sc in last 2 sts. Turn. (72 sts)
Row 28: Ch 1, ext sc in next 2 sts, * bpdc around next 4 sts, ext sc in next 4 sts, bpdc around next 4 sts, ext sc in next 2 sts, bpdc around next 8 sts *, ext sc in next 4 sts, bpdc around next 2 post sts, skip next st, bpdc around next 2 post sts, ext sc in top of same st as last bpdc worked around, ext sc in next 2 sts, ext sc in top of next post st, bpdc around same post st as last ext sc worked and around next post st, skip next 2 sts, bpdc around next 2 post sts, ext sc in top of same post st as last bpdc worked, ext sc in next st, bpdc around next 2 post sts, ext sc in next 2 sts, then work from * to * once more, then ext sc in last 4 sts. Turn. (72 sts)
Rows 29 – 52: Repeat Rows 5 – 28. Do not turn at the end of the last row.
Do not fasten off. Continue to Panel Edging. Finished panel should measure approximately 15″ W x 14-5/8″ H.
Panel Edging
Rnd 1 (RS): Continuing on from the Cabled Panel with a 3.50mm crochet hook, crochet around the perimeter of the cabled panel by working 1 sc into each st and adding 1 extra sc into each corner. Join with a sl st to the 1st st. (252 sts)
Fasten off. Weave in ends. Continue to Solid Panel.
Solid Panel Instructions (Make 1)
Row 1 (RS): With yarn & a 4.00mm crochet hook, ch 73, *switch to 3.50mm hook, working into the back hump of the foundation ch, ext sc in the 2nd ch from your hook, ext sc in each ch across. Turn. (72 sts)
Rows 2 – 52: Ch 1, ext sc in each st across. Turn. (72 sts) Do not turn at the end of the last row.
Do not fasten off. Continue to Panel Edging. Finished panel should measure approximately 15″ W x 14-5/8″ H.
Panel Edging
Rnd 1 (RS): Continuing on from the Solid Panel with a 3.50mm crochet hook, crochet around the perimeter of the cabled panel by working 1 sc into each st and adding 1 extra sc into each corner. Join with a sl st to the 1st st. (252 sts)
Fasten off. Weave in ends. Continue to Pillow Assembly.
Pillow Assembly
Step 1: Lay the two panels on top of one another. Make sure to line up the first and last rows of each panel. Use locking stitch markers to hold the panels together at each corner.
Step 2: Hold the panels so that the cabled panel is facing you, with yarn & a 3.50mm crochet hook, join yarn in any corner stitch with a slip stitch, then slip stitch (surface crochet) in each stitch around three of the sides of the crochet pillow cover, making sure to work through both layers. Do not fasten off.
Step 3: Insert the pillow form into the pillow cover, or stuff with Poly-fil. Continue to slip stitch along the last side of the panels.
Fasten off. Weave in ends.
A cabled crochet pillow is more than just a comfy backrest; it’s a piece of art that adds personality and warmth to your home. Whether you’re making one yourself or purchasing a handmade creation, these cushions are an investment in comfort and style!
I Made It! Now What?
Pin this post! Save this cabled crochet pillow pattern to your Pinterest boards so that you can come back and make it again.
Leave a comment below: We love to hear your feedback.
Share Your Finished Projects on Facebook or Instagram: I love to see your finished projects! Share with us on social media and tag me @acrochetedsimplicity or use the hashtag #ACrochetedSimplicity so I can find your posts.
Join us in the Facebook Community Group!
Come share your finished projects with us in the A Crocheted Simplicity Crochet Community Group on Facebook. Join us for fun community events such as crochet alongs, join in on crochet conversations, ask questions, get advice, and share your love for crochet!

More Crochet Cable Patterns I Think You’ll Love
Looking for More Crochet Home Patterns?
Check out our other free crochet patterns that will enhance your home decor and give a unique handmade look to all of your spaces.