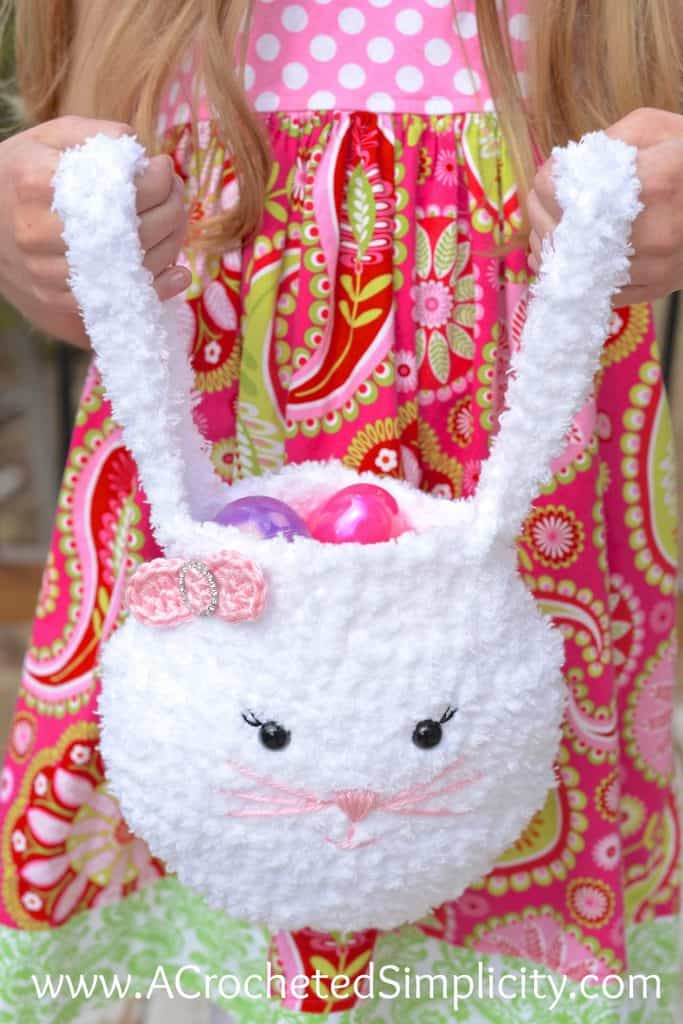
Pipsqueak Bunny Bag – Free Crochet Pattern
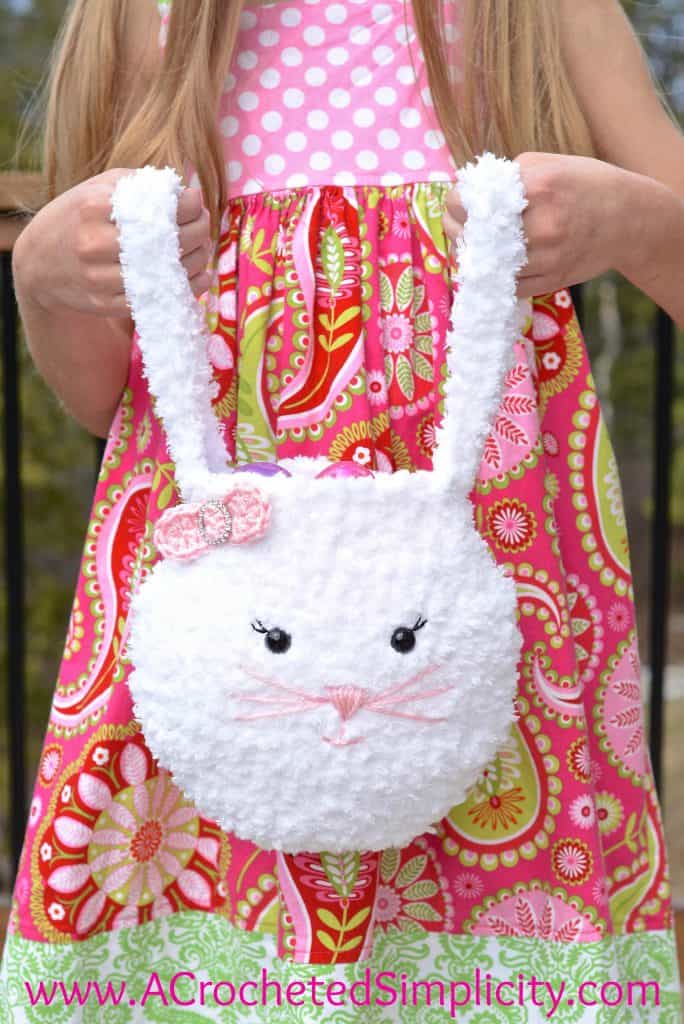
Every once in a while my youngest daughter will ask me to crochet something special for her. Her latest request was for a small bag she could use to collect eggs while at a local Easter egg hunt. This is where the inspiration for the Pipsqueak Bunny Bag came from. 🙂
I think you’ll agree that Bernat Pipsqueak yarn is the best yarn for making soft, fluffy bunnies at Easter time. So when Claire asked me to make her a small purse, it is the first yarn that came to mind. It’s the perfect yarn for the Pipsqueak Bunny Bag!
~Click HERE to sign-up to receive our weekly newsletter!~
~Don’t lose it, add It To Your Ravelry Favorites or Queue.~
~Don’t forget to Pin It too!~
*Purchase an ad-free PDF of this pattern (including all charts and photo tutorials) on Craftsy or Ravelry*
This post contains affiliate links.
Materials
- Yarn: Bernat Pipsqueak in Whitey White (160 yards) & Caron Simply Soft in White (160 yards) & Soft Pink (6 yards)
- Crochet Hooks: I/9/5.50mm; G/6/4.00mm (My favorite crochet hooks are the Clover Amour Hooks, I’ve never had an ache in my hand since switching)
- Scissors
- Yarn Needle
- Stitch Marker (or scrap of yarn)
- 12mm Solid Black Eyes (2)
- Black Thread (4 yards)
- 3/4″ rhinestone slide for bow (optional)
Many of these materials are available for purchase through our affiliates below:
 Bernat Pipsqueak Yarn, 8.8 ...Shop on Amazon
 Caron Simply Soft Light Yar...Shop on Amazon
  Medium Gauge 100% Acrylic - 6 oz - Pink - Machine Wash & Dry (H970039719)") Caron Simply Soft Solids Ya...Shop on Amazon
Caron Simply Soft Solids Ya...Shop on Amazon  Clover 1045/G Purple Amour ...Shop on Amazon
  Clover Amour Crochet Hook: ...Shop on Amazon
  Darice 50 Piece 12mm Solid ...Shop on Amazon
Stitch Abbreviations
- ch: chain
- sl st: slip stitch
- sc: single crochet
- dc: double crochet
- sc2tog: single crochet decrease by 1
- st(s): stitch(es)
- Rep: repeat
- Rnd(s): round(s)
Gauge isn’t crucial for this project
One Size
- 8″ diameter circle + Ear Handles 5-1/2″ tall
- Holds approximately 12 plastic Easter eggs (standard size)
Notes
- I tend to crochet on the tighter side, if you crochet more loosely, you may need to go down a hook size or two to crochet a bag the same size as mine.
- The entire bag is worked by holding together 1 strand of Bernat Pipsqueak & 1 strand of white Caron Simply Soft.
- The bag is worked in continuous rounds beginning at the bottom of the bag. I highly suggest using a stitch marker (I prefer to use a scrap piece of yarn) to mark the beginning/ending of each round, to keep your place.
- The bow is made using only 1 strand of soft pink.
If you’re looking for a great new crochet hook case, click here to check out this one from our affiliates!

Bag Instructions
Can’t see your stitches when working with Bernat Pipsqueak, read this! This is a great yarn, but it can be hard to see your stitches because it’s so soft and furry. So to make this project easier to work, I’ve designed it holding together 1 strand of Pipsqueak with 1 strand of Caron Simply Soft. Adding the worsted weight yarn, Caron Simply Soft, gives you the ability to be able to feel your stitches and see them just a little bit better. So, as I’m working around, I use the thumb and first finger on my non-hook hand to squeeze the top edge of my work. I’m feeling for the top loops of the stitches so that I know where to insert my hook to work the next stitch. I hope this helps you too!
Rnd 1: Hold together 1 strand of Bernat Pipsqueak & 1 strand of Caron Simply Soft & using a 5.50mm crochet hook, ch 9, 3 sc in the 2nd ch from your hook, sc in each of the next 6 chs, 3 sc in the last ch, rotate to work into the bottom of the chs, sc in each of the next 6 chs. Do not join. Read * note below. (18 sts)
*Bag is worked in continuous rounds. Place a stitch marker ( I use a 3″ scrap piece of yarn) after the last stitch of the round, before moving on to the next round. Move the marker up as you complete each round by removing it and placing it after the last st of the round just completed.
Rnd 2: ( 2 sc in the next st, 3 sc in the next st, 2 sc in the next st, sc in each of the next 6 sts ) rep from ( to ). (26 sts)
Rnd 3: sc in each of the next 3 sts, 3 sc in the next st, sc in each of the next 12 sts, 3 sc in the next st, sc in each of the next 9 sts. (30 sts)
Rnd 4: sc in each of the next 3 sts, 2 sc in each of the next 3 sts, sc in each of the next 12 sts, 2 sc in each of the next 3 sts, sc in each of the next 9 sts. (36 sts)
Rnds 5 – 6: sc in each st around. (36 sts)
Rnd 7: sc in each of the next 4 sts, 2 sc in each of the next 5 sts, sc in each of the next 13 sts, 2 sc in each of the next 5 sts, sc in each of the next 9 sts. (46 sts)
Rnds 8 – 16: sc in each st around. (46 sts)
Rnd 17: sc in each of the next 5 sts, (sc2tog) 5 times, sc in each of the next 14 sts, (sc2tog) 5 times, sc in each of the next 7 sts. (36 sts)
Rnds 18 – 19: sc in each st around. (36 sts)
Rnd 20: sc in each of the next 6 sts, (sc2tog) 3 times, sc in each of the next 12 sts, (sc2tog) 3 times, sc in each of the next 6 sts. (30 sts)
Rnd 21: sc in each of the next 8 sts, loosely ch 30 (for first ear), sc in each of the next 15 sts, loosely ch 30 (for second ear), sc in each of the next 7 sts. (30 sts + 60 chs)
Rnd 22: sc in each of the next 8 sts, sc in each of the next 5 chs, dc in each of the next 20 chs, sc in each of the next 5 chs, sc in each of the next 15 sts, sc in each of the next 5 chs, dc in each of the next 20 chs, sc in each of the next 5 chs, sc in each of the next 7 sts. (90 sts)
Fasten off. Weave in all ends. Continue on to the Bunny Face Tutorial below.
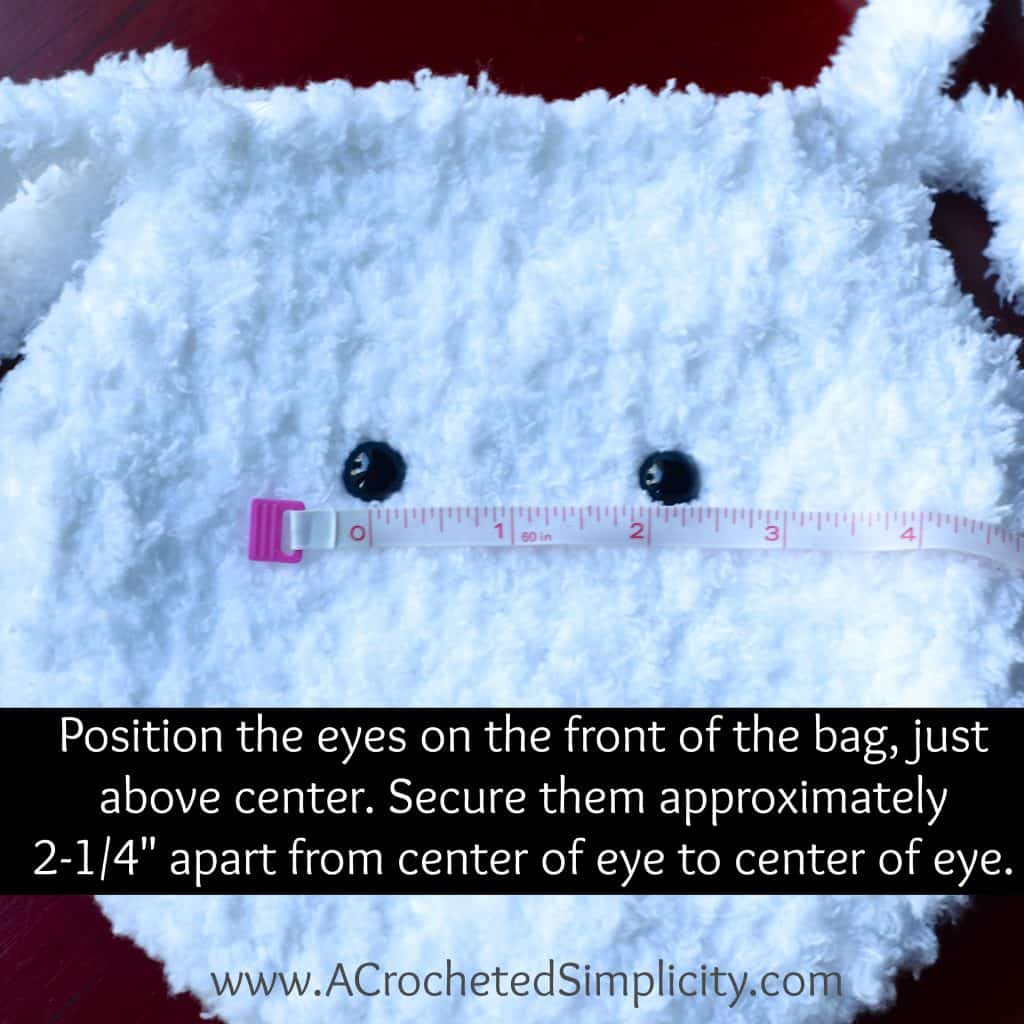
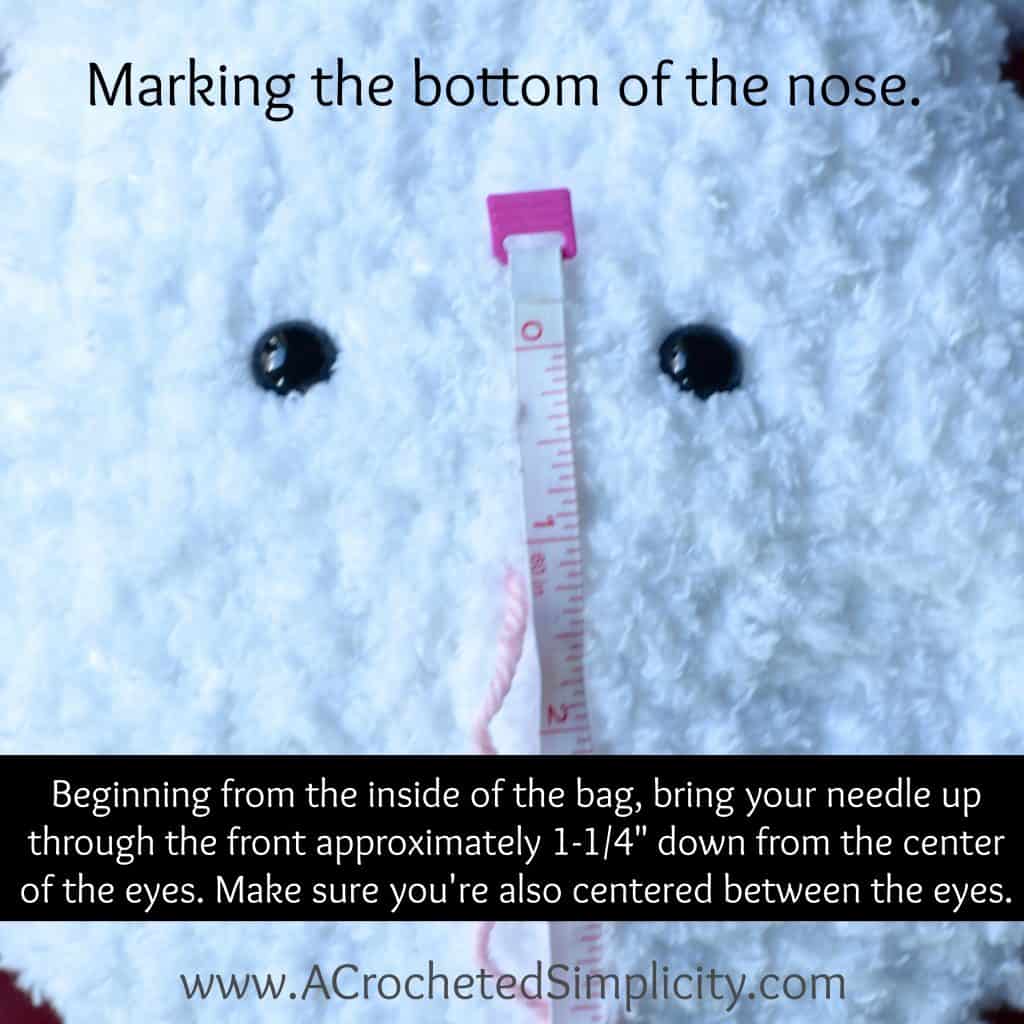
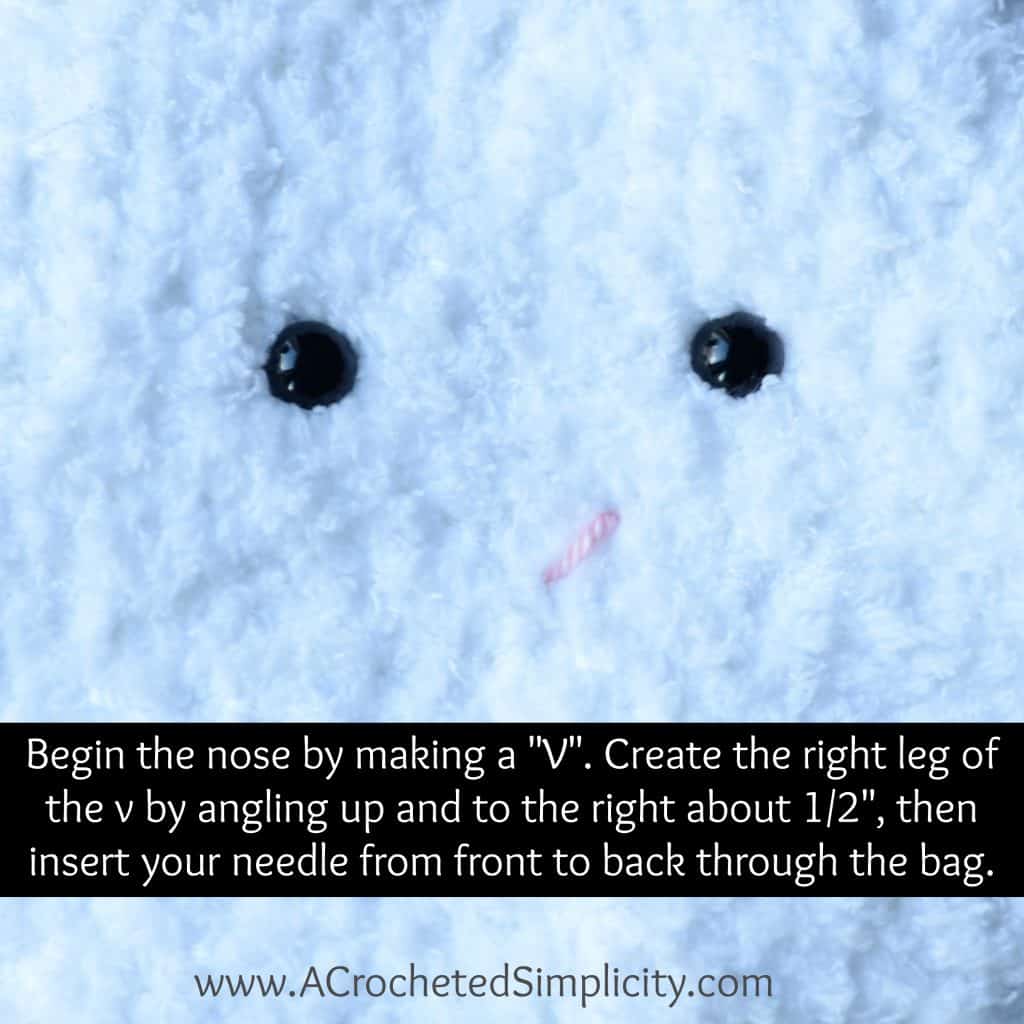
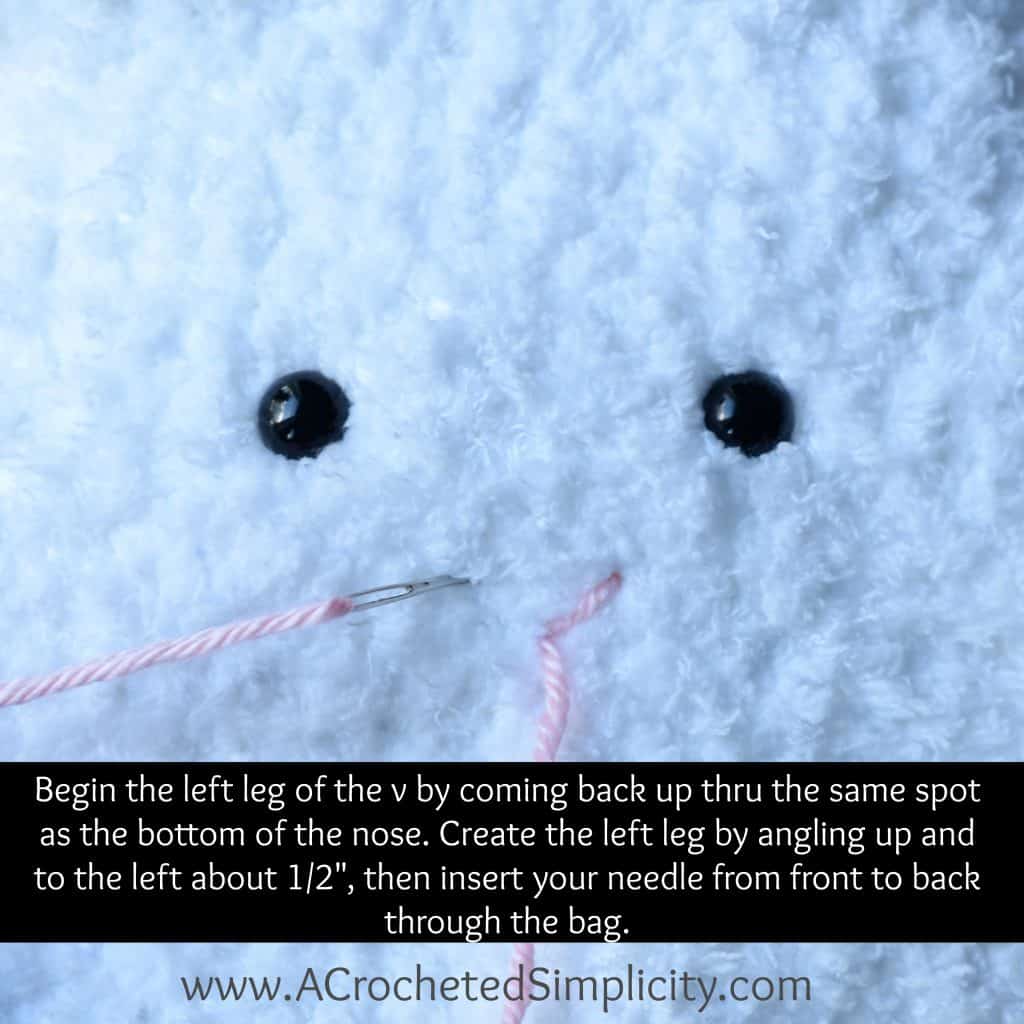
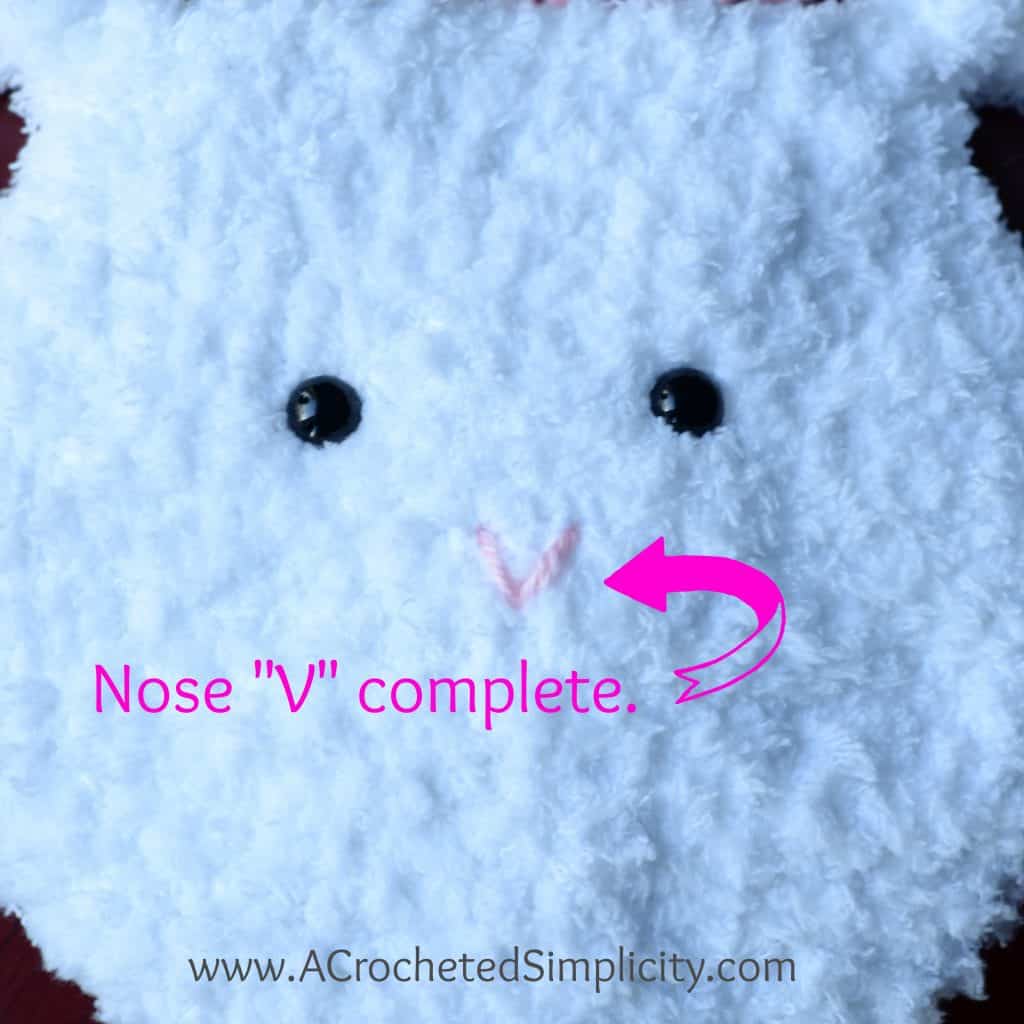
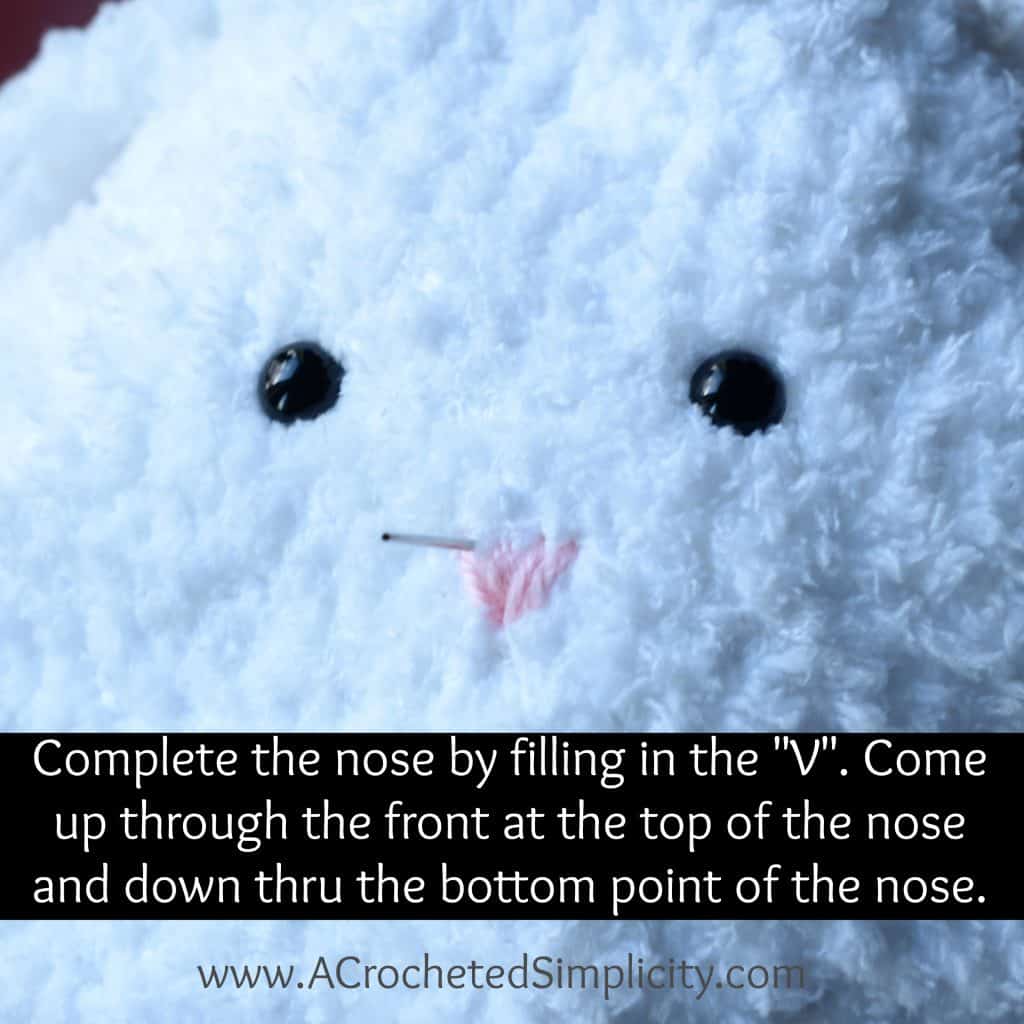
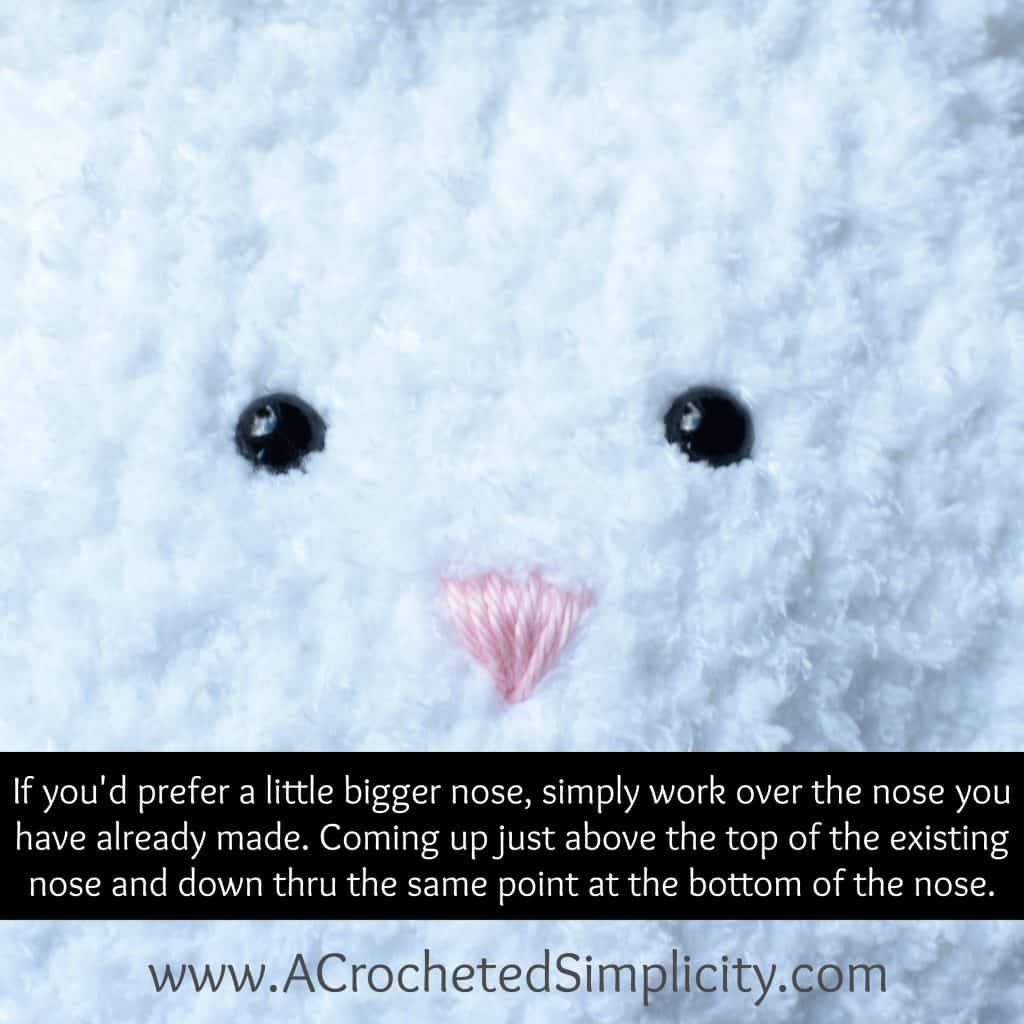
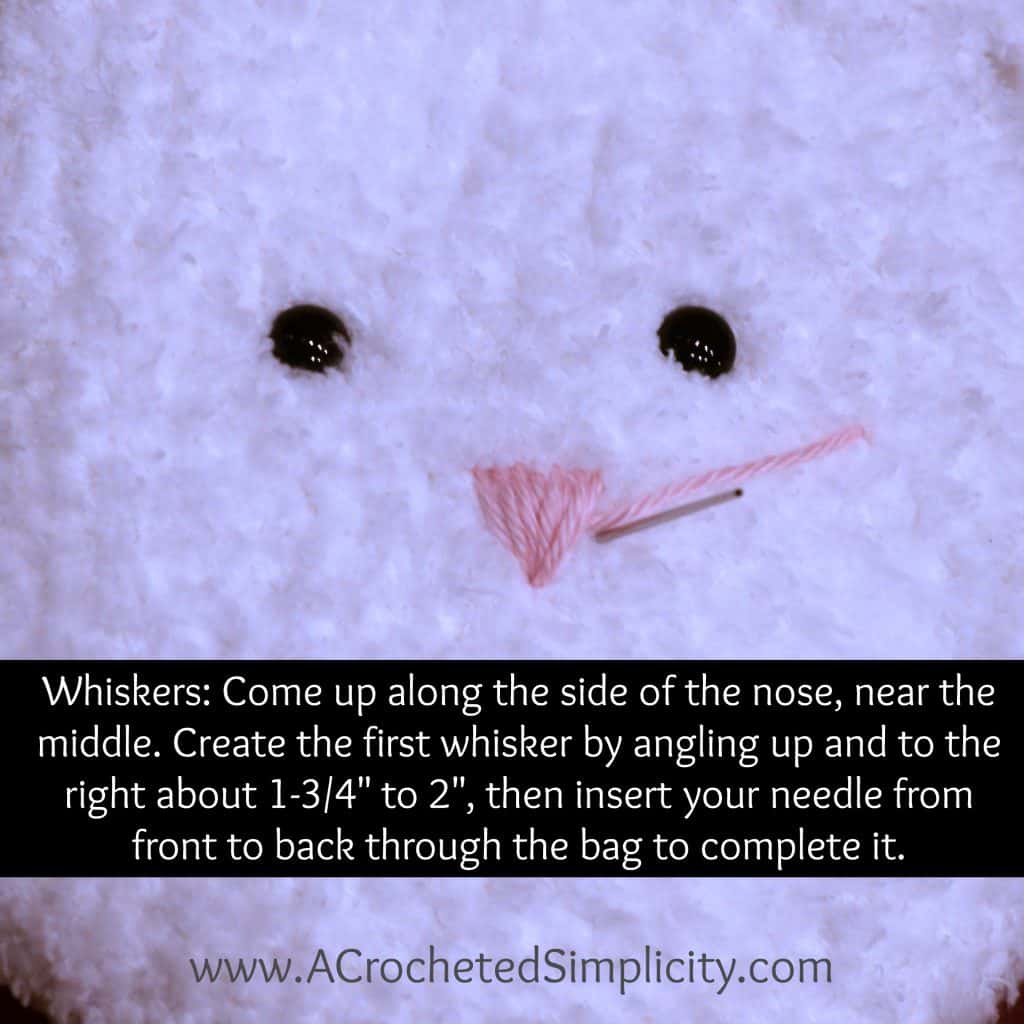
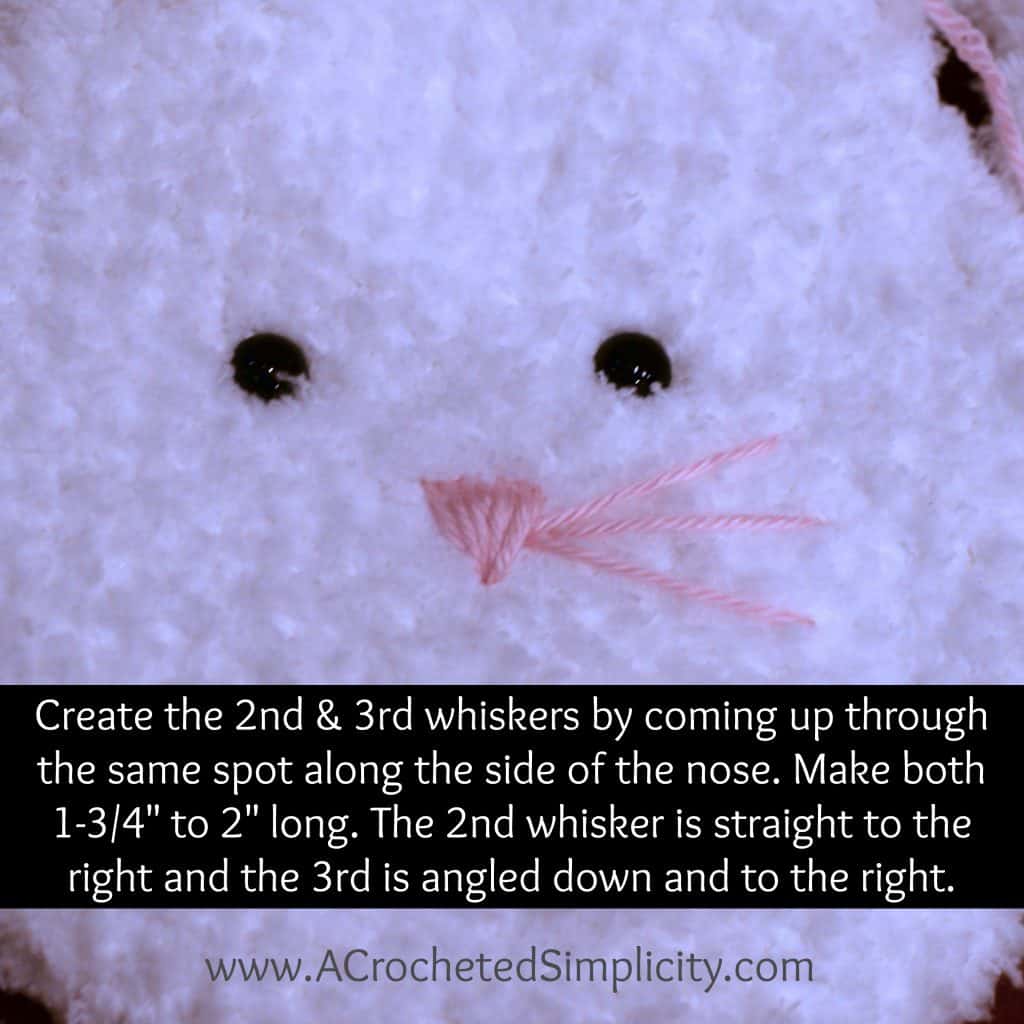
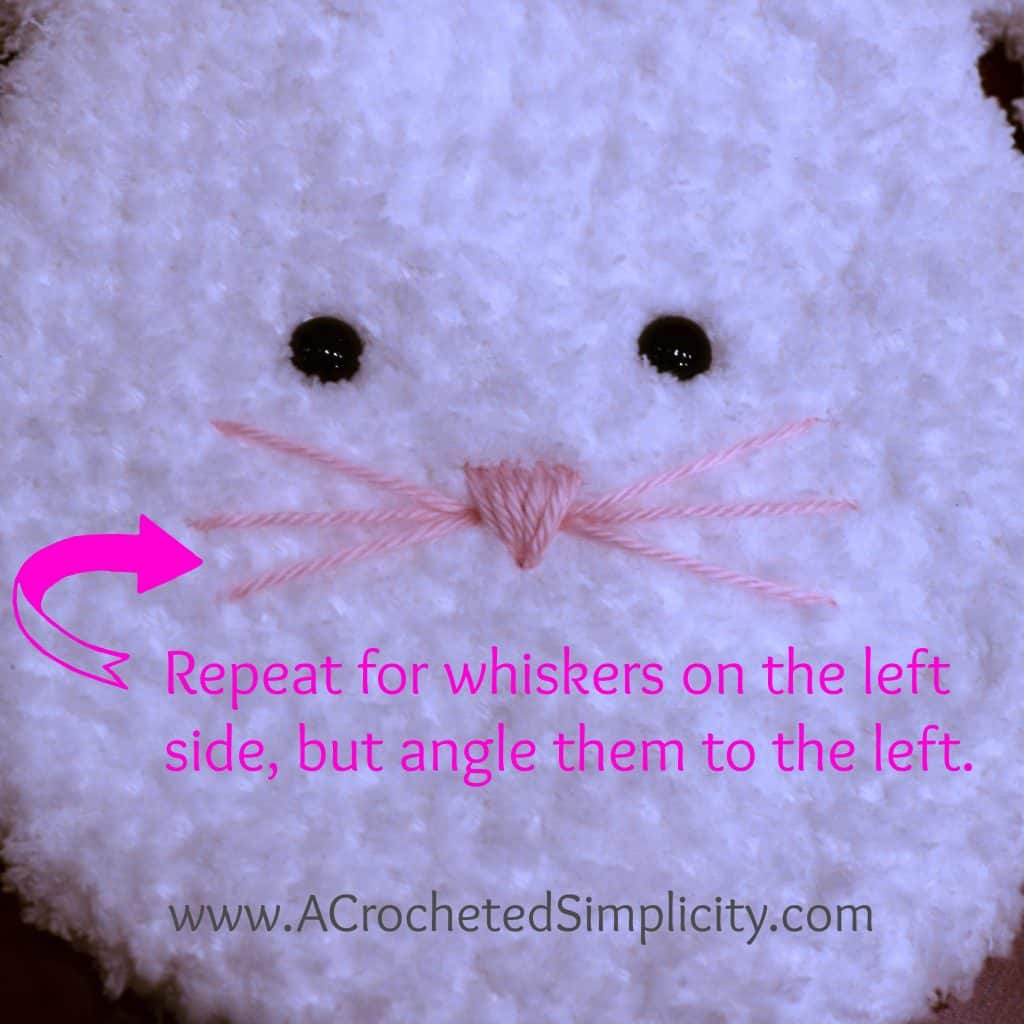
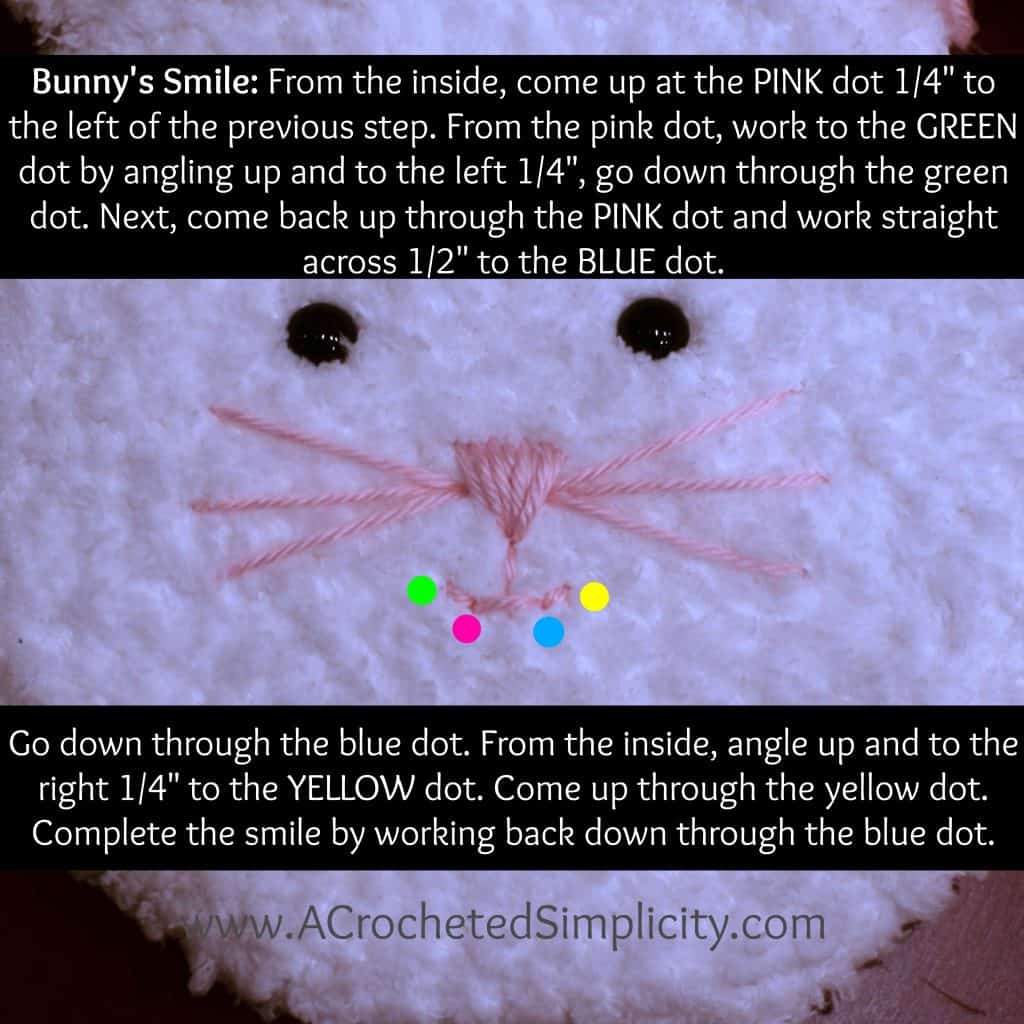
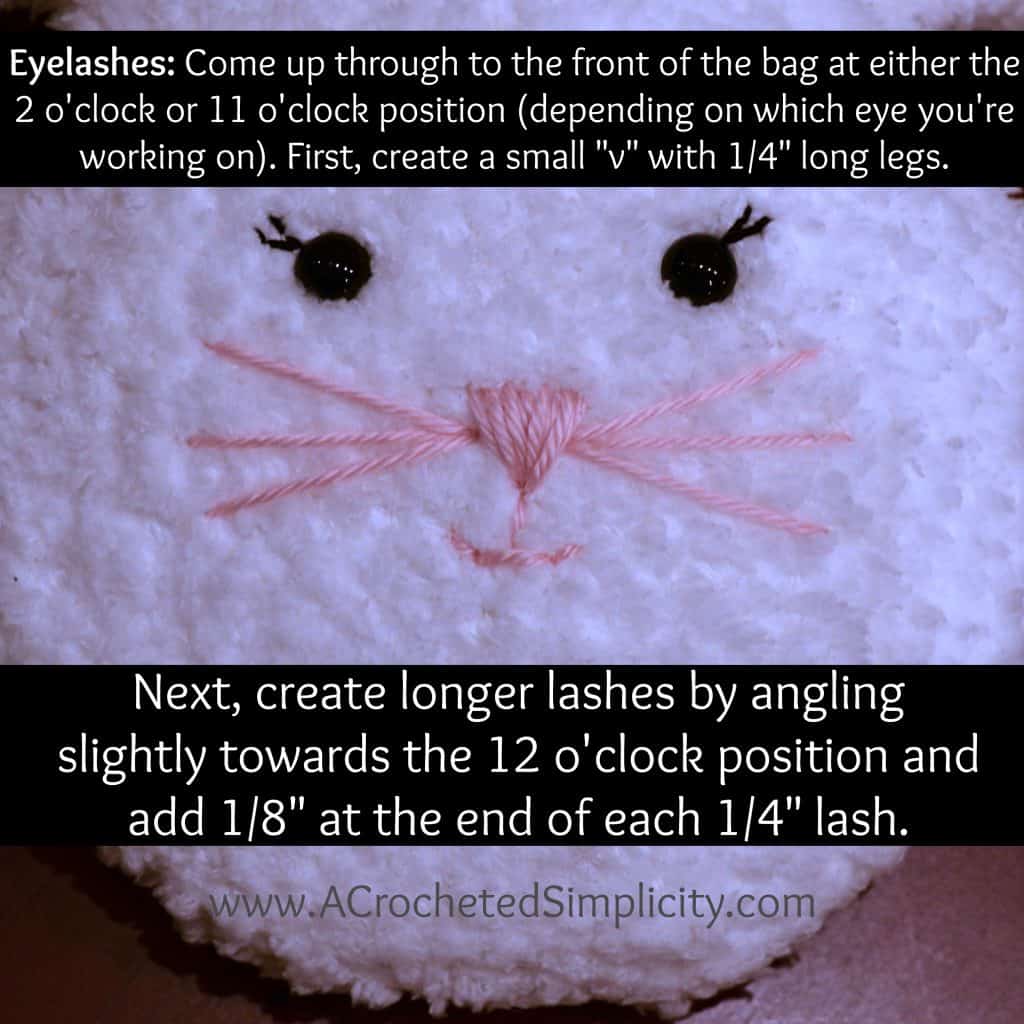
Bunny Face Tutorial


Eyelashes: Hold together as one, (8) 12″ strands of black thread. Or you can also use black embroidery floss.
Bow Instructions
Rnd 1: Using a 4.00 mm crochet hook and 1 strand of soft pink yarn, leave an 8″ tail of yarn for sewing later, ch 12, 5 dc in 3rd ch from your hook, dc in each of the next 8 chs, 5 dc in the last ch, rotate to work along the bottom of the foundation ch, dc in each of the next 8 chs. Join w/ a sl st to the 1st st of the rnd. (26 sts)
Fasten off. Use the Invisible Join Technique (click here for tutorial) to keep the edge of your bow as smooth as possible. Weave in the end from joining.
If you’re using a small slide for your bow, weave the bow through the slide now. If not, you can cinch the center of your bow by wrapping a small amount of yarn around it. Continue on to Finishing.
Finishing
Using a yarn needle and the tail of yarn you left at the beginning of round 1, sew the bow onto your bag. I prefer to position mine near one of the ears.
Find all of my FREE crochet patterns HERE

” data-medium-file=”https://i1.wp.com/www.acrochetedsimplicity.com/wp-content/uploads/2016/12/InStyle-Cabled-Shoulder-Bag.jpg?fit=225%2C300″ data-large-file=”https://i1.wp.com/www.acrochetedsimplicity.com/wp-content/uploads/2016/12/InStyle-Cabled-Shoulder-Bag.jpg?fit=400%2C533″>
Please share your finished ACS projects with me in the A Crocheted Simplicity Crochet Community Group on Facebook!
Happy Crocheting!

So cute!
Am I reading this right that you can get 2 bunny bags from the white yarn you recommend?
With the large skeins of Bernat Pipsqueak, yes. I believe they’re 8.8oz.
This pattern is adorable! I would love to win it!