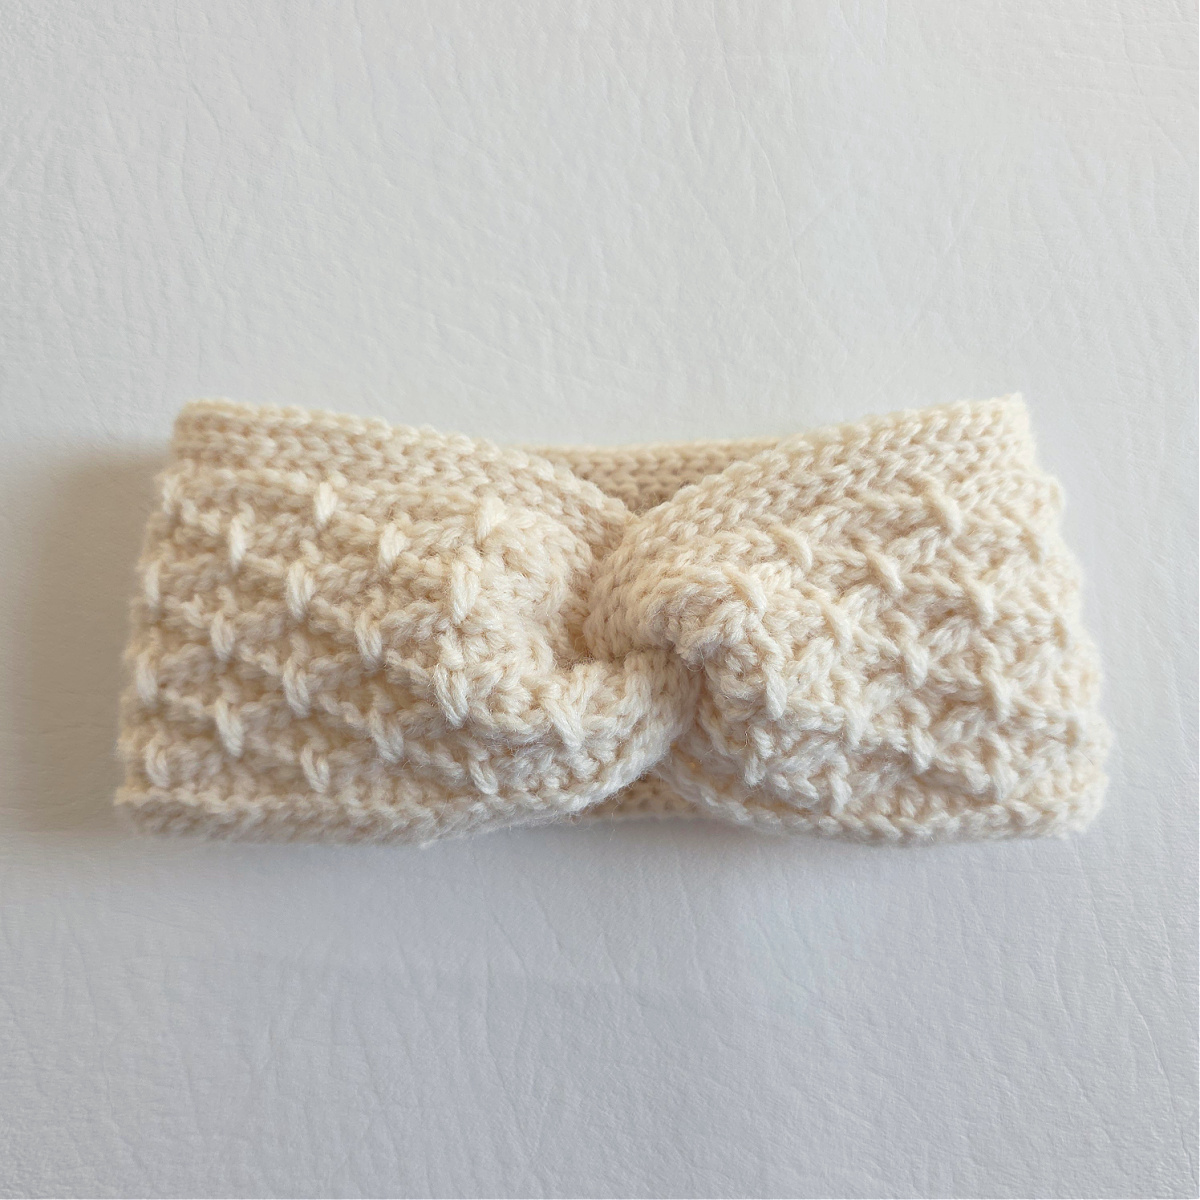
Fireside Crochet Head Warmer
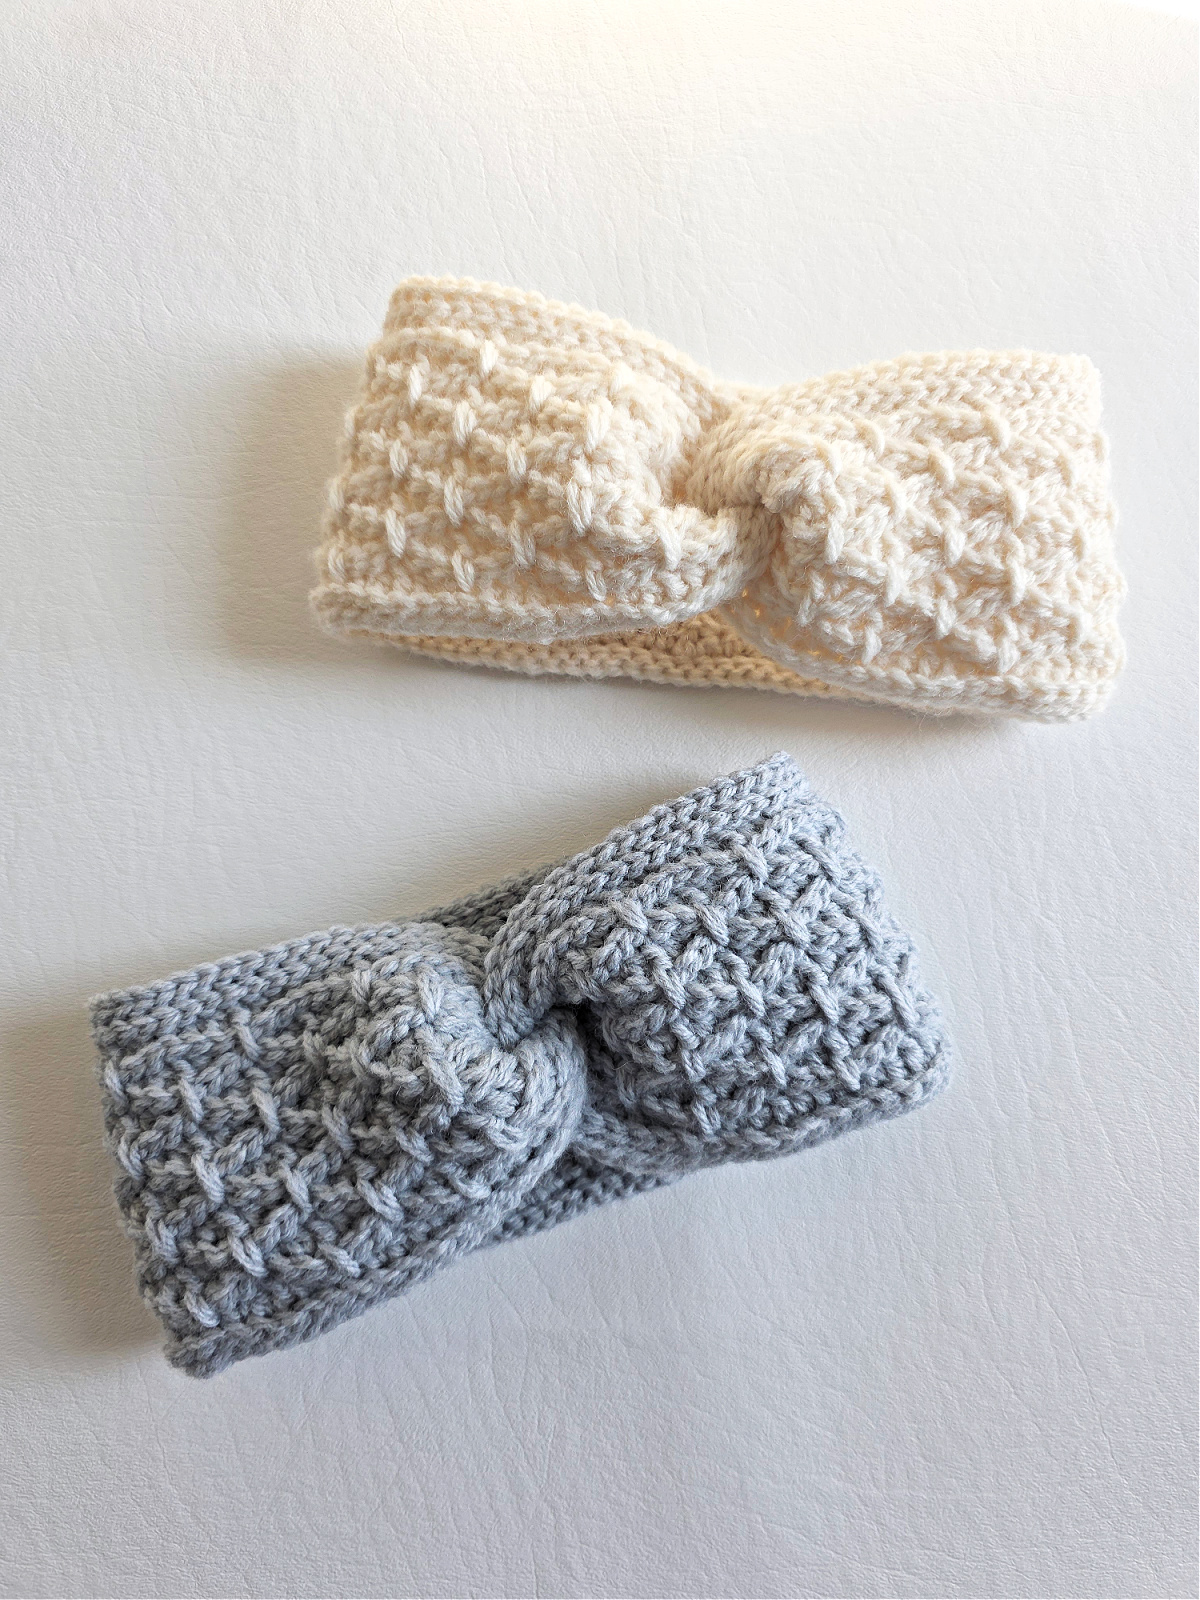
Keep your ears toasty warm and your hair from flying about in the chilly wind with a handmade crochet head warmer like this one. This acts as both a practical accessory to achieve warmth and coziness as well as a stylish outfit choice that gives you a polished look when you go about your day.
Sometimes, you just don’t want the bulk of a hat to cover your head, especially when you’re planning to be indoors too. Moments like these call for an ear warmer that you can whip out when your outside and stuff into your pocket or bag when you’re inside.
You’ll find the free crochet head warmer pattern in the post below, or you can find an ad-free printable PDF (that includes all photo tutorials), on Ravelry, or Etsy (aff).
Unlike hats, which are amazing to make too, ear warmers can be crocheted with relatively less yarn and you can make several from one skein. If you’re planning on having the family match their accessories for holiday photos, this is a great pattern to work up to achieve that.
If you’re a beginner who wants to add more stitches to their crochet library, especially to achieve texture and depth in your projects, smaller makes like these ones are a great way to go about it. Even if you make a mistake, you won’t have to frog up a lot of rows, and because this is so quick, you’ll feel very accomplished at the end of it.
And if you’re looking for a last minute, quick gift, the Fireside ear warmer works up in less than an hour and uses less than a skein of yarn!
Related: If you want to make another ear warmer pattern with lots of texture packed in it, you should check out the Diamonds Ear Warmer.
How to Crochet an Ear Warmer
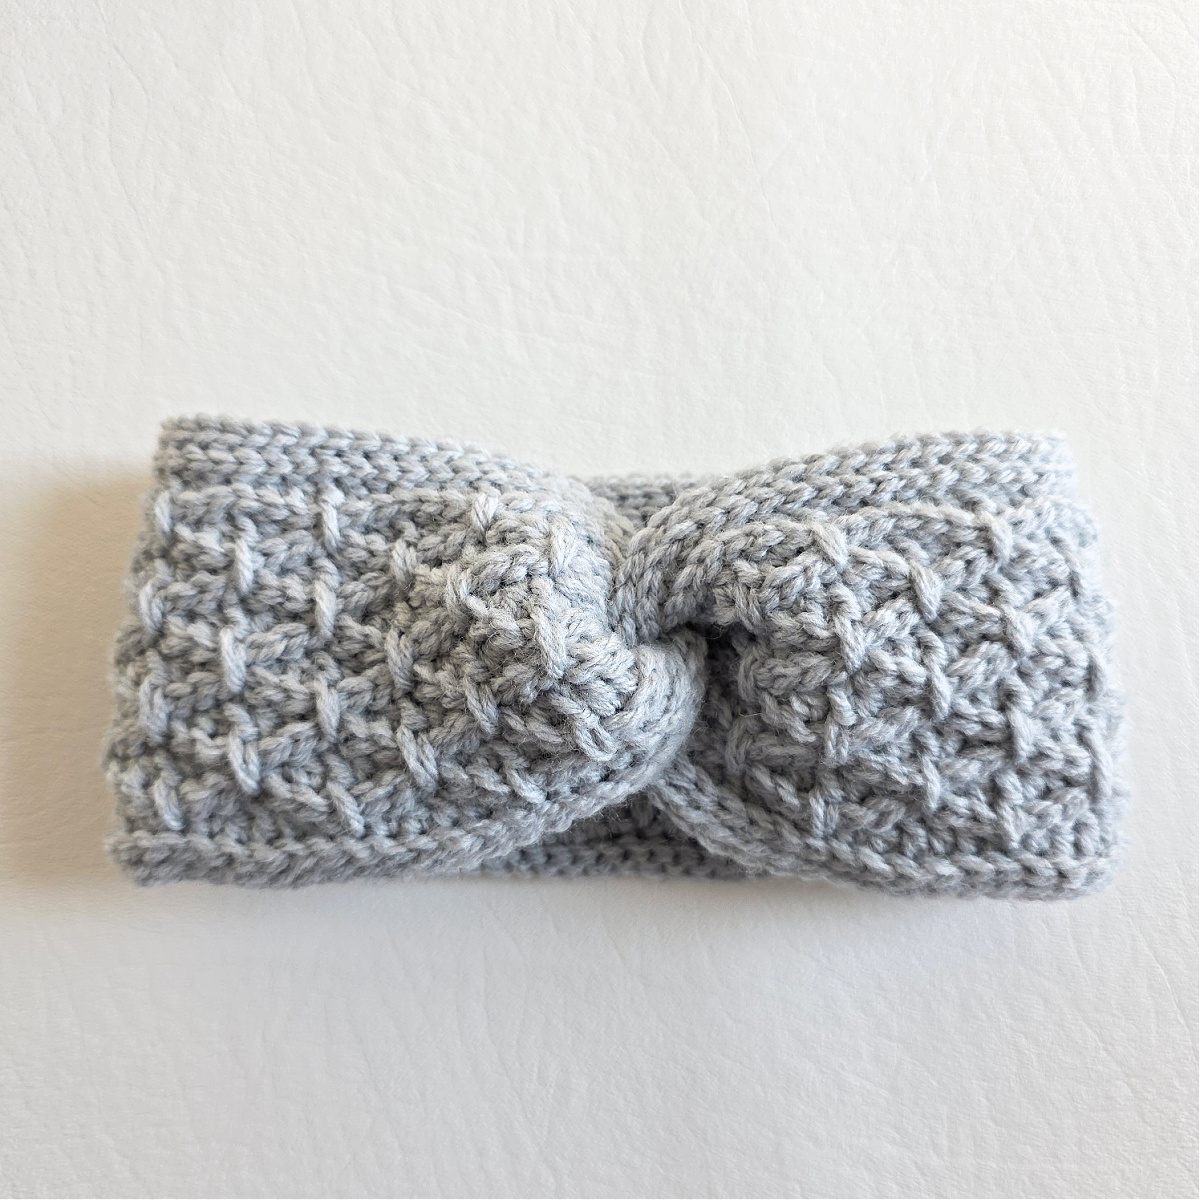
If this is your first time making a crochet head warmer, you don’t have to worry too much about the construction. It has one of the most classic and timeless seams out there, featuring a twist in the middle.
This crochet ear warmer is worked flat, from side to side to achieve its length and width. Then the short edges are seamed in a way that adds a knotted twist to the headwarmer. That’s it! And your ear warmer is ready for you to take it for a spin.
How To Get The
Fireside Head Warmer Pattern
Option 1: Scroll down for the free ear warmer crochet pattern right here in this blog post.
Option 2: Purchase the ad-free printable PDF from one of my shops:
Best Yarn for Crochet Ear Warmers
For a crochet head warmer, while there are many options to choose from, I used an acrylic and wool blend. The added wool content gives it extra warmth and makes it the ideal accessory for cold winters. Because of the acrylic, it holds its shape well and has good stitch definition, which is especially great for patterns that need structure to remain on your head.
It’s also readily available and can come in a variety of colors which allows you to choose just the right one for whoever is receiving this crochet ear warmer.
Yarn
This crochet headband was designed with a worsted weight yarn to make sure it would strike the right balance between being too heavy and too light. I chose not to use a bulky yarn for fear it would then be too thick to be worn in the transitioning months of autumn and spring as we want to get the most wear out of this everyday piece.
I chose Lion Brand Wool-Ease for my crochet head warmer. This is a worsted weight / 4, acrylic and wool blend yarn and it’s currently available in glitter, multi, prints, and frosts. This yarn offers a smooth even texture in a contemporary color palette with plenty of neutral tones.
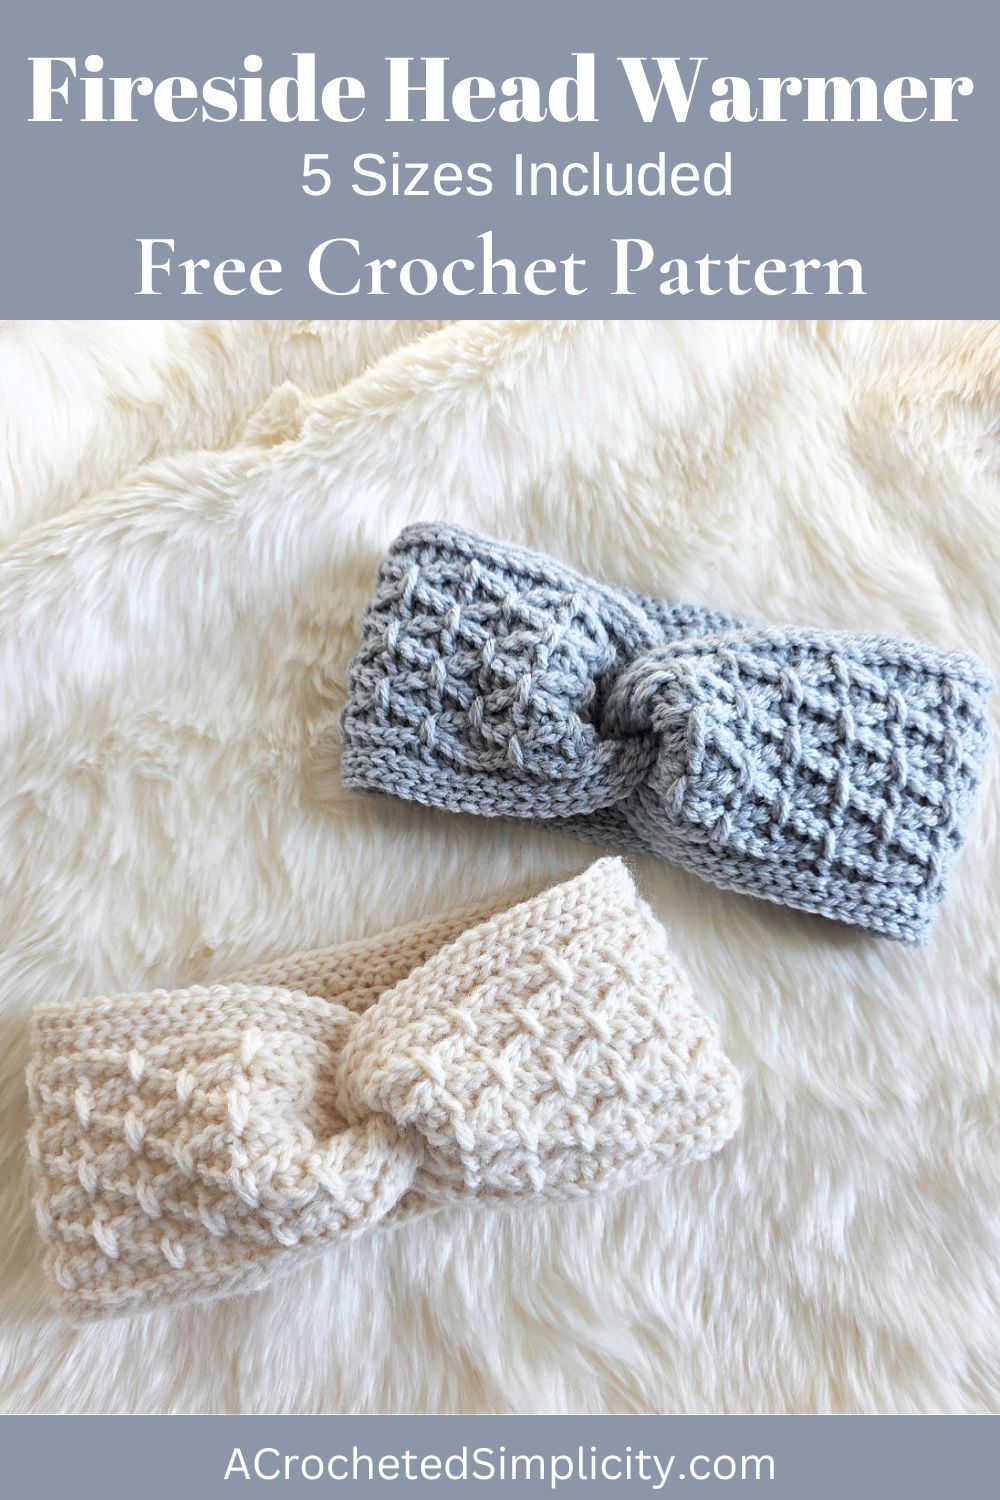
Fireside Head Warmer – Free Pattern
The crochet headband pattern is free below, but if you love to work offline, I’ve got a couple other great options for you.
Purchase the ad-free, printable PDF, (that includes all photo tutorials), on Ravelry, or on Etsy (aff).
This post contains affiliate links.
Materials
- Yarn: Worsted Weight / 4 / Yarn, Lion Brand Wool-Ease was used for the sample in the photos [80% acrylic / 20% wool (197 yds / 180 m / 85 g / 3 oz)].
- Yardage: 70 – 100 yards (depending on size)
- Crochet Hook: H/8/5.00mm; G/6/4.00mm; or size needed to obtain gauge (My favorite crochet hooks are the Clover Amour Crochet Hooks, I’ve never had an ache in my hand since switching).
- Measuring Tape
- Scissors
- Yarn Needle
- Locking Stitch Markers
Abbreviations (US Terms)
- ch(s): chain(s)
- sl st(s): slip stitch(es)
- st(s): stitch(es)
- yo: yarn over
- sc: single crochet
- hdc: half double crochet
- dc: double crochet
- BLO: back loop only
- Rep: repeat
- RS: right side
Experience Level
- Intermediate
Gauge
- With a 4.00mm hook: 23 sts = 5″
- Instructions are given to adjust height so row height isn’t crucial.
- See Swatch Instructions below.
Sizes
- Choose size based on wearer’s head size when possible.
- Baby: 16″ – 17.5″ circumference (70 yards)
- Toddler: 17″ – 19″ circumference (75 yards)
- Child: 19″ – 21″ circumference (80 yards)
- Teen / Adult Small: 21″ – 22″ circumference (90 yards)
- Adult Medium / Large: 22.5″ – 24″ circumference (100 yards)
Pattern Notes
- Turning chains are not counted as stitches.
- Yarn Notes: Lion Brand Wool-Ease (3 oz / 85 g / 197 yards / 180 m / 80% acrylic / 20% wool) was used for the samples in the pictures. Other comparable yarns may be used as long as gauge is met.
- Changes for Sizes Written as Follows: Baby (Toddler, Child, Teen/Adult Small, Adult Medium/Large)
- Changes for Stitch Counts as Follows: (Baby, Toddler, Child, Teen/Adult Small, Adult Medium/Large)
- Construction Notes: This crochet ear warmer is worked flat, from side to side. Then the short edges are seamed in a way that adds a knotted twist to the headwarmer.
Fireside Head Warmer – Written Pattern
Swatch Instructions
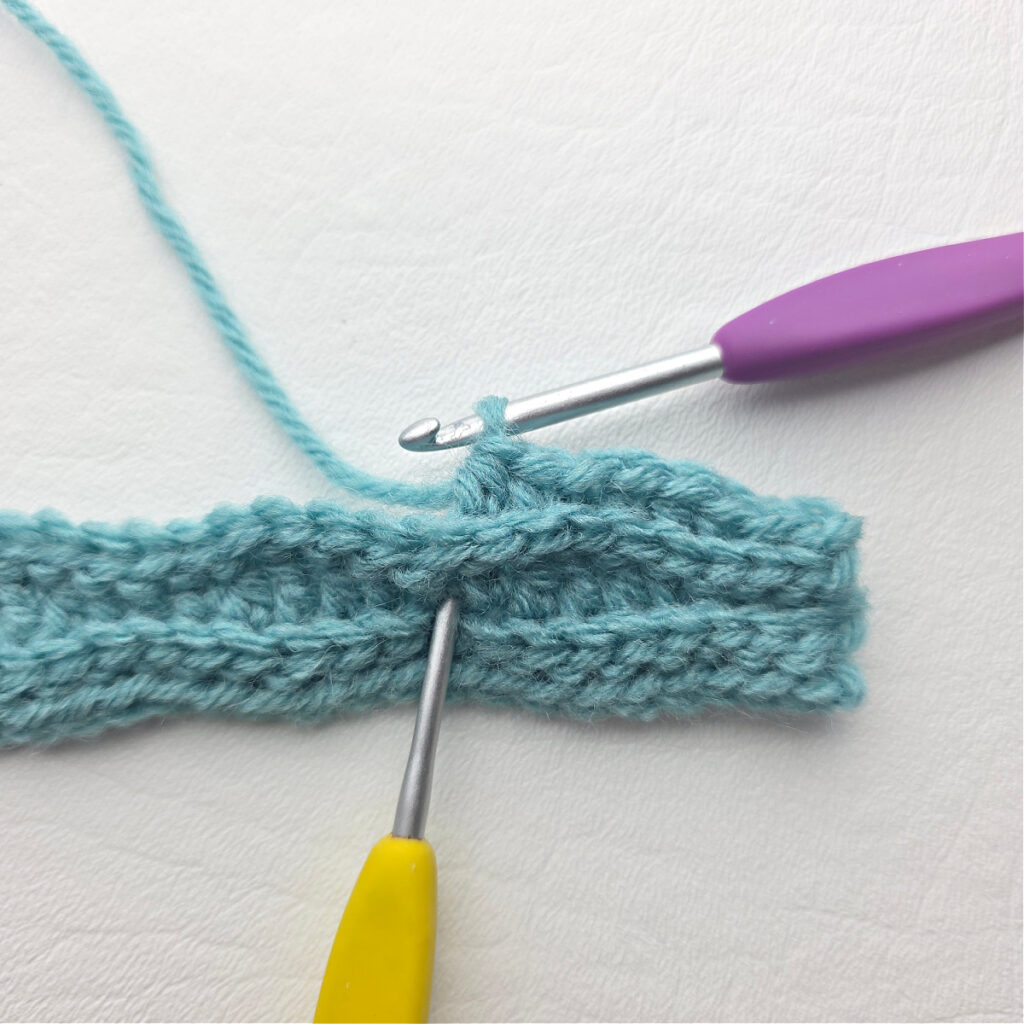
Tip: If you find it hard to control the tension of your slip stitches, go up a hook size (or two) when working all BLO sl st rows. Check out my video tutorial for working BLO slip stitches, it includes MANY valuable tips!
Row 1 (RS): With yarn & a 5.00mm crochet hook, ch 24 switch to a 4.00mm crochet hook, working into the back humps of the foundation ch, sl st in the 2nd ch from your hook and in each ch across. Turn. (23 sts)
Row 2: Ch 1, BLO sl st in each st across. Turn. (23 sts)
Row 3 (RS): Ch 1, BLO sl st in each of the first 3 sts, (BLO sc in the next st, BLO hdc in the next st, BLO dc in the next st, BLO hdc in the next st, BLO sc in the next st, BLO sl st in the next st) work from ( to ) 3 times, then BLO sl st in each of the last 2 sts. Turn. (23 sts)
Row 4: Rep Row 2.
Row 5: Ch 1, BLO sl st in each of the first 2 sts, BLO sc in the next st, BLO hdc in the next st, BLO sc in the next st, BLO sl st in the next st, (BLO sc in the next st, BLO hdc in the next st, dc in the same st as the next sl st from Row 3, BLO hdc in the next st, BLO sc in the next st, BLO sl st in the next st) work from ( to ) 2 times, then BLO sc in the next st, BLO hdc in the next st, BLO sc in the next st, BLO sl st in each of the last 2 sts. Turn. (23 sts)
Row 6: Rep Row 2.
Row 7: Ch 1, BLO sl st in each of the first 3 sts, (BLO sc in the next st, BLO hdc in the next st, dc in the next dc 4 rows below, BLO hdc in the next st, BLO sc in the next st, BLO sl st in the next st) work from ( to ) 3 times, then BLO sl st in each of the last 2 sts. Turn. (23 sts)
Row 8: Rep Row 2.
Row 9: Ch 1, BLO sl st in each of the first 2 sts, BLO sc in the next st, BLO hdc in the next st, BLO sc in the next st, BLO sl st in the next st, (BLO sc in the next st, BLO hdc in the next st, dc in the next dc 4 rows below, BLO hdc in the next st, BLO sc in the next st, BLO sl st in the next st) work from ( to ) 2 times, then BLO sc in the next st, BLO hdc in the next st, BLO sc in the next st, BLO sl st in each of the last 2 sts. Turn. (23 sts)
Rows 10 – 12: Rep Row 2.
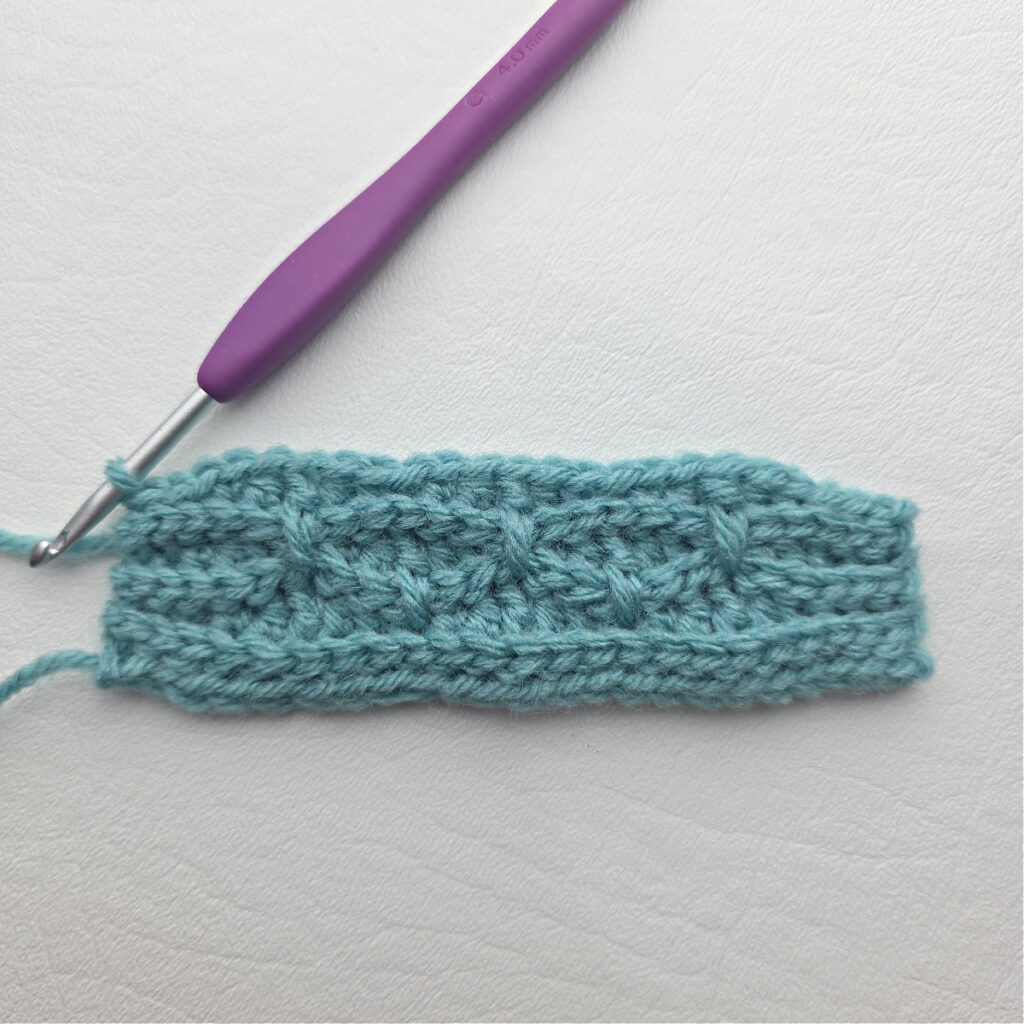
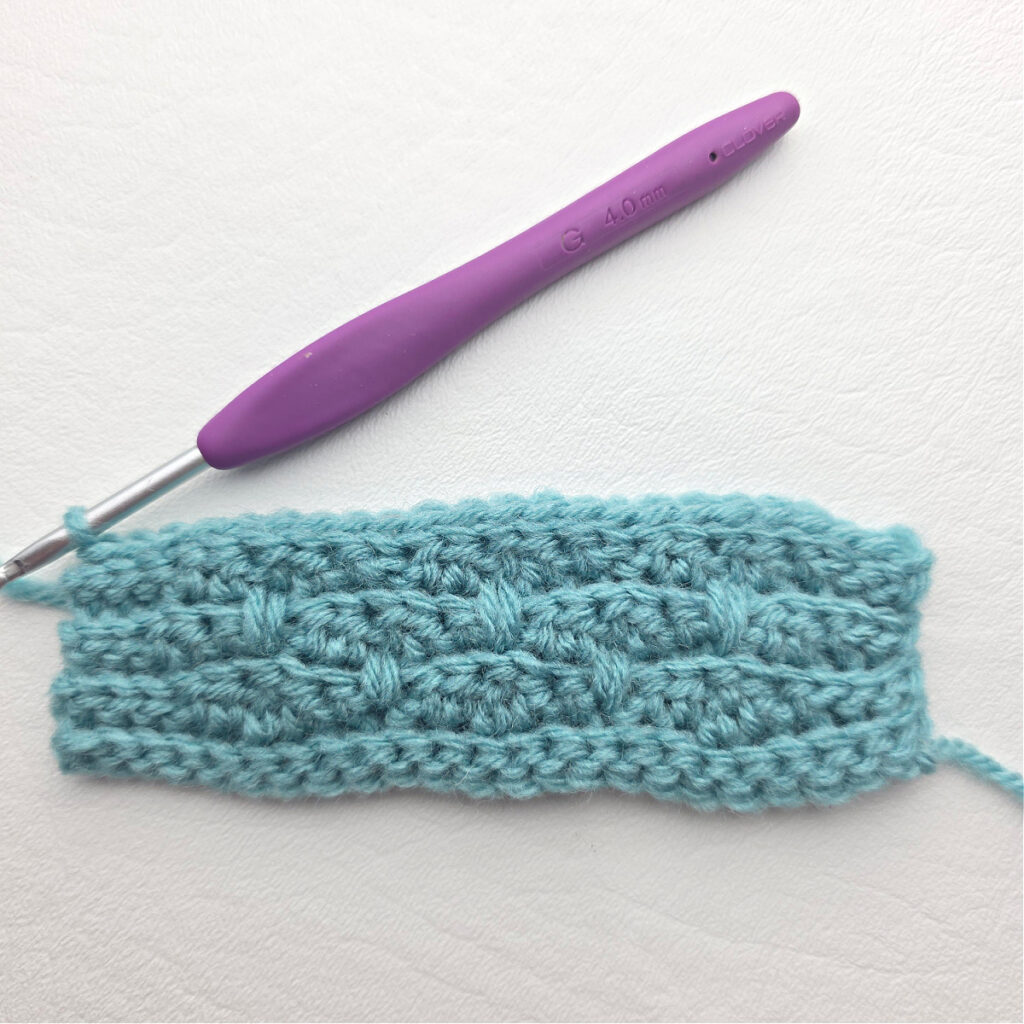
Fasten off. Weave in ends. Swatch size should be approximately 5″ W x 2.5″ H.
Headwarmer Instructions
Changes for Sizes Written as Follows: Baby (Toddler, Child, Teen/Adult Small, Adult Medium/Large)
Changes for Stitch Counts as Follows: (Baby, Toddler, Child, Teen/Adult Small, Adult Medium/Large)
Tip: If you find it hard to control the tension of your slip stitches, go up a hook size (or two) when working all BLO sl st rows. Check out my video tutorial for working BLO slip stitches, it includes MANY valuable tips!
Row 1 (RS): With yarn & a 5.00mm crochet hook, ch 66 (72, 78, 84, 96), switch to a 4.00mm crochet hook, working into the back humps of the foundation ch, sl st in the 2nd ch from your hook and in each ch across. Turn. (65, 71, 77, 83, 95)
Row 2: Ch 1, BLO sl st in each st across. Turn. (65, 71, 77, 83, 95)
Row 3 (RS): Ch 1, BLO sl st in each of the first 3 sts, (BLO sc in the next st, BLO hdc in the next st, BLO dc in the next st, BLO hdc in the next st, BLO sc in the next st, BLO sl st in the next st) work from ( to ) 10 (11, 12, 13, 15) times, then BLO sl st in each of the last 2 sts. Turn. (65, 71, 77, 83, 95)
Row 4: Rep Row 2.
Row 5: Ch 1, BLO sl st in each of the first 2 sts, BLO sc in the next st, BLO hdc in the next st, BLO sc in the next st, BLO sl st in the next st, (BLO sc in the next st, BLO hdc in the next st, dc in the same st as the next sl st from Row 3, BLO hdc in the next st, BLO sc in the next st, BLO sl st in the next st) work from ( to ) 9 (10, 11, 12, 14) times, then BLO sc in the next st, BLO hdc in the next st, BLO sc in the next st, BLO sl st in each of the last 2 sts. Turn. (65, 71, 77, 83, 95)
Row 6: Rep Row 2.
Row 7: Ch 1, BLO sl st in each of the first 3 sts, (BLO sc in the next st, BLO hdc in the next st, dc in the next dc 4 rows below, BLO hdc in the next st, BLO sc in the next st, BLO sl st in the next st) work from ( to ) 10 (11, 12, 13, 15) times, then BLO sl st in each of the last 2 sts. Turn. (65, 71, 77, 83, 95)
Row 8: Rep Row 2.
Row 9: Ch 1, BLO sl st in each of the first 2 sts, BLO sc in the next st, BLO hdc in the next st, BLO sc in the next st, BLO sl st in the next st, (BLO sc in the next st, BLO hdc in the next st, dc in the next dc 4 rows below, BLO hdc in the next st, BLO sc in the next st, BLO sl st in the next st) work from ( to ) 9 (10, 11, 12, 14) times, then BLO sc in the next st, BLO hdc in the next st, BLO sc in the next st, BLO sl st in each of the last 2 sts. Turn. (65, 71, 77, 83, 95)
Sizes Baby, Teen/Adult Small & Adult Medium/Large
Rows 10 – 13 (10 – 17, 10 – 17): Rep Rows 6 – 9. Continue on to Height Check.
Sizes Toddler & Child
Rows (10 – 15, 10 – 15): Rep Rows 6 – 9.
Rows (14 – 15, 14 – 15): Rep Rows 6 – 7. Continue on to Height Check.
Height Check: Your headwarmer should measure approximately 2.5″ H, 2.75″ H, 2.75″ H, 3.25″ H, 3.25″ H) at this point. If it is too tall, remove two rows at a time. If it’s too short, add two rows at a time by continuing to repeat rows 6 – 9. Then continue on to the last three rows.
Rows 14 – 16 (16 – 18, 16 – 18, 18 – 20, 18 – 20): Rep Row 2.
Fasten off, leaving a tail of yarn that is 12″ long. Continue on to Seaming.
Your headwarmer should measure approximately 14″ W x 2.75″ H (15.5″ W x 3″ H, 16.75″ W x 3″ H, 18″ W x 3.5″ H, 20.5″ W x 3.5″ H).
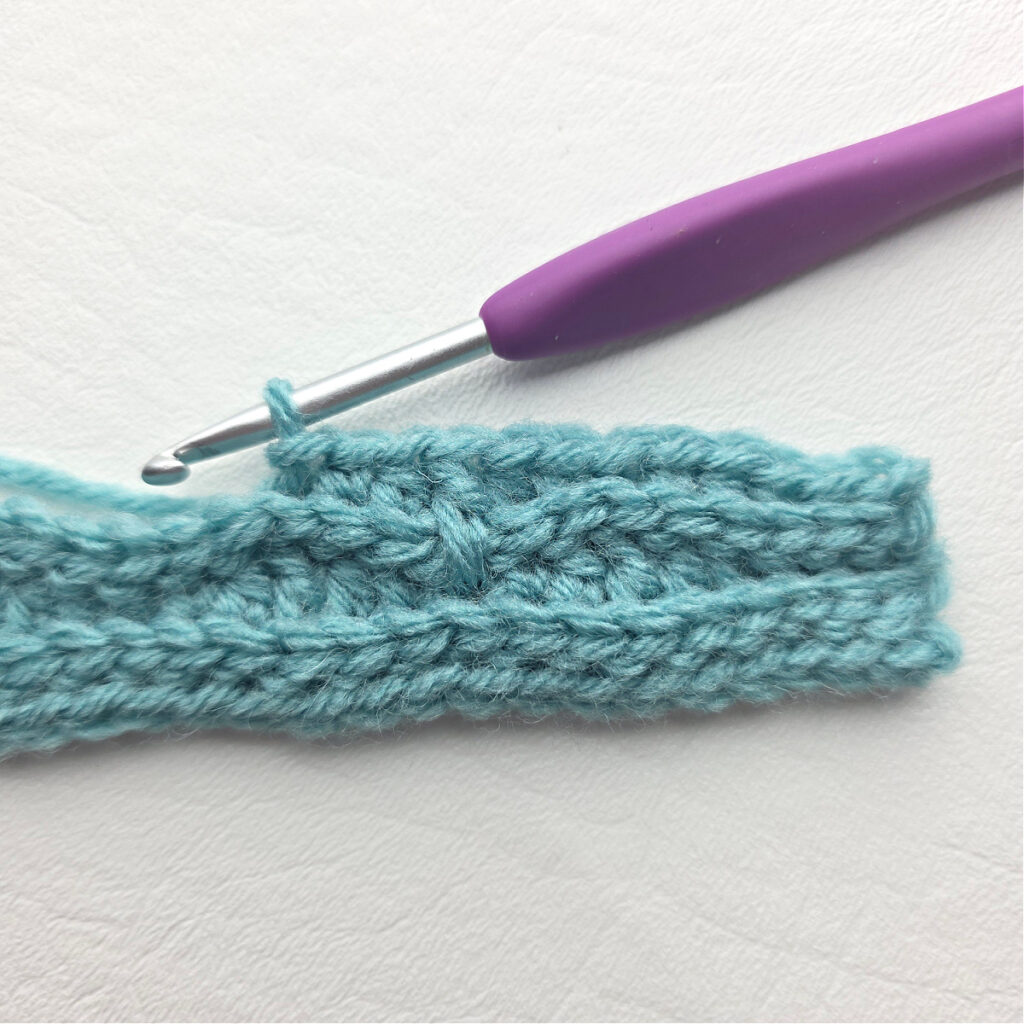
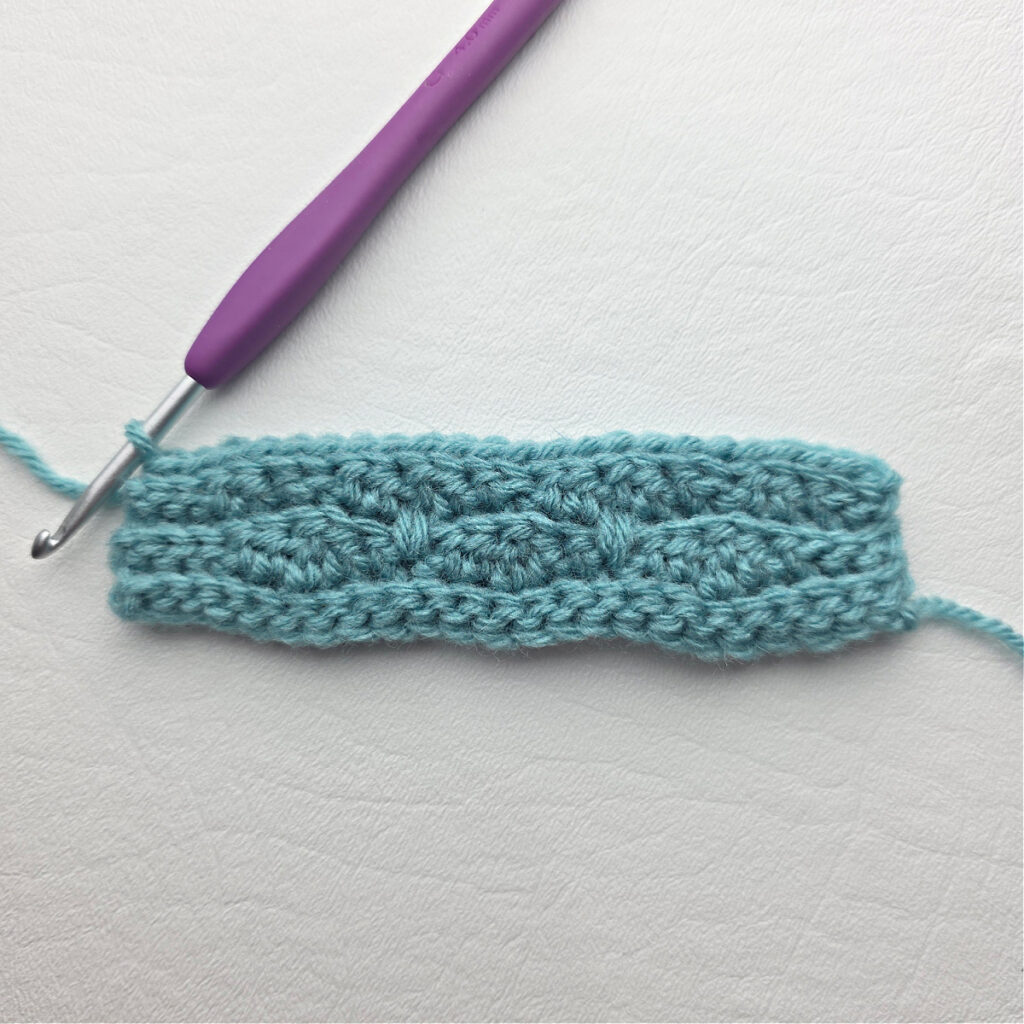
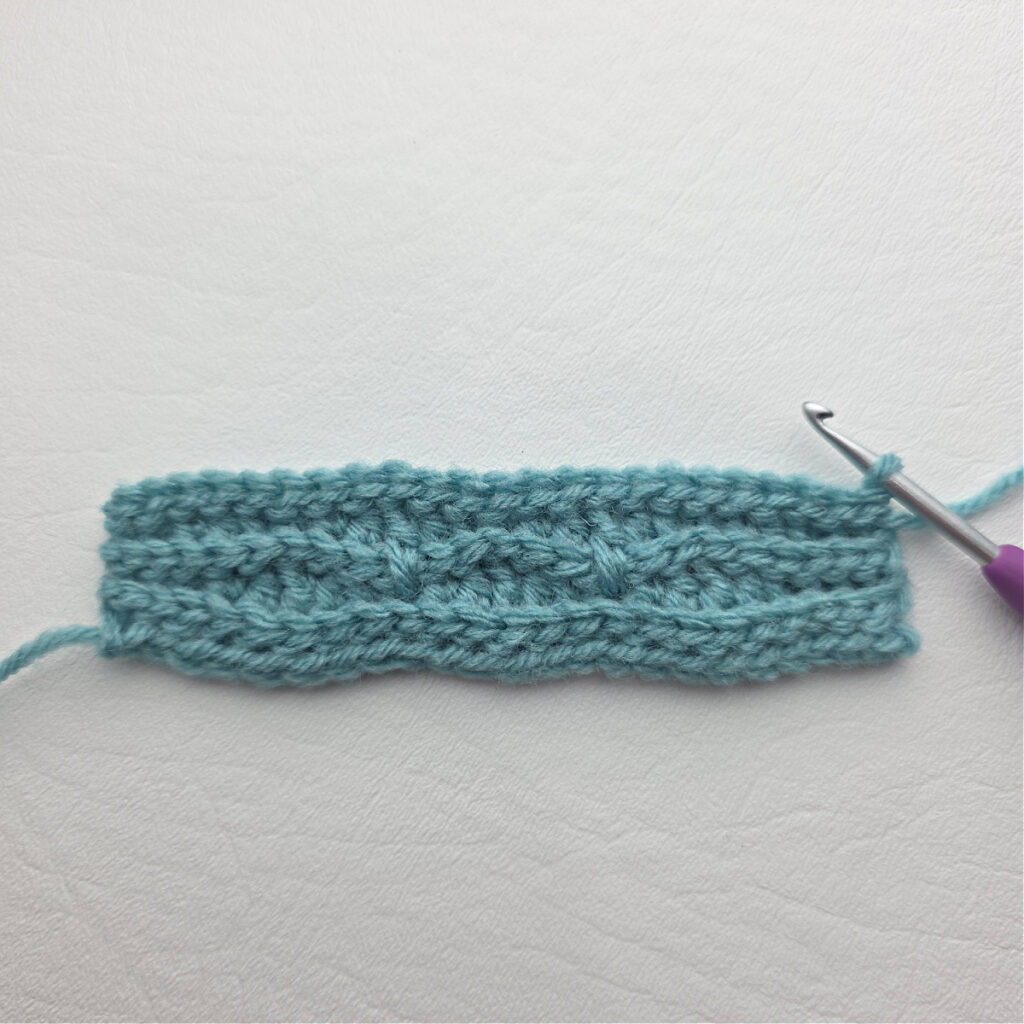
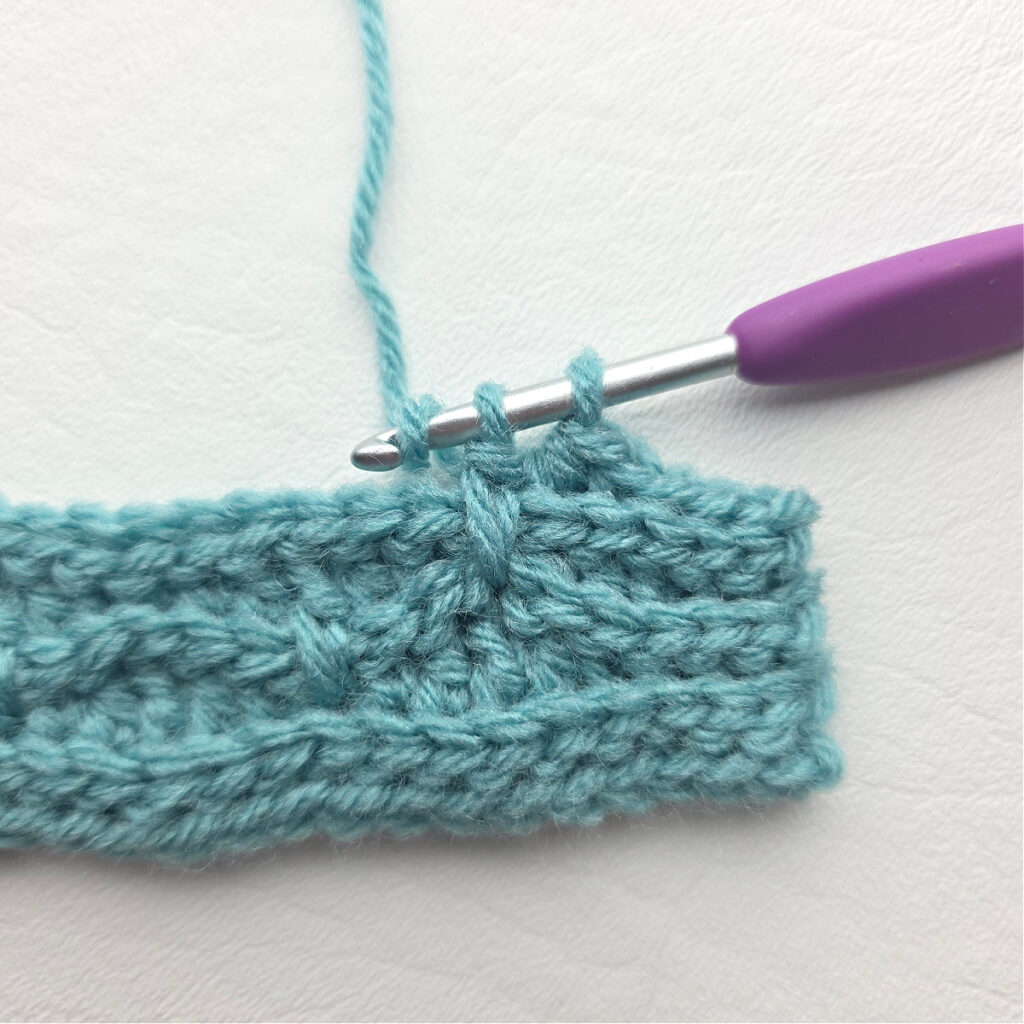
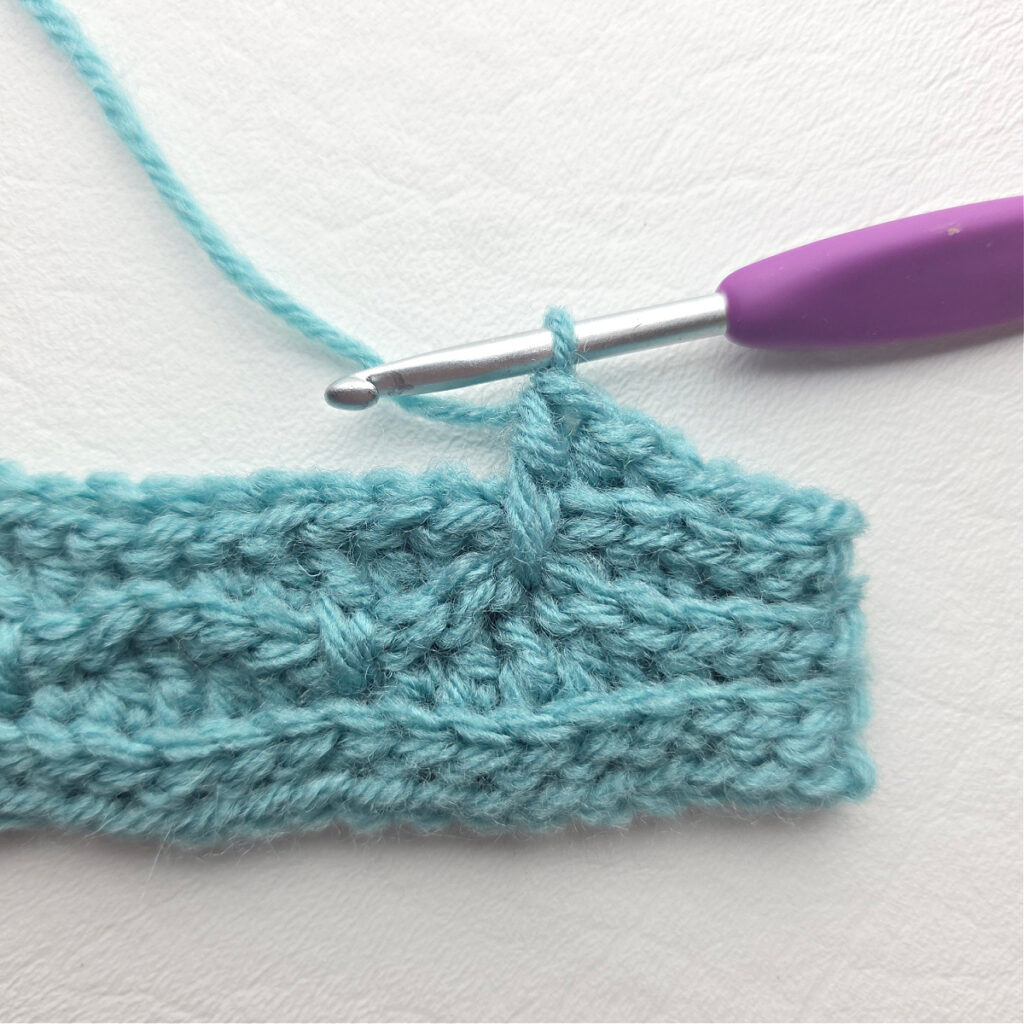
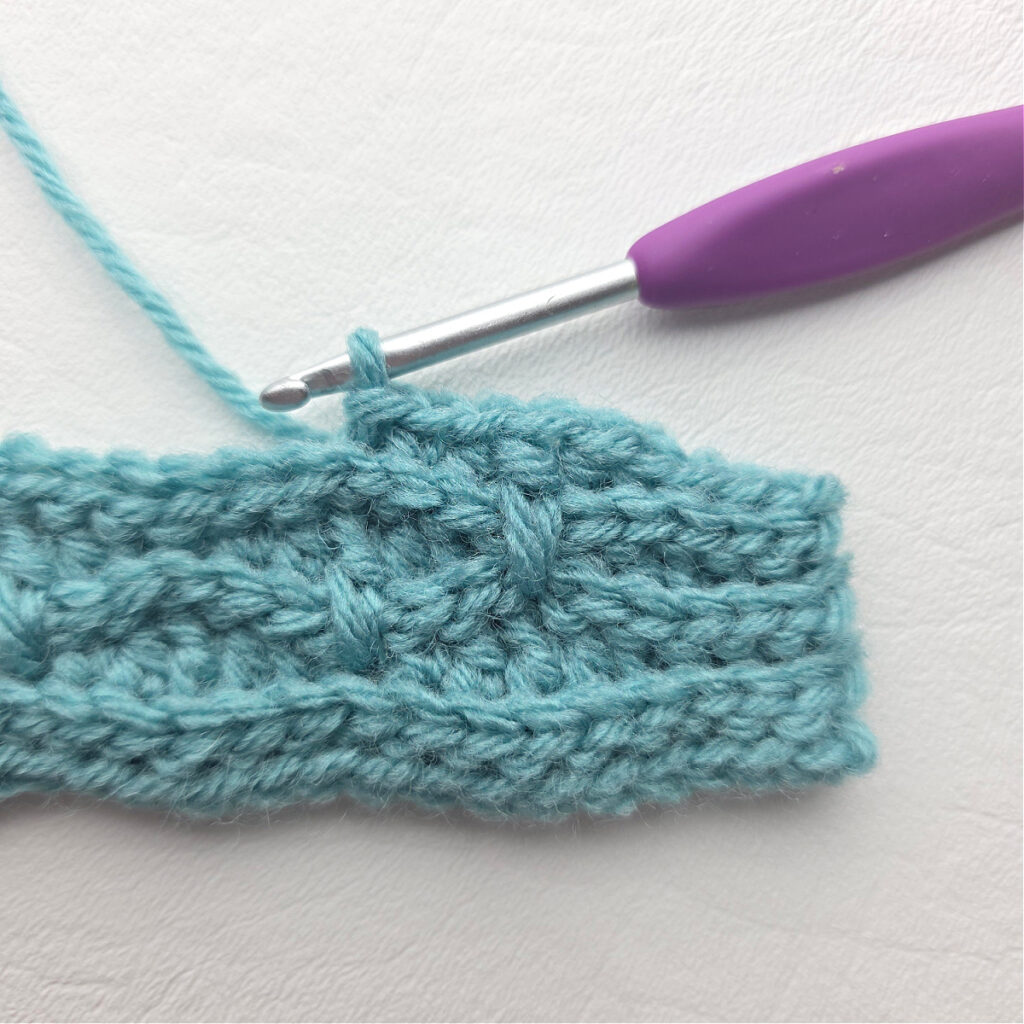
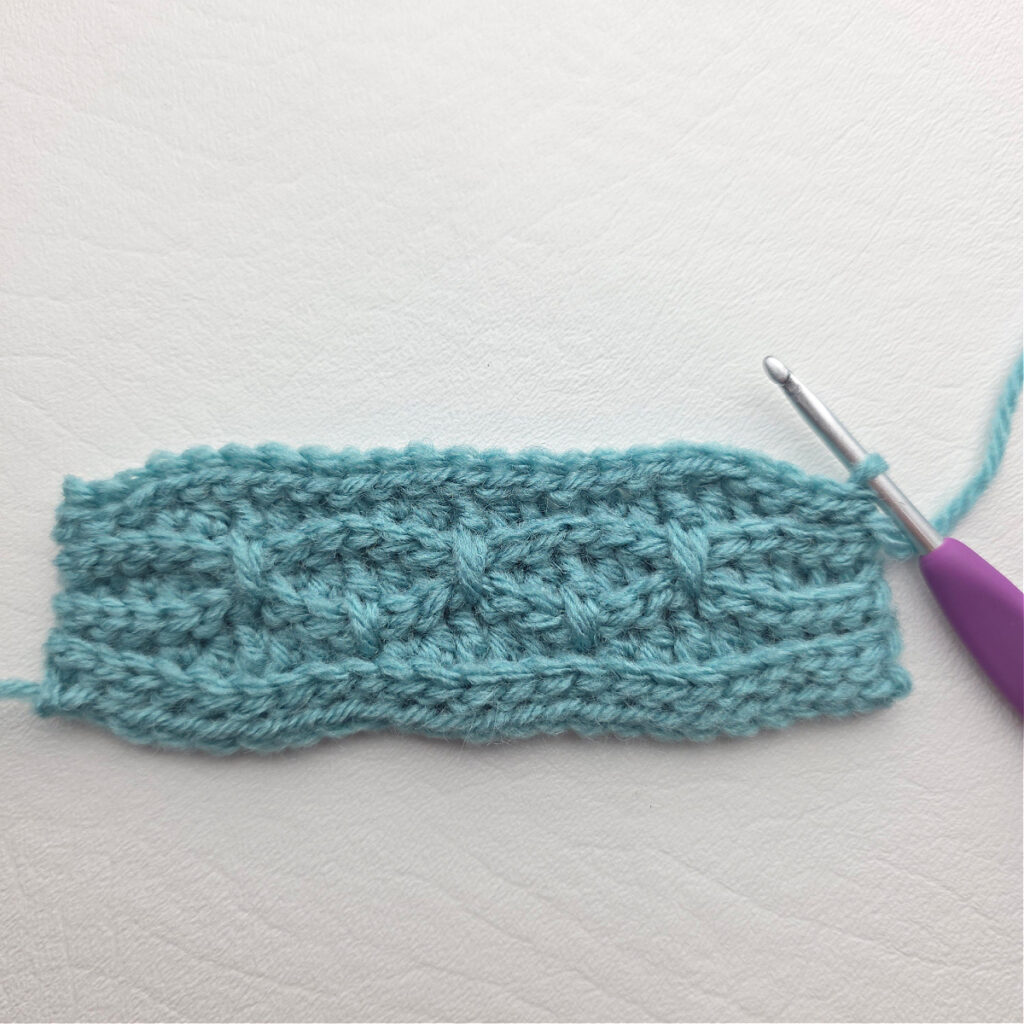
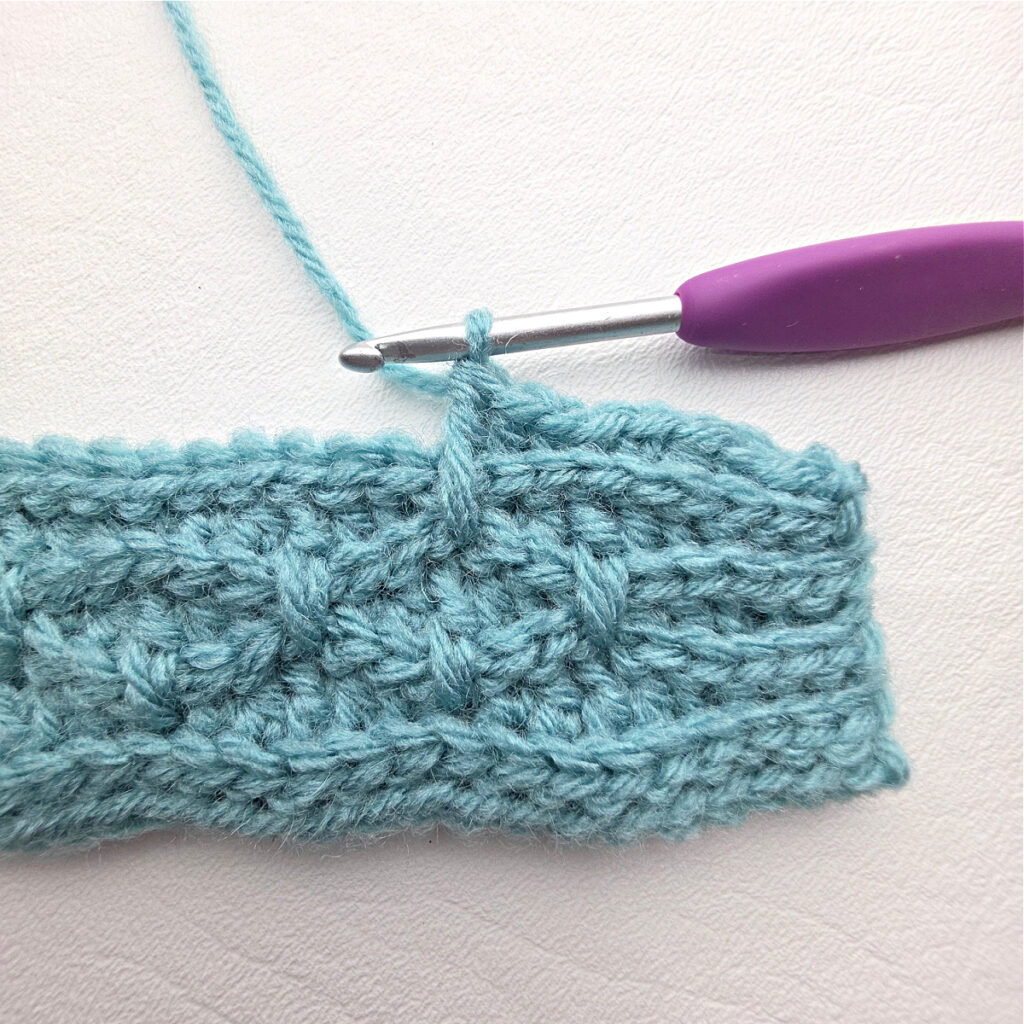
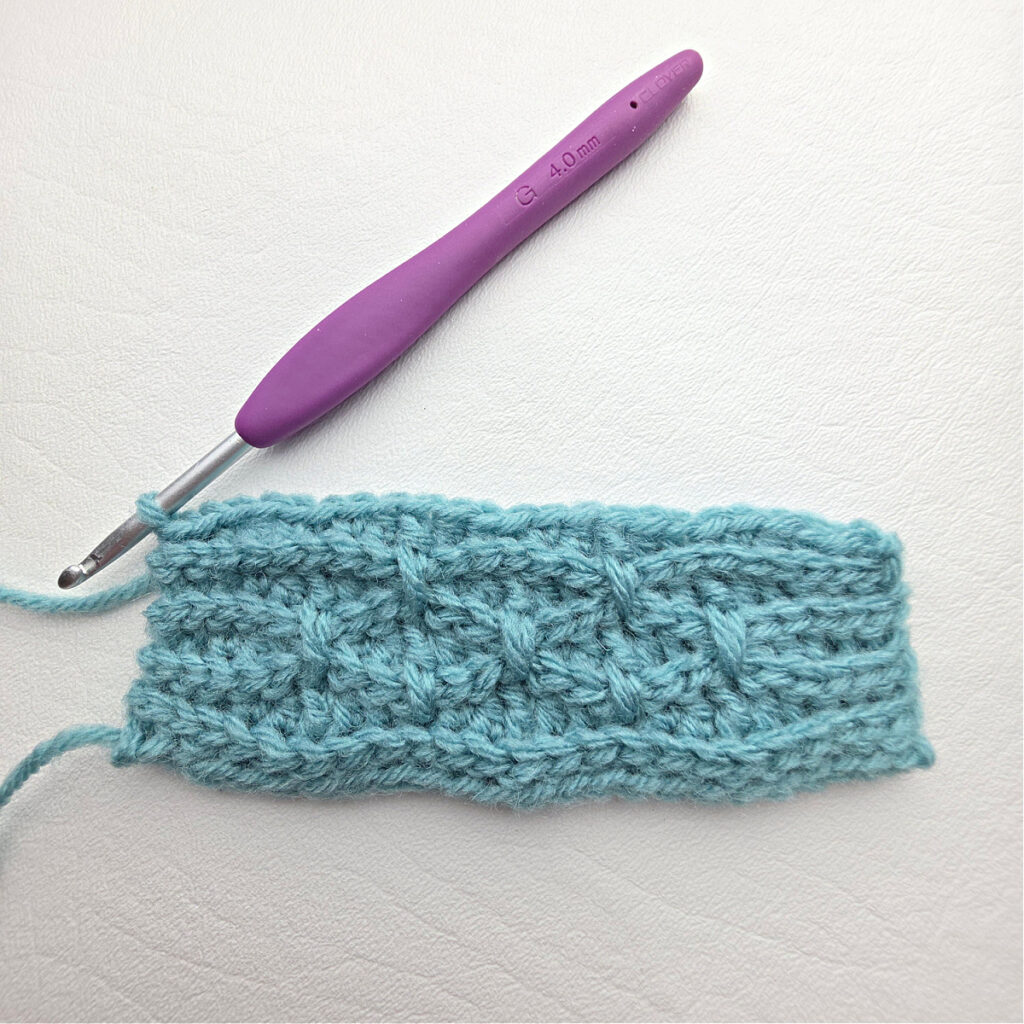
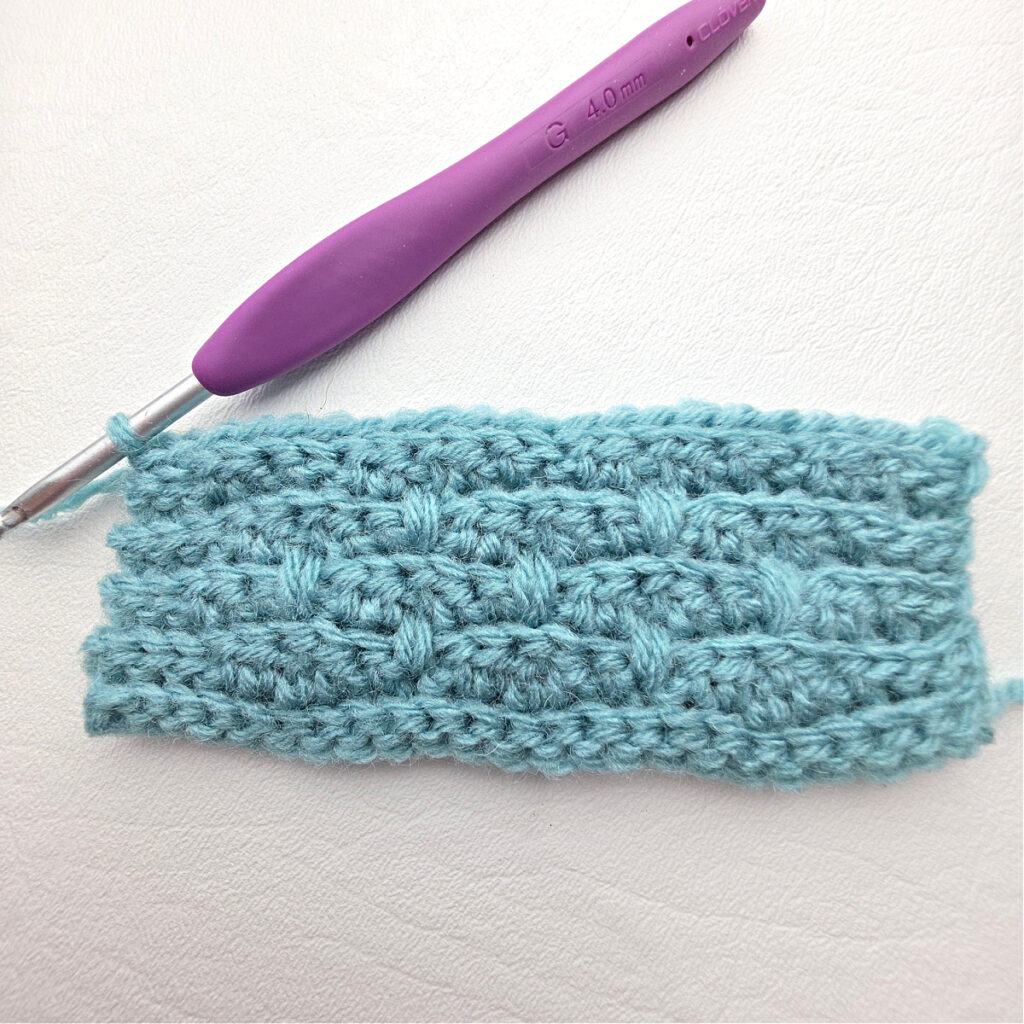
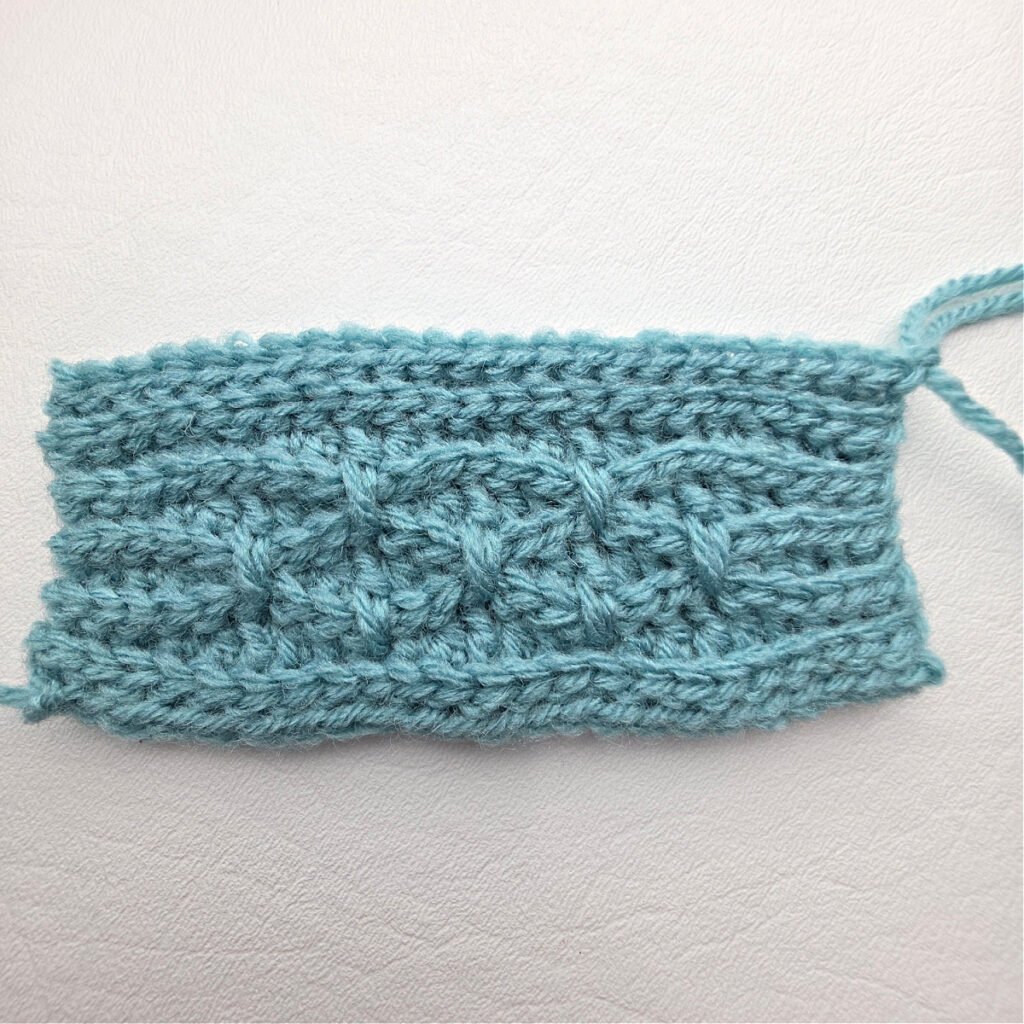
Progression Photos (Before Seaming)
The photos below are of a worsted weight swatch to show placement of the dc’s only. Do not count stitches.


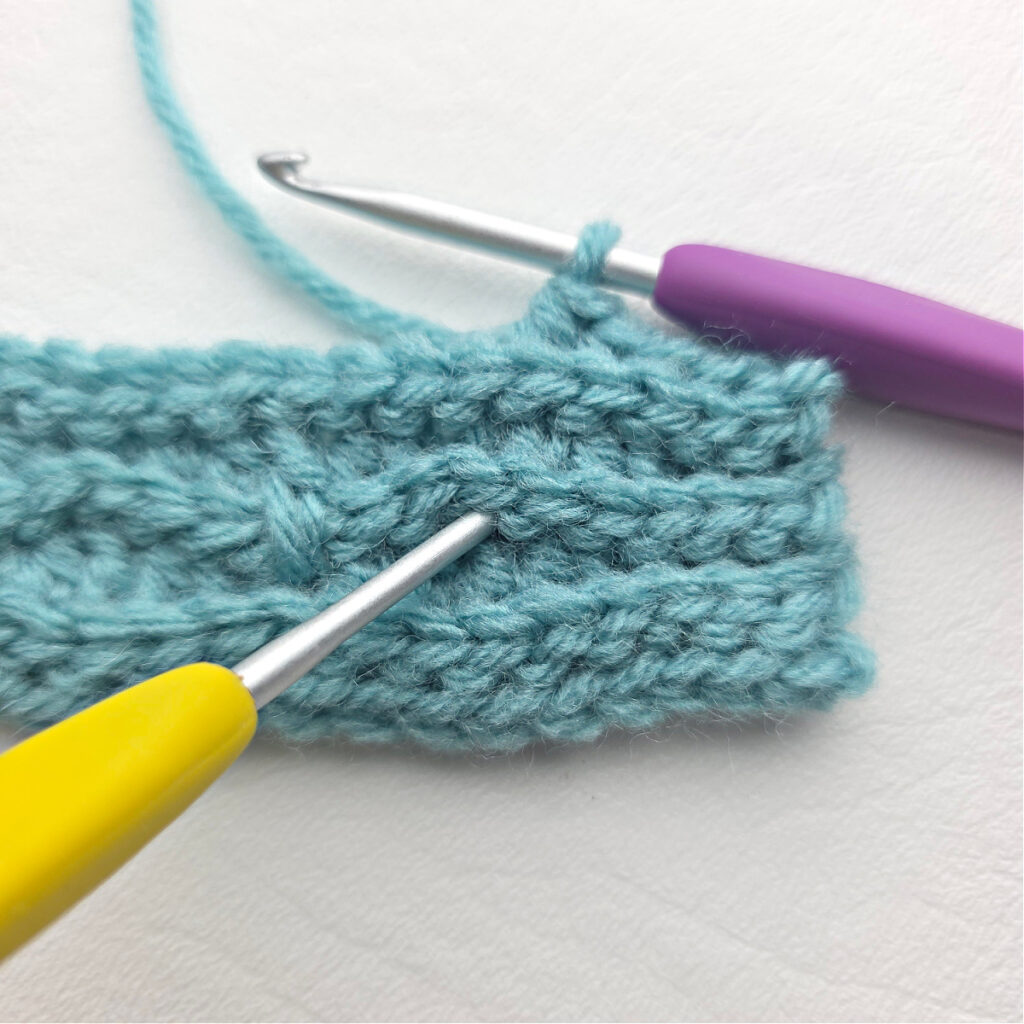
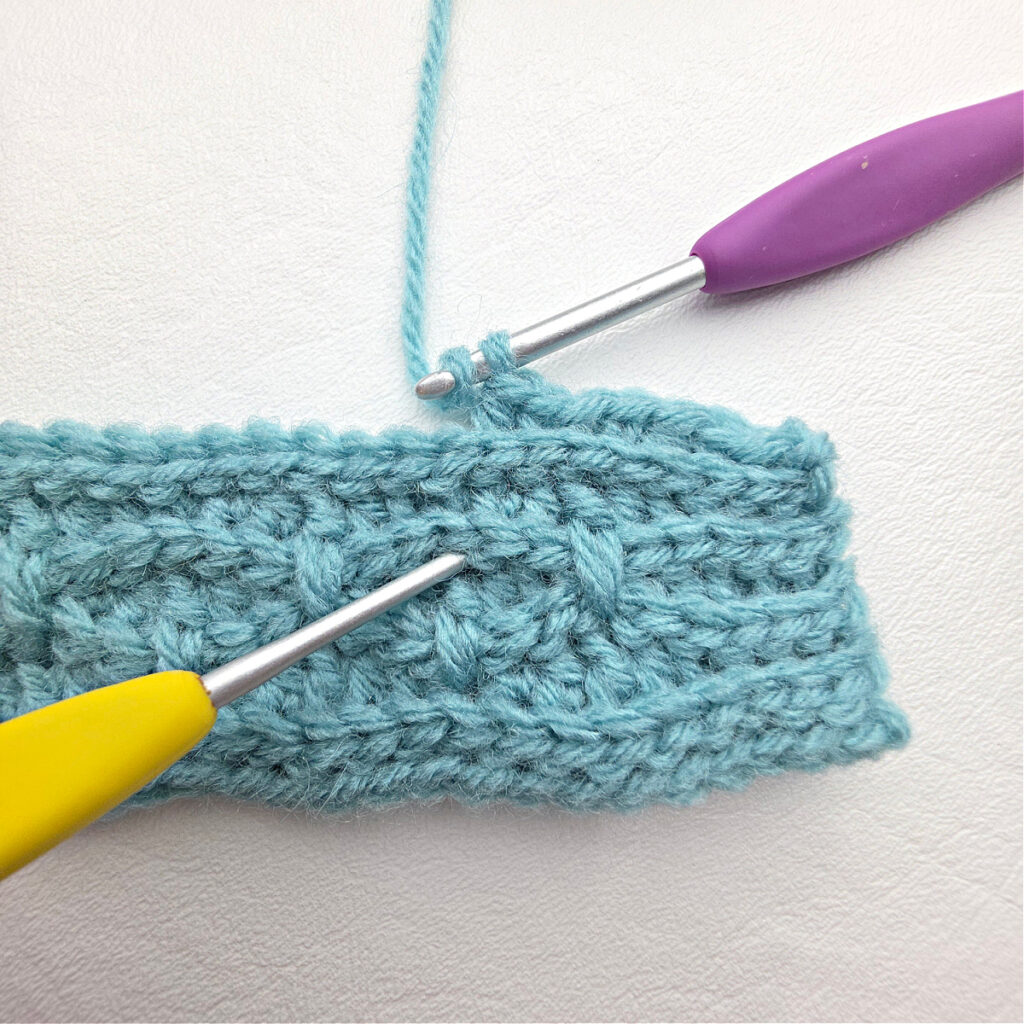

Seaming Instructions
Step One: With the RS facing, fold your head warmer in half as shown in the photo below.
Step Two: Line up the short edges so that half of one edge lines up with half of the other edge as shown in the middle photo below. Fold the bottom layer on top of the top layer. Move the corner shown by the pink dot to the spot marked by the pink arrow. See top view photo below.


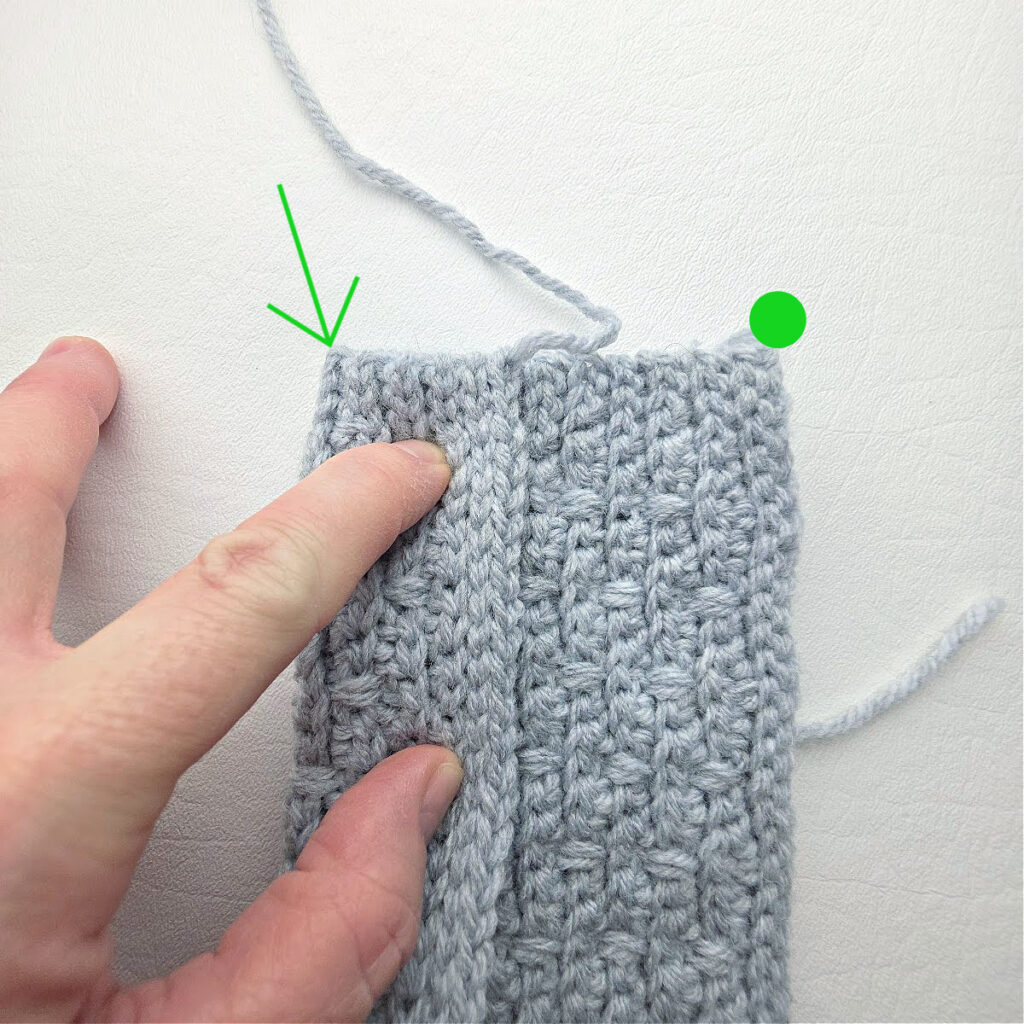
Step Three: Fold the corner on the right to the bottom. Move the corner shown by the green dot to the spot marked by the green arrow. This section should be on the bottom of the project. See top view photo below.
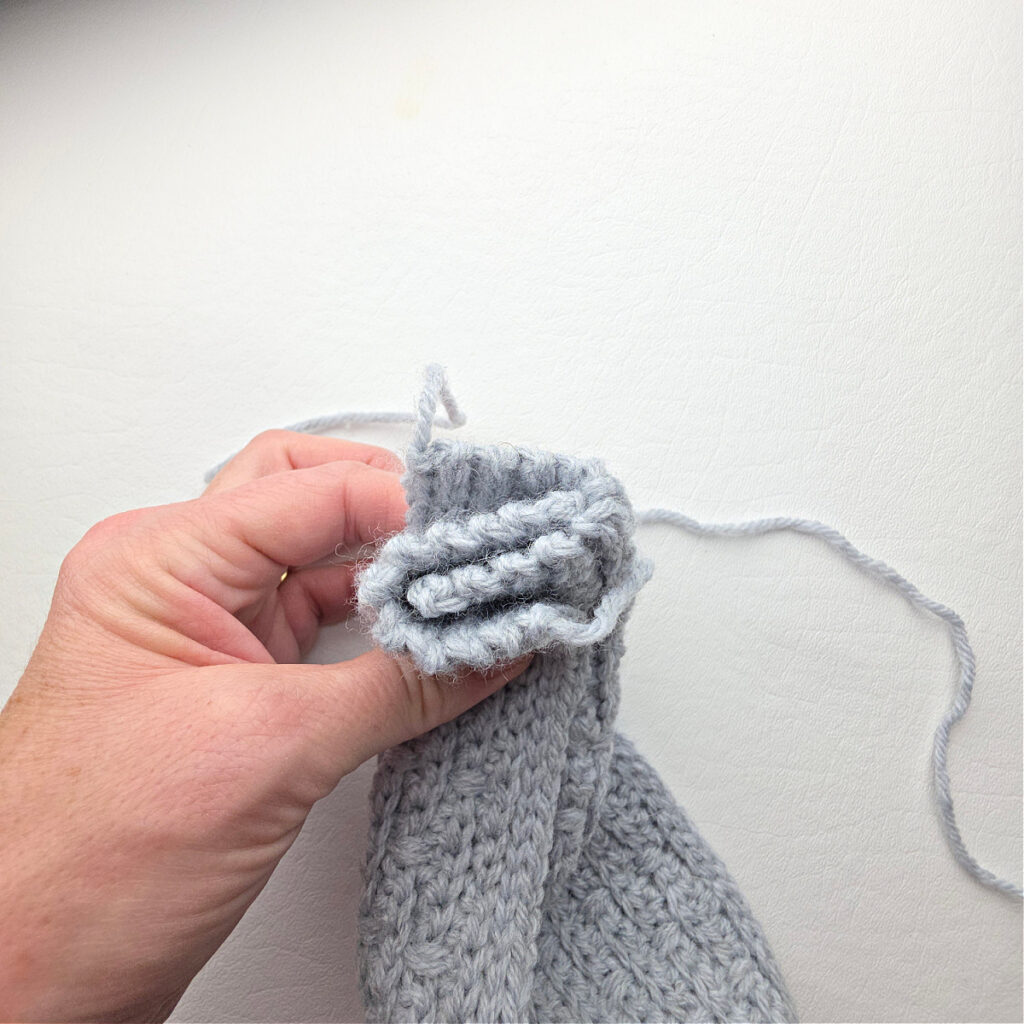
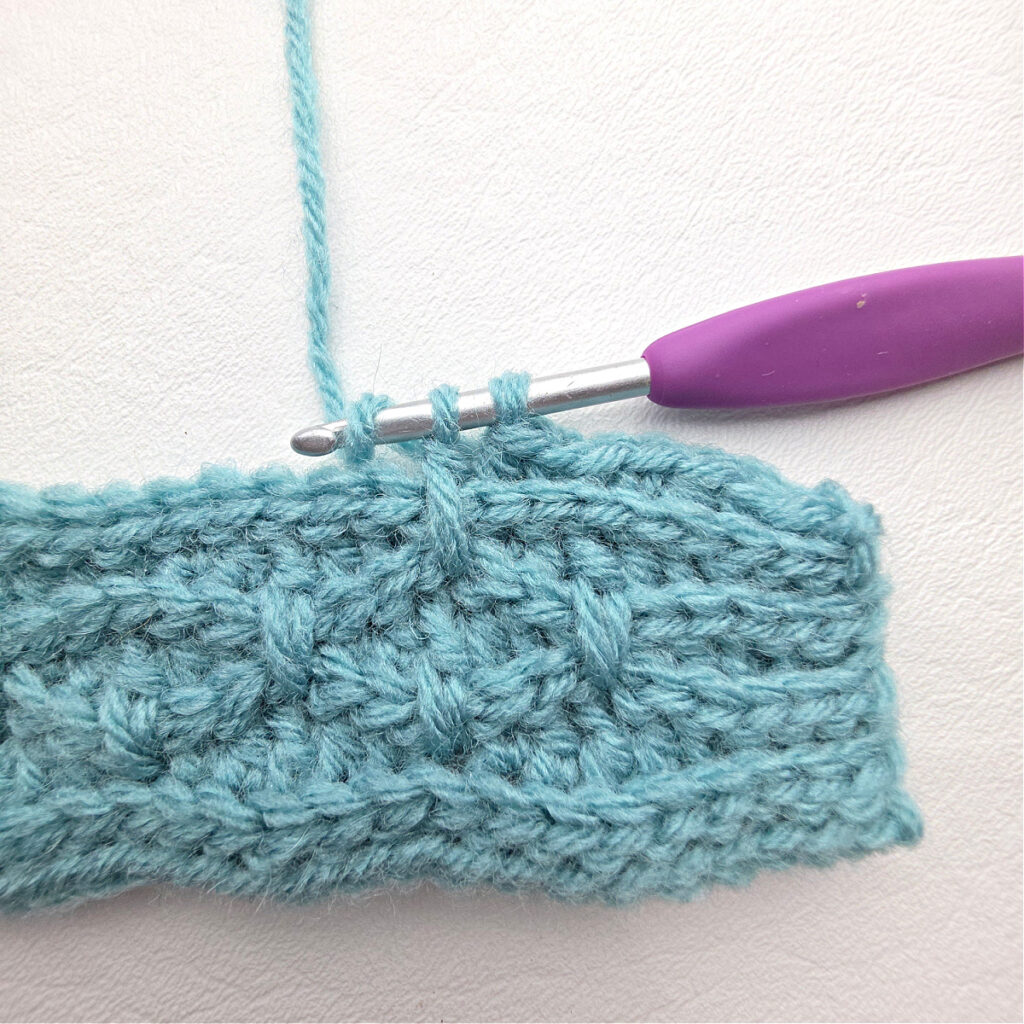
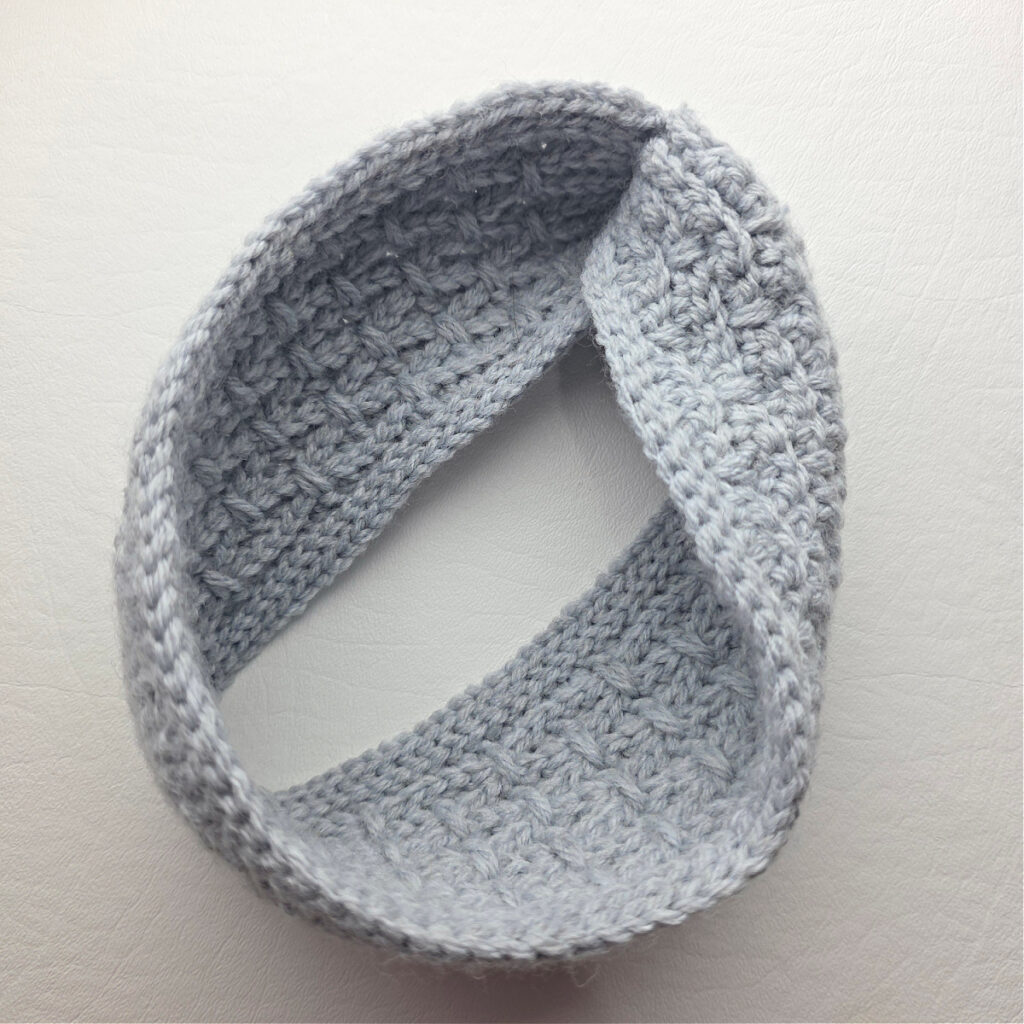
Step Four: With a yarn needle and the tail of yarn, sew through all four layers that you just folded together. Make sure you work through all four layers. Continue sewing across the edges through all layers. Weave in ends. Turn headwarmer right side out.


I MADE IT! NOW WHAT?
Pin this post!: Save this crochet head warmer pattern to your Pinterest boards so that you can come back and make it again.
Leave a comment below: We love to hear your feedback.
Share Your Finished Projects on Facebook or Instagram: I love to see your finished projects! Share with us on social media and tag me @acrochetedsimplicity or use the hashtag #ACrochetedSimplicity so I can find your posts.
Join us in the Facebook Community Group!
Come share your finished projects with us in the A Crocheted Simplicity Crochet Community Group on Facebook. Join us for fun community events such as crochet alongs, join in on crochet conversations, ask questions, get advice, and share your love for crochet!

More Crochet Ear Warmer Patterns I Think You’ll Love
- Knit-Look Crochet Ear Warmer
- Diamonds Ear Warmer
- Chevron Peaks Ear Warmer
- Winter Waves Cowl & Ear Warmer
- Diamonds Messy Bun
More Crochet Headwear Patterns
Are you looking for more crochet hat and ear warmer patterns? We have several more patterns for all kinds of crochet beanies and ear warmers, including matching sets for mothers and daughters and even for fathers and sons.