Fireside Crochet Christmas Bauble
Make yourself a crochet Christmas bauble that combines both timeless design and holiday charm. You’ll find both a written pattern and picture tutorial to guide you through the process.
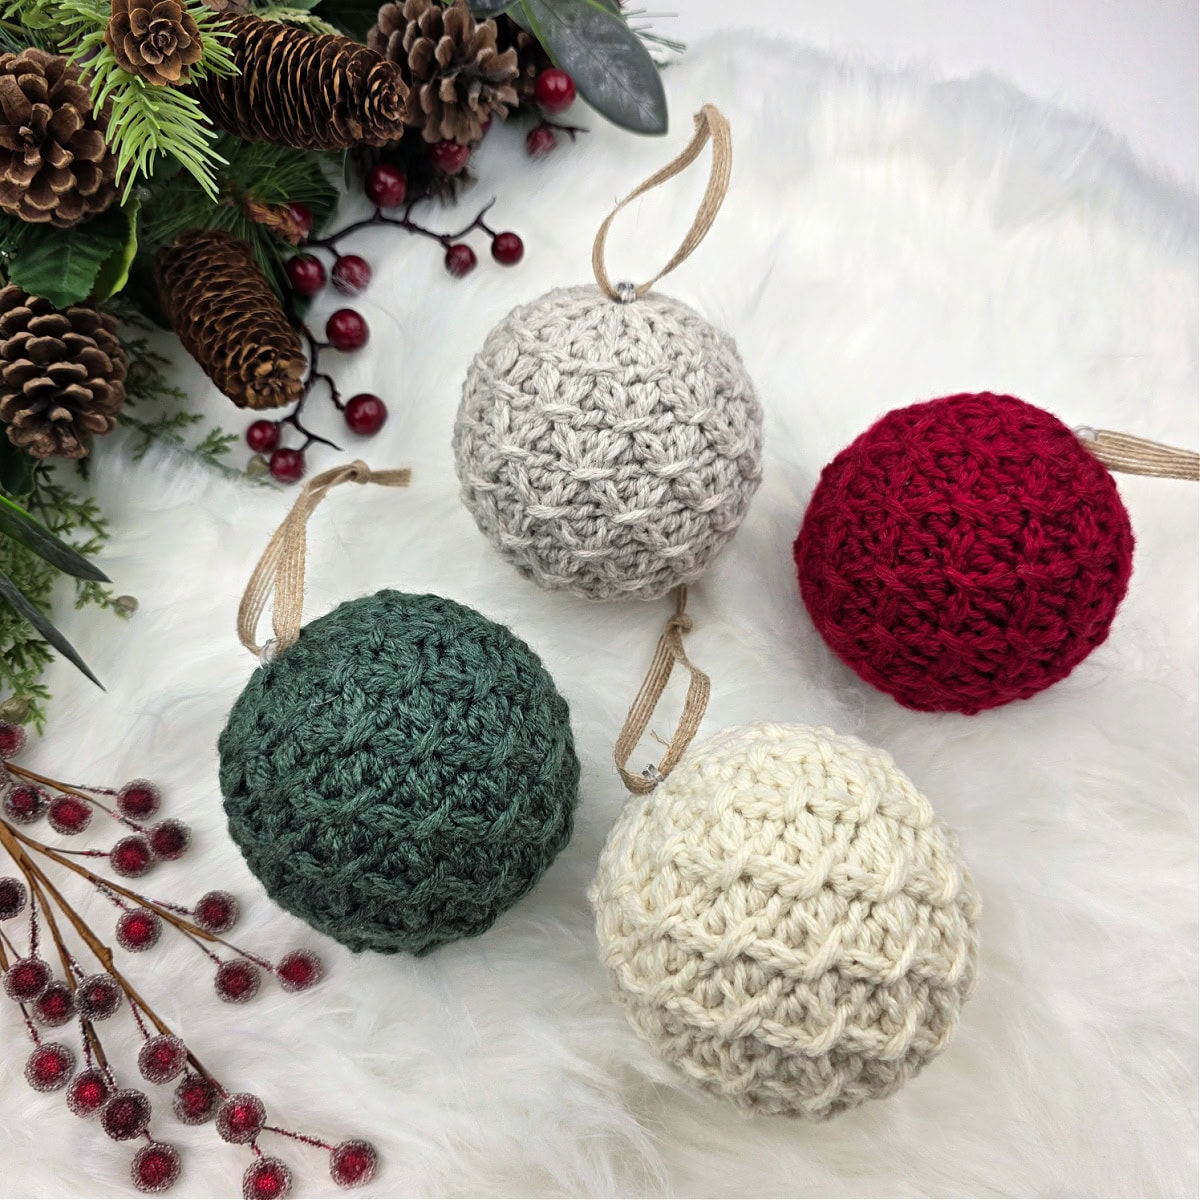
You have the creative liberty to crochet these ornaments in soft neutral tones or bold bright colors, depending on your decor for the season.
You’ll find the free crochet bauble pattern in the post below, or you can find an ad-free printable PDF (that includes all photo tutorials), on Ravelry, or Etsy (aff).
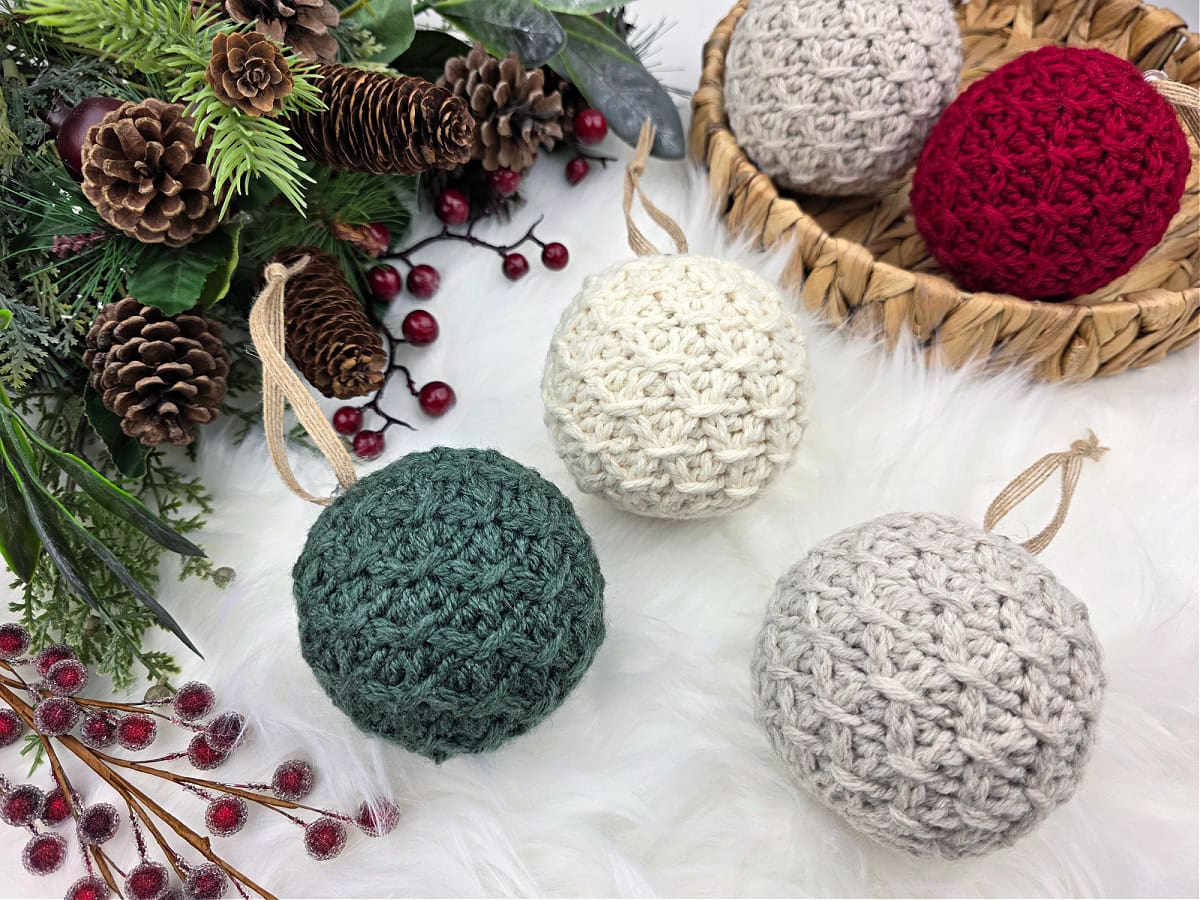
The stitch combination used for this bauble has a subtle texture to it which adds to its overall character. You can also turn this into a stashbusting project and use up different shades of yarn to have a very colorful tree decor this year. Once you master the pattern repeat, you’ll be working up these crochet Christmas baubles in no time!
How to Crochet an Ornament
If you’ve never crocheted a bauble before, there’s not that much to it! Follow along the written pattern and take help from the pictures to guide you through every step for a hassle-free crochet journey.
These knit-look crochet Christmas baubles are first crocheted flat using crochet short row shaping. Next, you’ll start to seam the long edges but won’t go all the way. While seaming, at the point indicated, you’ll insert the bauble or fill with fiberfil depending on which you prefer. Remember, both will give you a slightly different ornament feel.
After seaming the edges, you’ll stitch a few finishing stitches to blend the seam stitches together. Lastly, you’ll use a piece of yarn to close the small gaps at the top and bottom of the bauble and you’re all done!

How To Get The
Fireside Christmas Bauble Pattern
Option 1: Scroll down for the free crochet ornament pattern right here in this blog post.
Option 2: Purchase the ad-free printable PDF from one of my shops:
The Fireside Crochet Christmas Bauble was designed for the 7th Annual Christmas in July Make Along hosted by Marie at the Underground Crafter. Make sure to pop on by Marie’s blog to join in the fun and enter to win prizes!
Best Yarn for Crochet Baubles
You have the option to choose whatever type of yarn you want for your handmade ornaments and there might be a bit of variety if you decide to bust your stash. However, I highly recommend you use a durable yarn that can hold its shape well and will easily last a while. Since your crochet Christmas bauble will be hung outside for some time, and you also want to store it to use again and again, this is important.
For my baubles, I used an acrylic and wool blend yarn. I was very happy with the final result and if you have this yarn in your bucket, be sure to use it for this project!
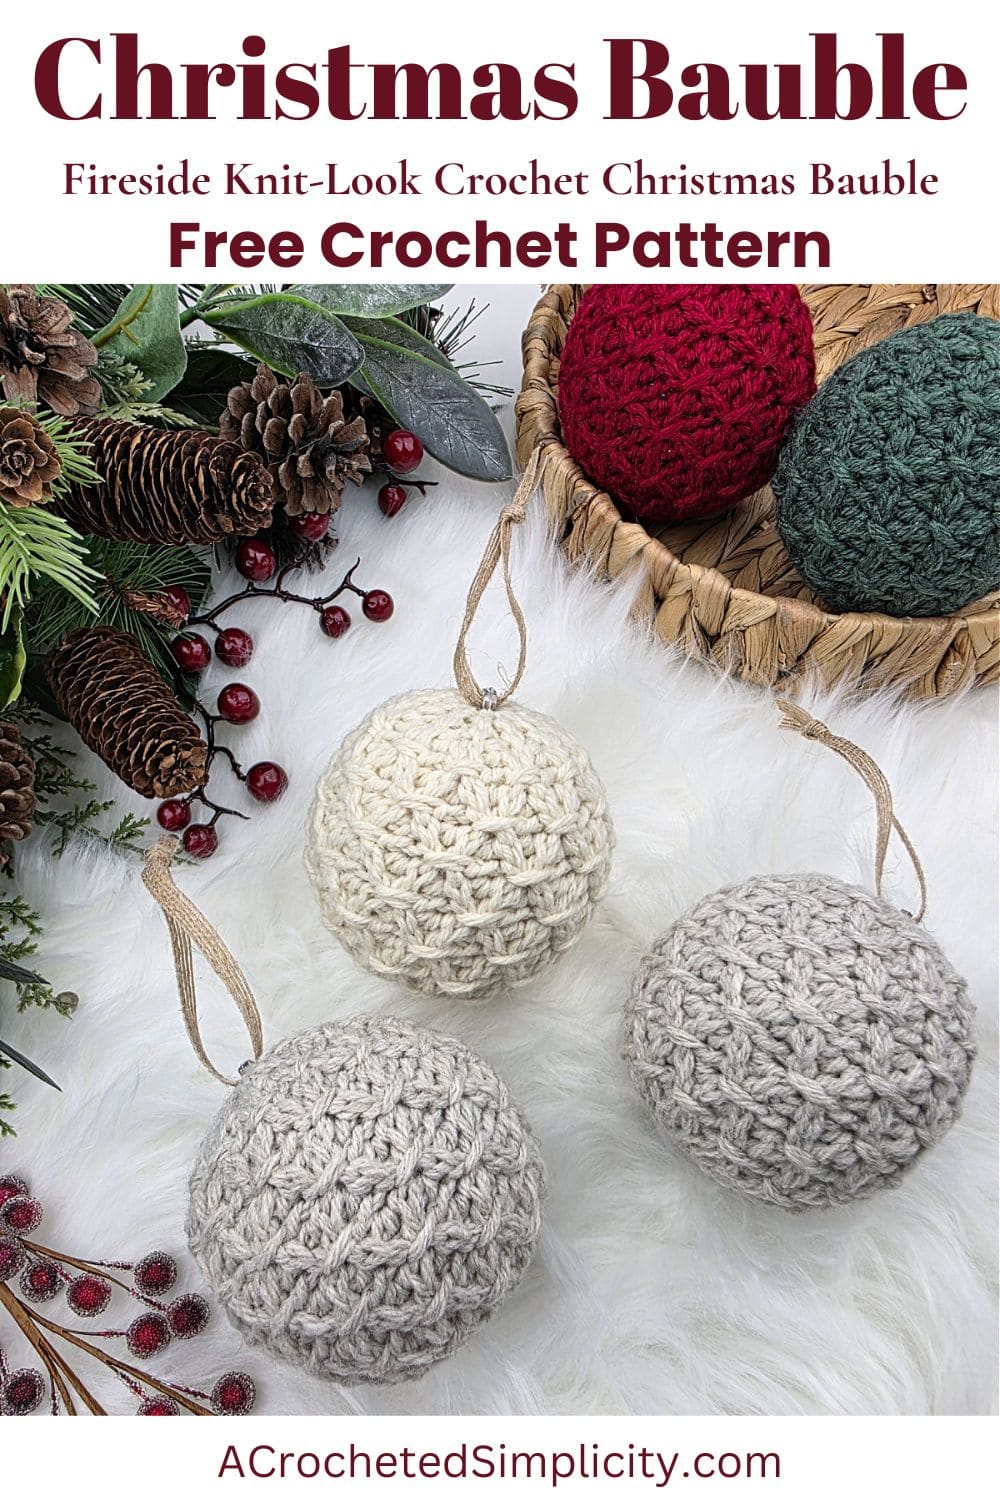
Fireside Christmas Bauble – Free Pattern
The crochet Christmas bauble pattern is free below, but if you love to work offline, I’ve got a couple other great options for you.
Purchase the ad-free, printable PDF, (that includes all photo tutorials), on Ravelry, or on Etsy (aff).
This post contains affiliate links.
Materials
- Yarn: Worsted Weight / 4 / Yarn, Lion Brand Yarns Wool Ease was used for the sample in the photos [80% Acrylic, 20% Wool (197 yds / 180 m / 85 g / 3 oz)].
- Yardage: 100 yards per bauble
- See Pattern Notes below for a list of all colors shown.
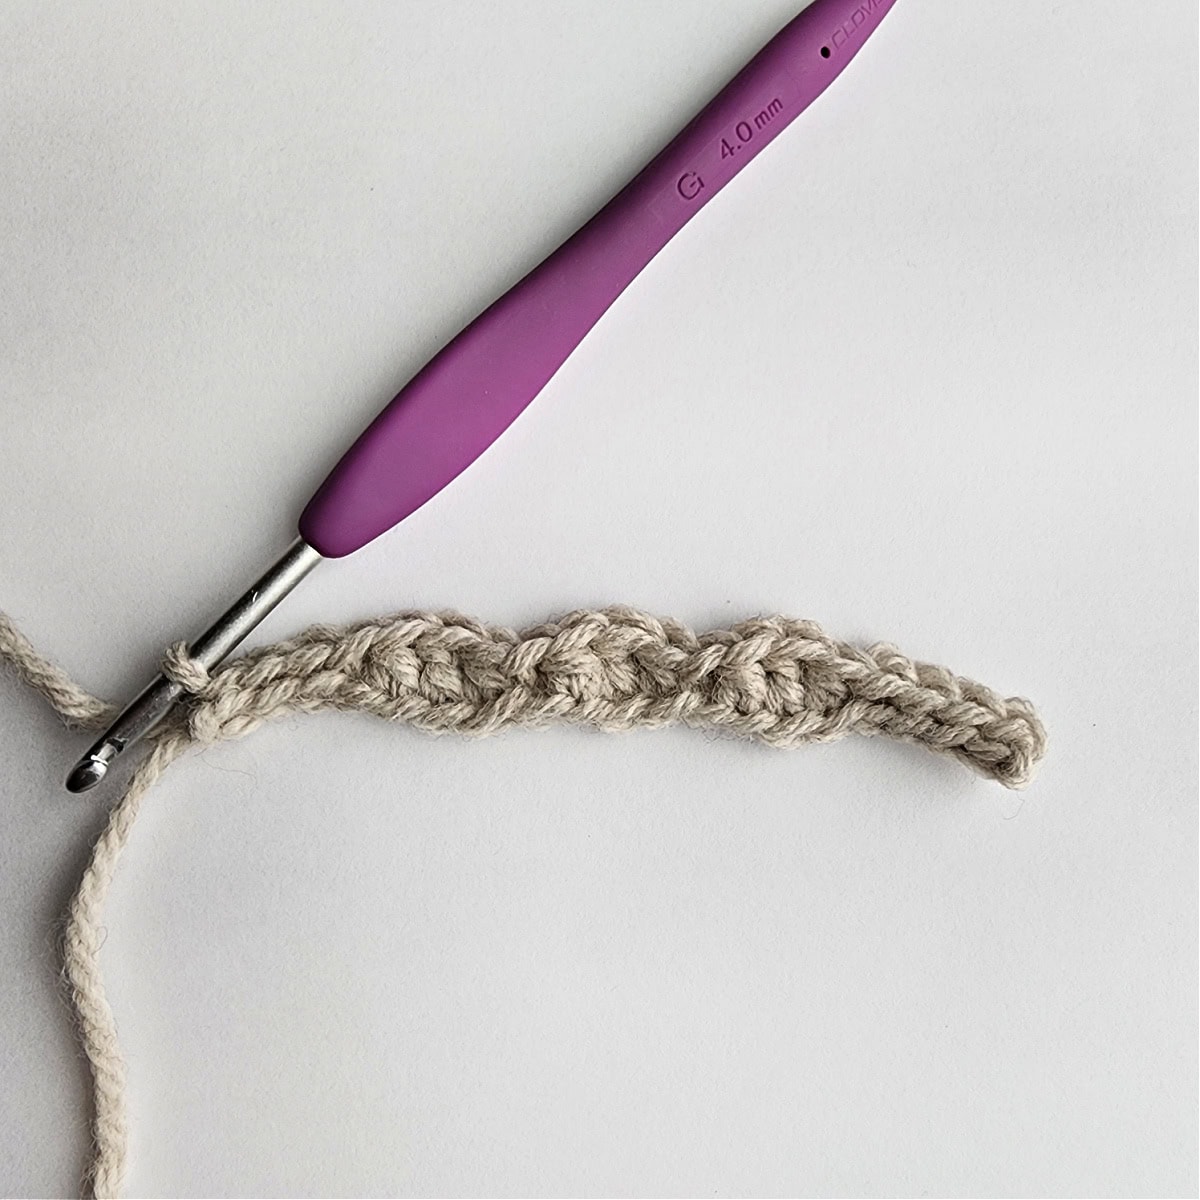
- Crochet Hook: G/6/4.00mm or size needed to obtain gauge (My favorite crochet hooks are the Clover Amour Crochet Hooks, I’ve never had an ache in my hand since switching).
- Measuring Tape
- Scissors
- Yarn Needle
- 3″ diameter plastic ornament or Fiberfil
- 1/4″ Burlap Ribbon (for a hanging loops)
Abbreviations (US Terms)
- ch: chain
- sl st(s): slip stitch(es)
- st(s): stitch(es)
- yo: yarn over
- hdc: half double crochet
- dc: double crochet
- Rep: repeat
- SM: stitch marker
- BLO: back loop only
Experience Level
- Easy / Intermediate
Gauge
- In stitch pattern as written: 19 sts= 4.25″; 12 rows = 2″
Sizes
- One Size: 3″ diameter
Pattern Notes
- Turning chains are not included in stitch count.
- Yarn Notes: Lion Brand Yarns Wool Ease was used for the sample. Other comparable yarns may be used as long as gauge is met.
- Lion Brand Yarns Wool Ease, worsted weight / 4 yarn, 80% Acrylic / 20% Wool (197 yards / 180 m / 85 g / 3 oz)
- Yardage & Color
- Oatmeal #620-024A (100 yards per bauble)
- Fisherman #620-099 (100 yards per bauble)
- Cranberry #620-138 (100 yards per bauble)
- Forest Green Heather #620-180 (100 yards per bauble)
- Construction: These knit-look crochet Christmas baubles are first crocheted flat using crochet short row shaping. Next, you’ll seam the long edges. While seaming, you’ll insert the bauble, or fill with fiberfil. After seaming the edges, you’ll stitch a few finishing stitches to blend the seam stitches together. Lastly, you’ll use a piece of yarn to close the small gaps at the top and bottom of the bauble.
Fireside Crochet Christmas Bauble – Written Pattern
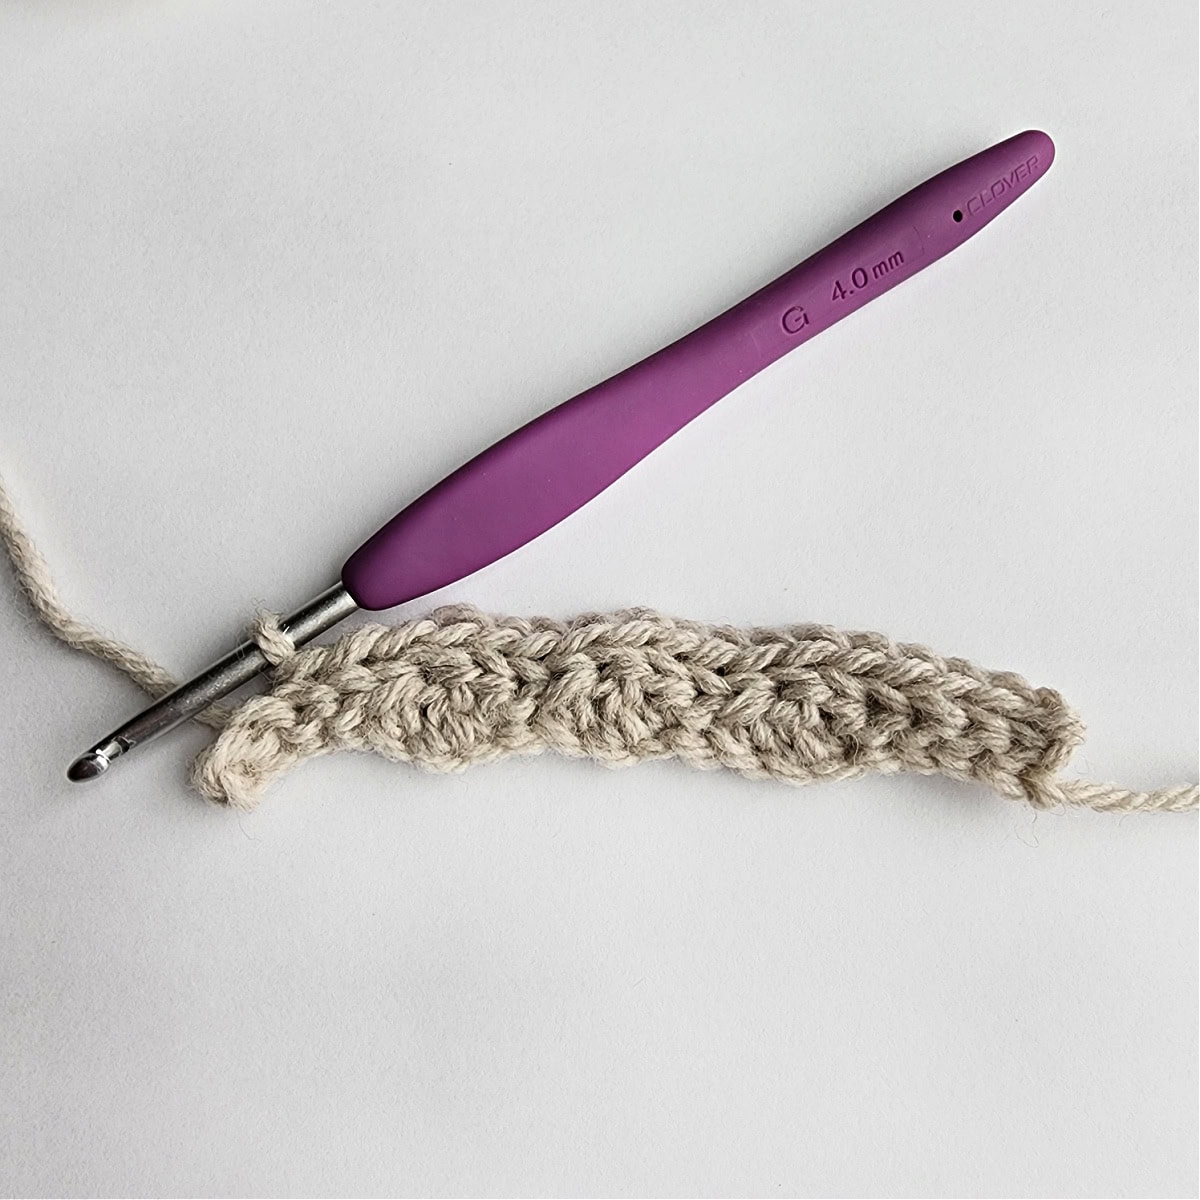
Row 1 (RS): With yarn & a 4.00mm crochet hook, ch 20, working into the back humps of your foundation ch, sl st into the 2nd ch from your hook, sl st in each of the next 3 chs, (hdc in the next ch, dc in the next ch, hdc in the next ch, sl st in the next st) 3 times, sl st in each of the last 3 chs. Turn. (19 sts)
Row 2: Ch 1, BLO sl st in each of the next 17 sts, skip the remaining 2 sts. Turn. (17 sts)
Row 3: Ch 1, BLO hdc in the first st, dc in the next foundation ch from Row 1, BLO hdc in the next st, BLO sl st in the next st, (BLO hdc in the next st, dc in the next foundation ch from Row 1, BLO hdc in the next st, BLO sl st in the next st) 2 times, then BLO hdc in the next st, dc in the next foundation ch from Row 1, BLO hdc in the next st, skip the remaining 2 sts. Turn. (15 sts)
Row 4: Ch 1, BLO sl st in each st across the previous row, BLO sl st in each of the 2 skipped sts from the previous even row. Turn. (17 sts)
Row 5: Ch 1, BLO sl st in each of the first 4 sts, (BLO hdc in the next st, dc in the next dc from Row 1, BLO hdc in the next st, BLO sl st in the next st) 3 times, BLO sl st in the next st, BLO sl st in each of the 2 skipped sts from the previous odd row. Turn. (19 sts)
Row 6: Ch 1, BLO st st in each of the next 17 sts, skip the remaining 2 sts. Turn. (17 sts)
Row 7: Ch 1, BLO hdc in the first st, dc in the next dc 4 rows below, BLO hdc in the next st, BLO sl st in the next st, (BLO hdc in the next st, dc in the next dc 4 rows below, BLO hdc in the next st, BLO sl st in the next st) 2 times, then BLO hdc in the next st, dc in the next dc 4 rows below, BLO hdc in the next st, skip the remaining 2 sts. Turn. (15 sts)
Row 8: Ch 1, BLO sl st in each st across the previous row, BLO sl st in each of the 2 skipped sts from the previous even row. Turn. (17 sts)
Row 9: Ch 1, BLO sl st in each of the first 4 sts, (BLO hdc in the next st, dc in the next dc 4 rows below, BLO hdc in the next st, BLO sl st in the next st) 3 times, BLO sl st in the next st, BLO sl st in each of the 2 skipped sts from the previous odd row. Turn. (19 sts)
Rows 10 – 41: Rep Rows 6 – 9, 8 times.
Row 42: Rep Row 6.
Row 43: Ch 1, BLO hdc in the first st, dc in the next dc 4 rows below, BLO hdc in the next st, BLO sl st in the next st, (BLO hdc in the next st, dc in the next dc 4 rows below, BLO hdc in the next st, BLO sl st in the next st) 2 times, then BLO hdc in the next st, dc in the next dc 4 rows below, BLO hdc in the next st, BLO sl st in each of the last 2 sts. Turn. (17 sts)
Row 44: Ch 1, BLO sl st in each st across the previous row, BLO sl st in each of the 2 skipped sts from the previous even row. Turn. (19 sts)
Fasten off leaving a tail of yarn 3 times the length of the seam to be made. Continue on to the Nearly Invisible Seam.
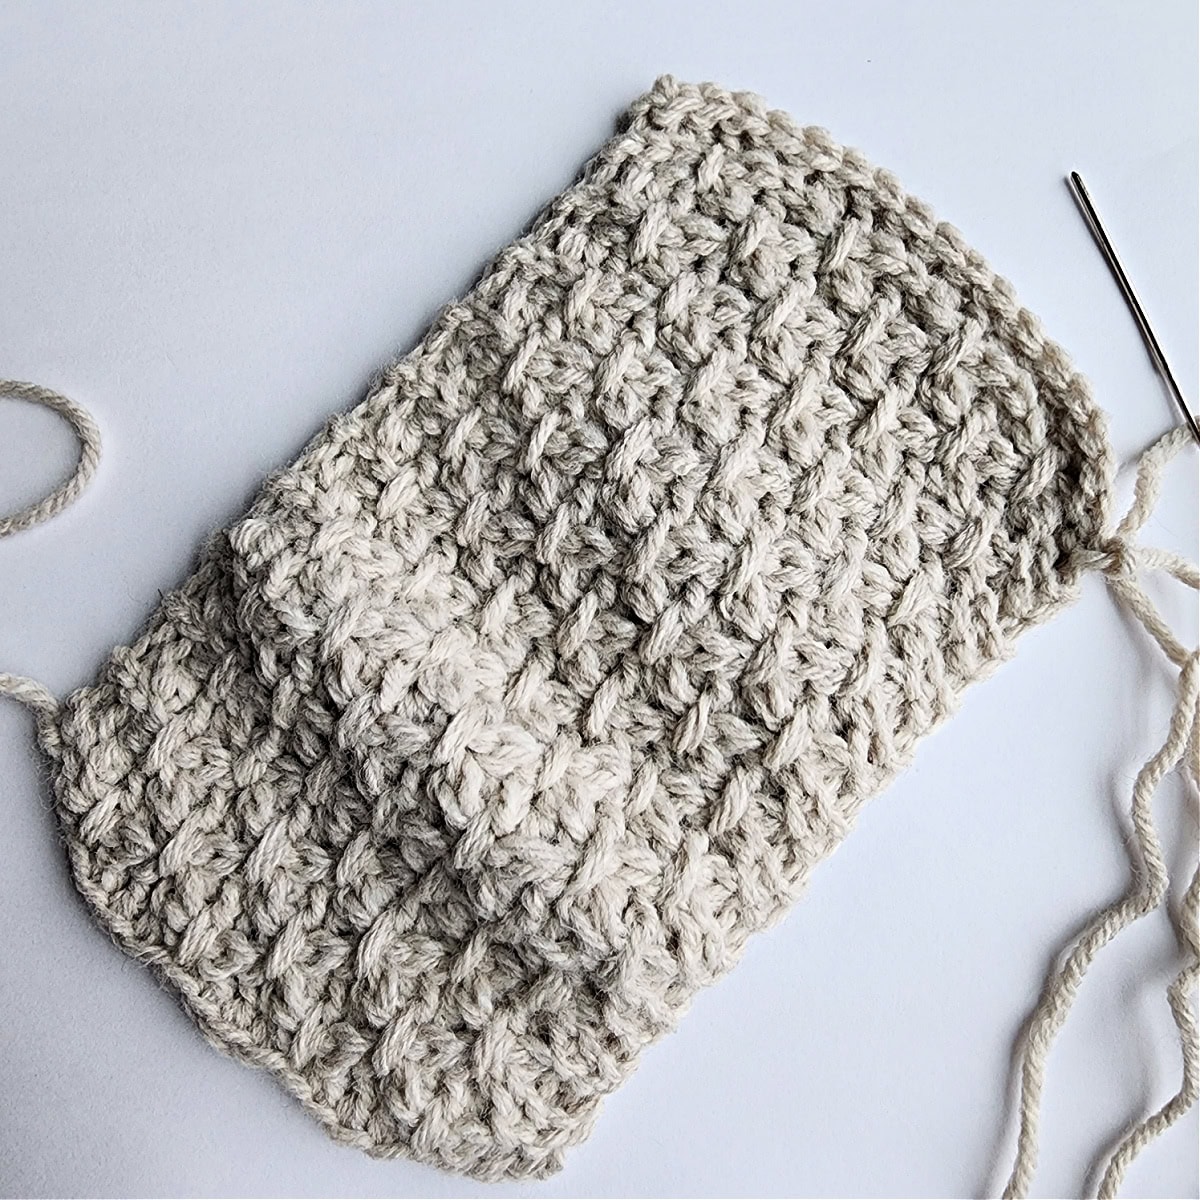
Your smocked crochet bauble cover should measure approximately 4-1/4″ W x 7-3/8″ L.
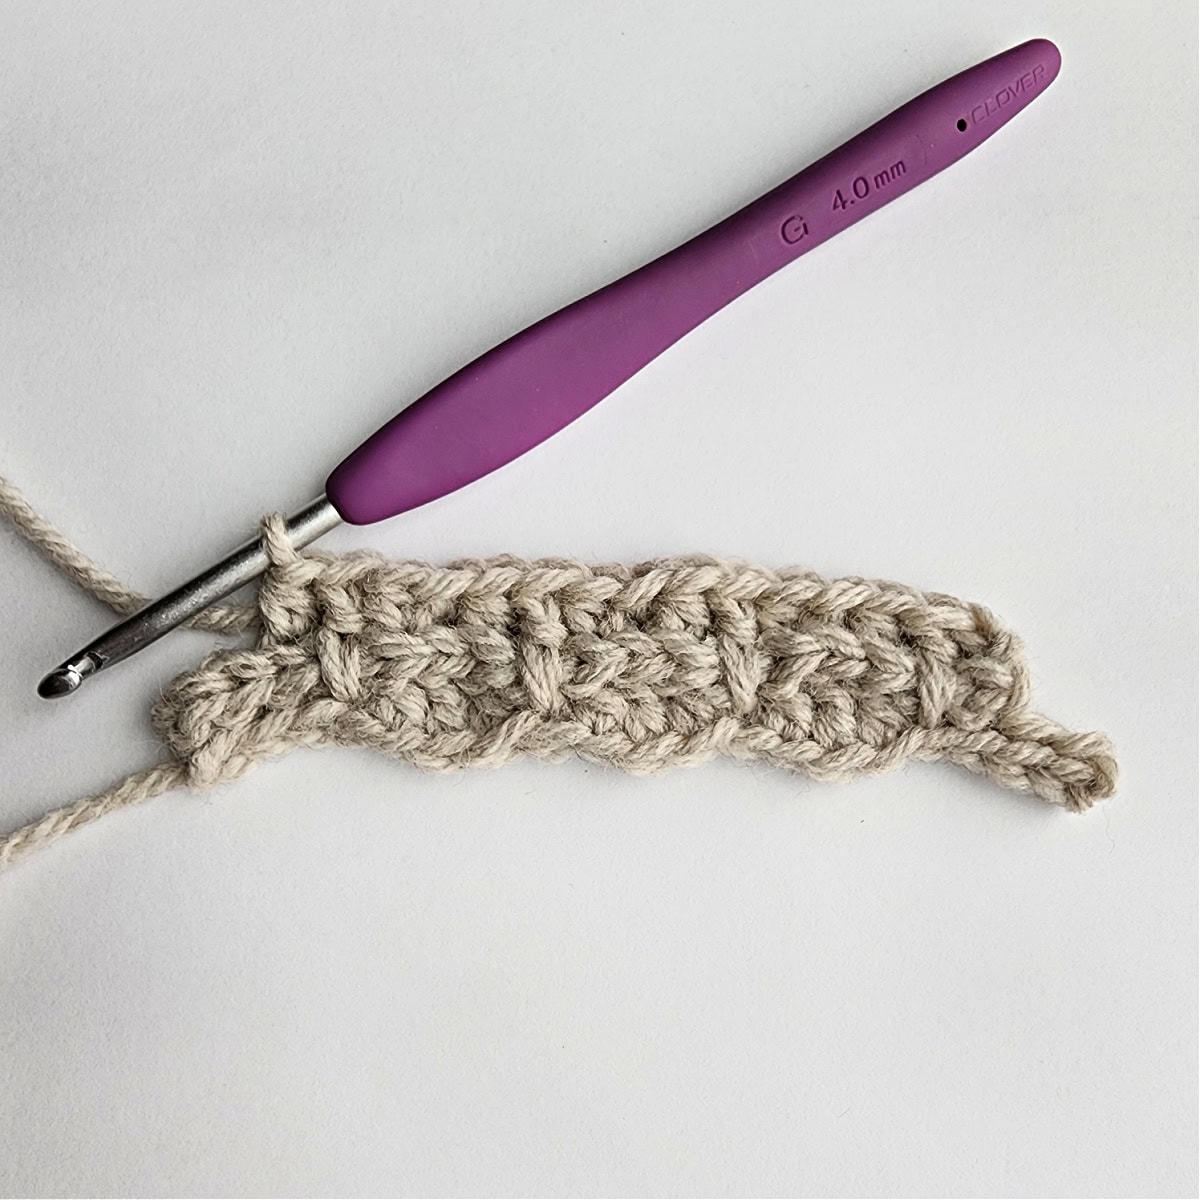
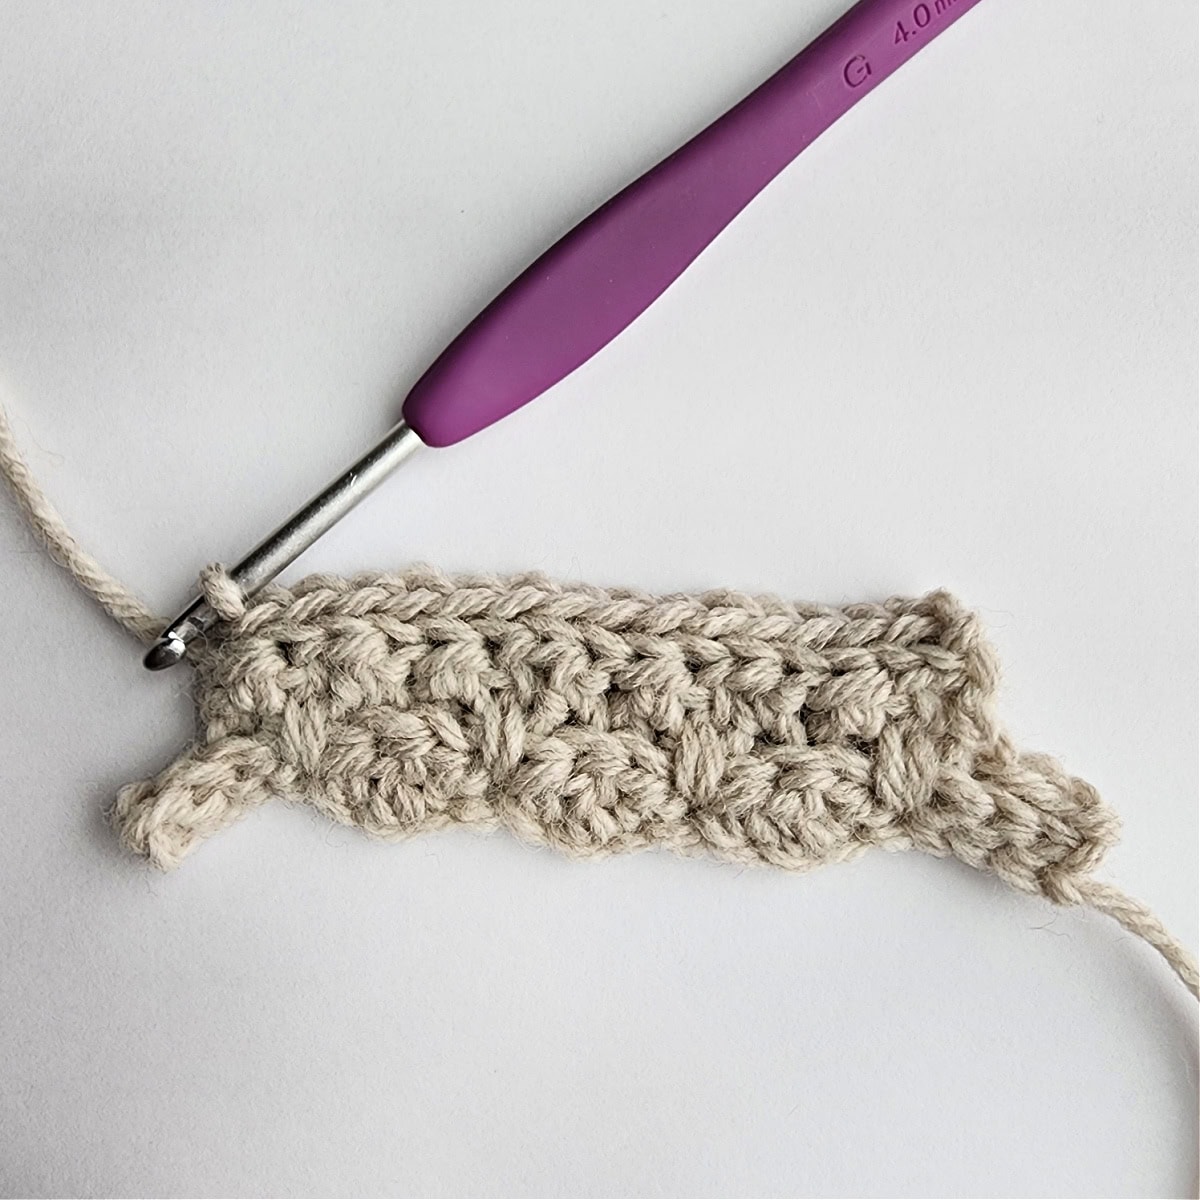
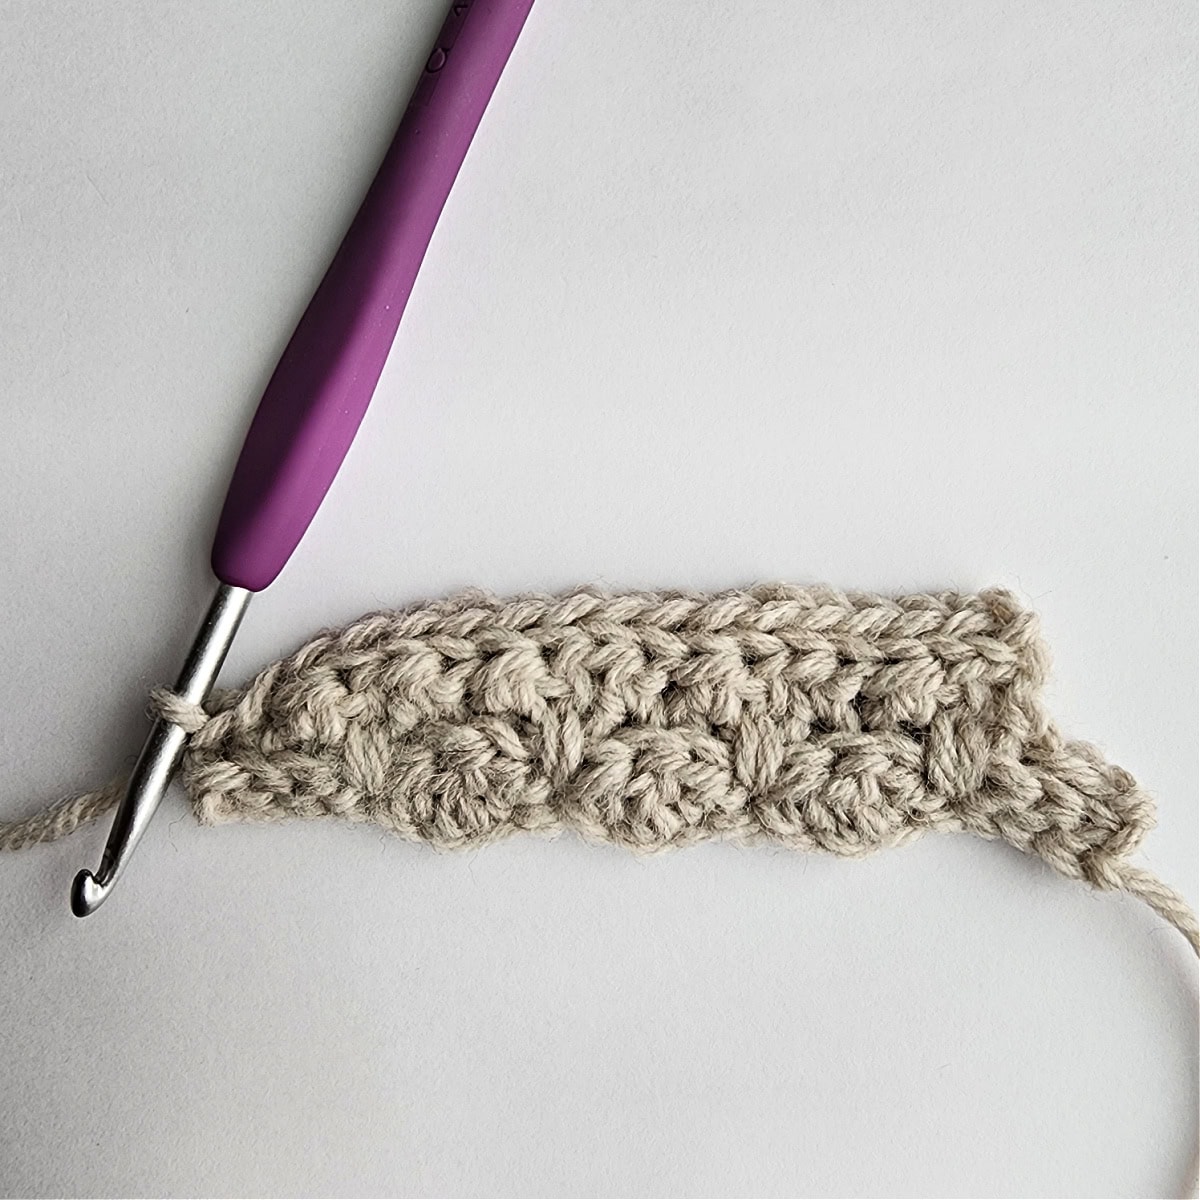
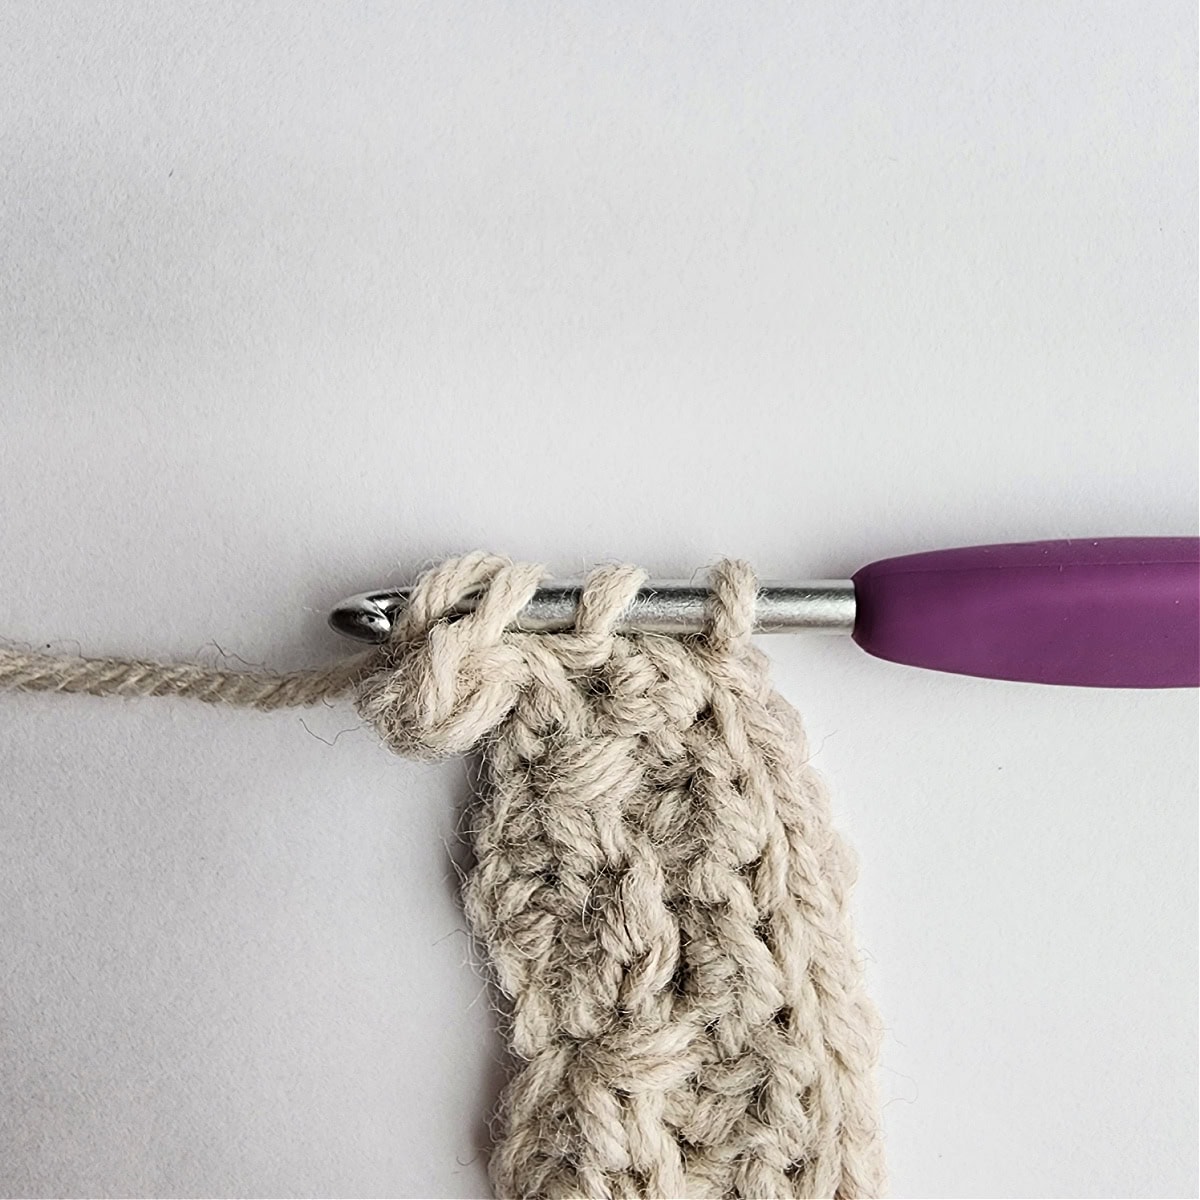
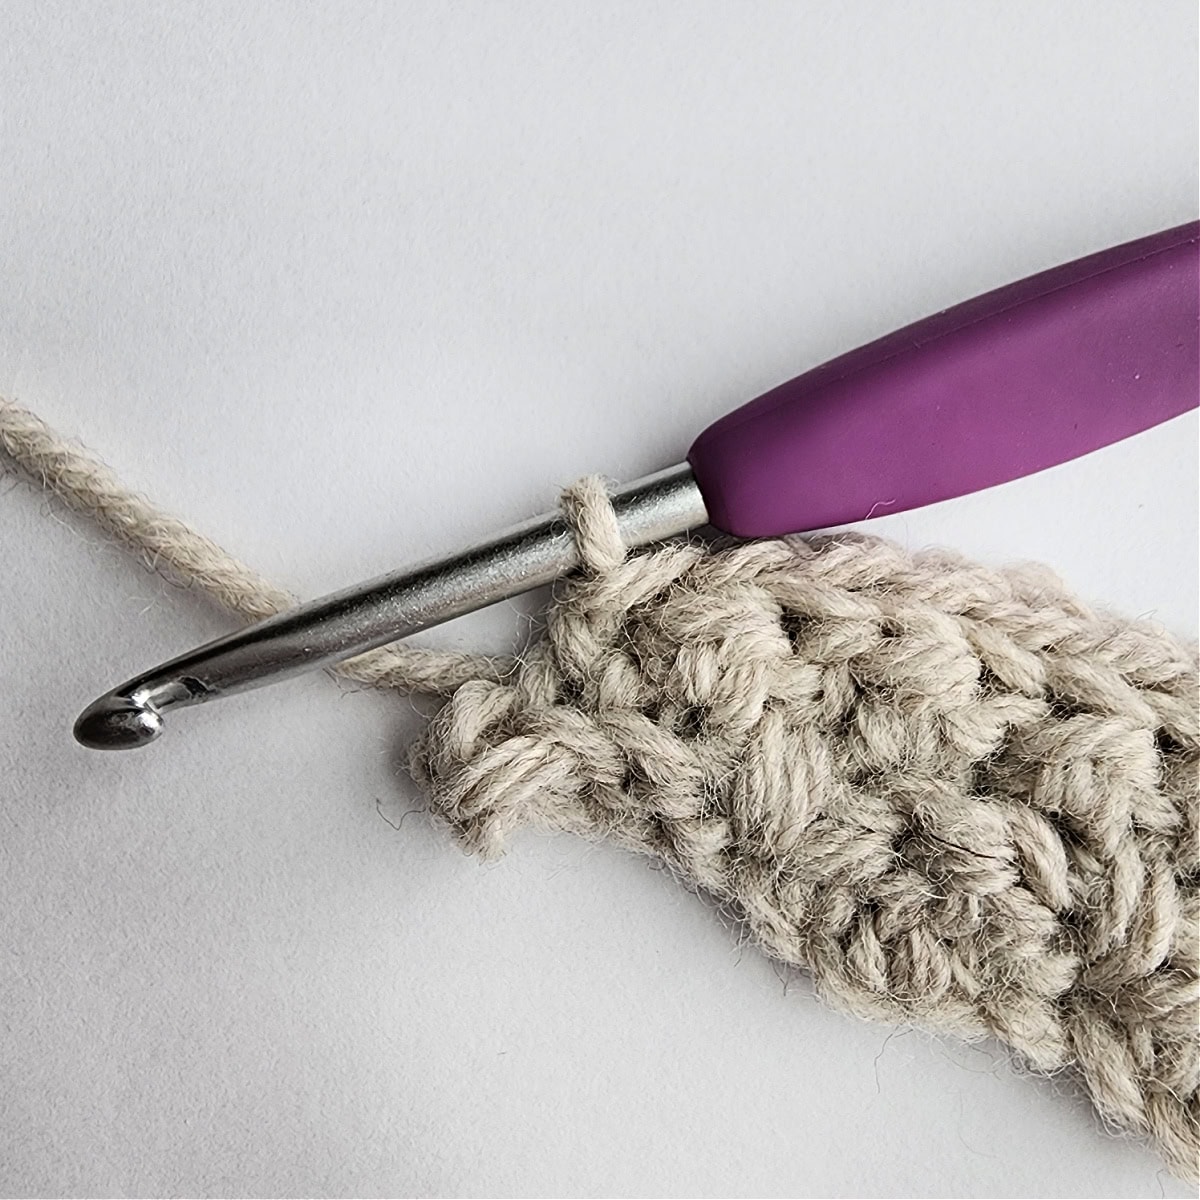
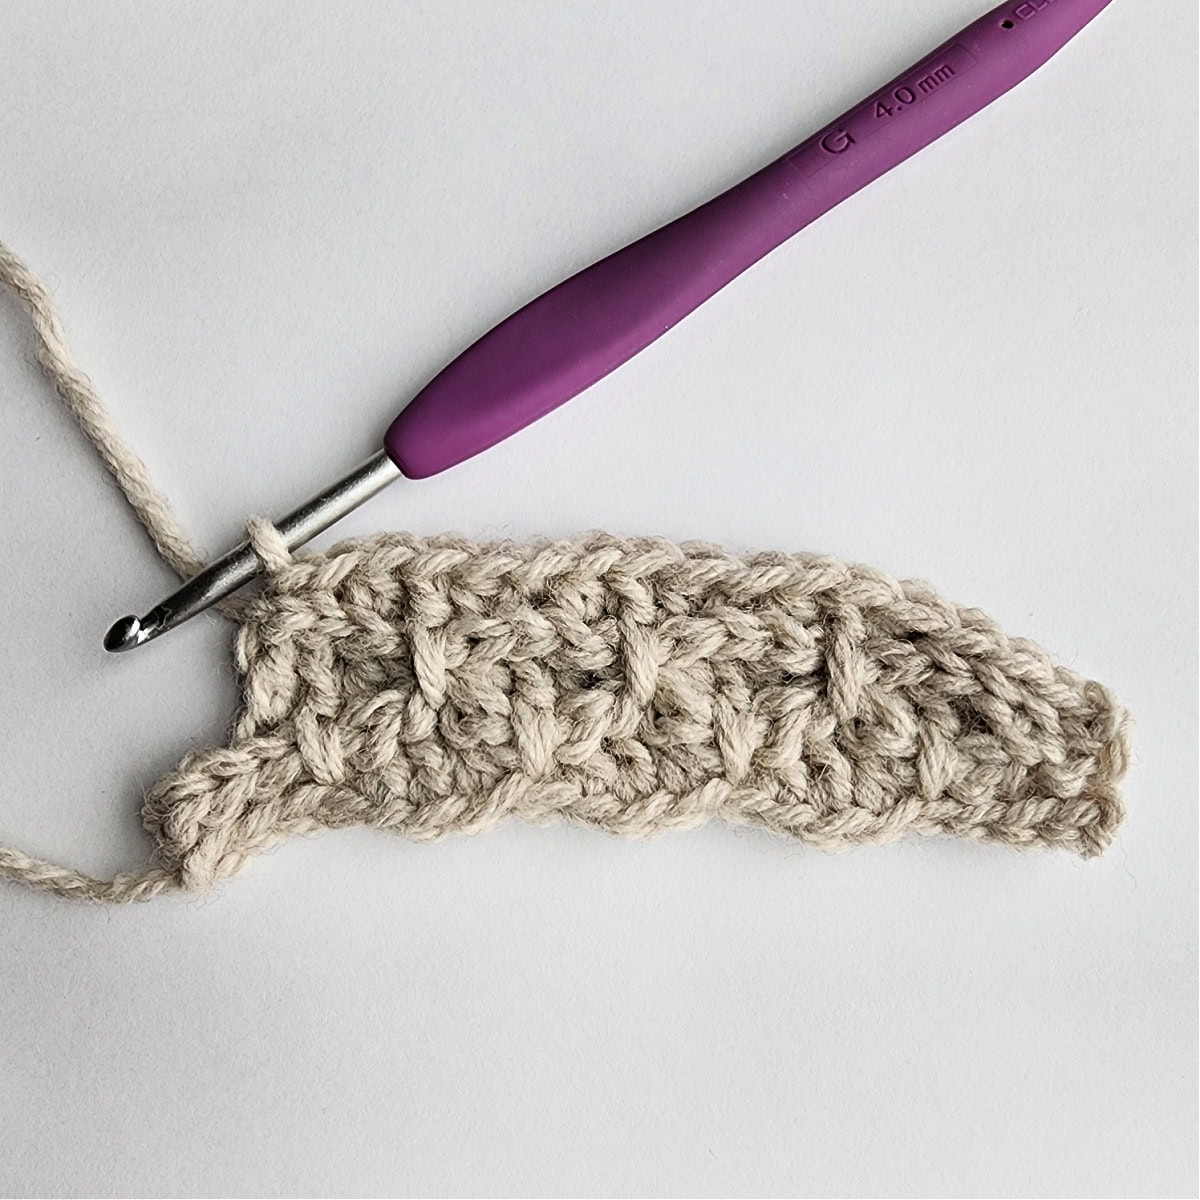
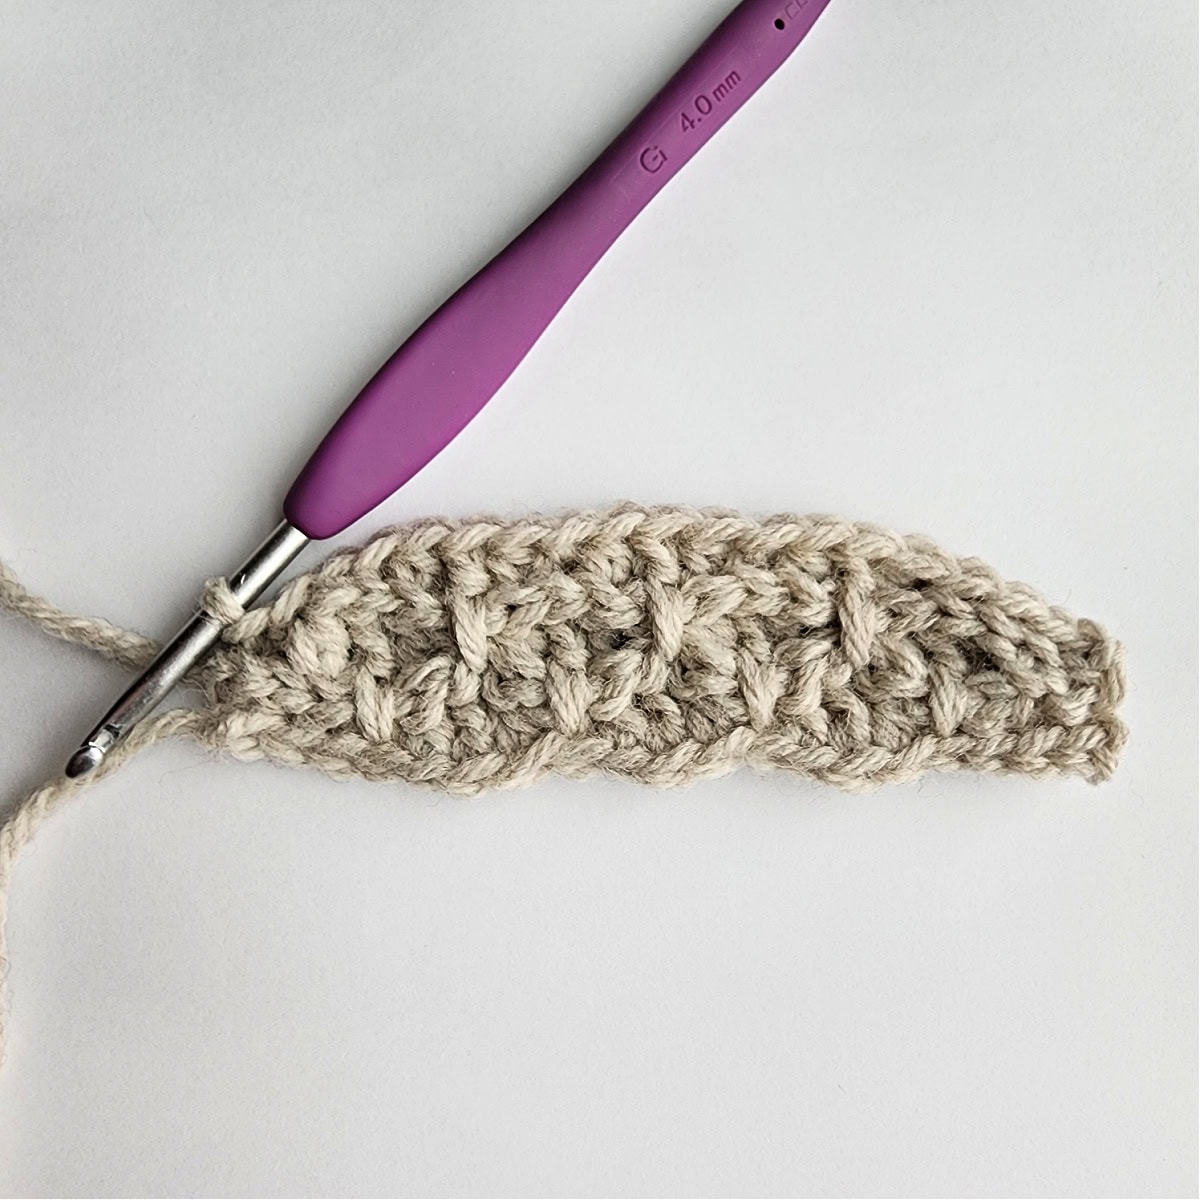
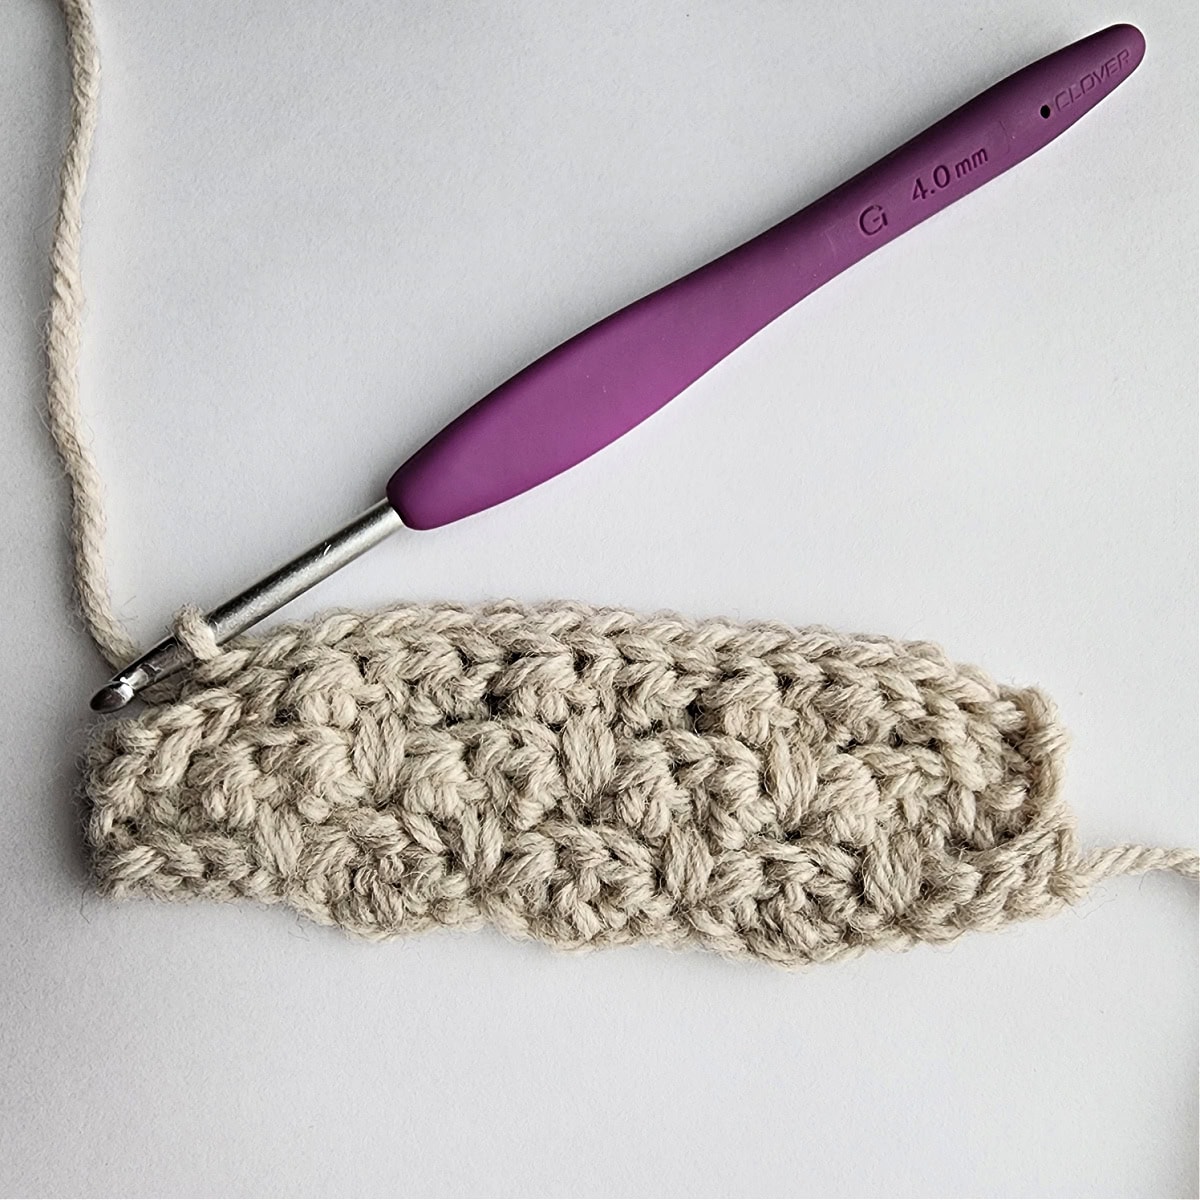
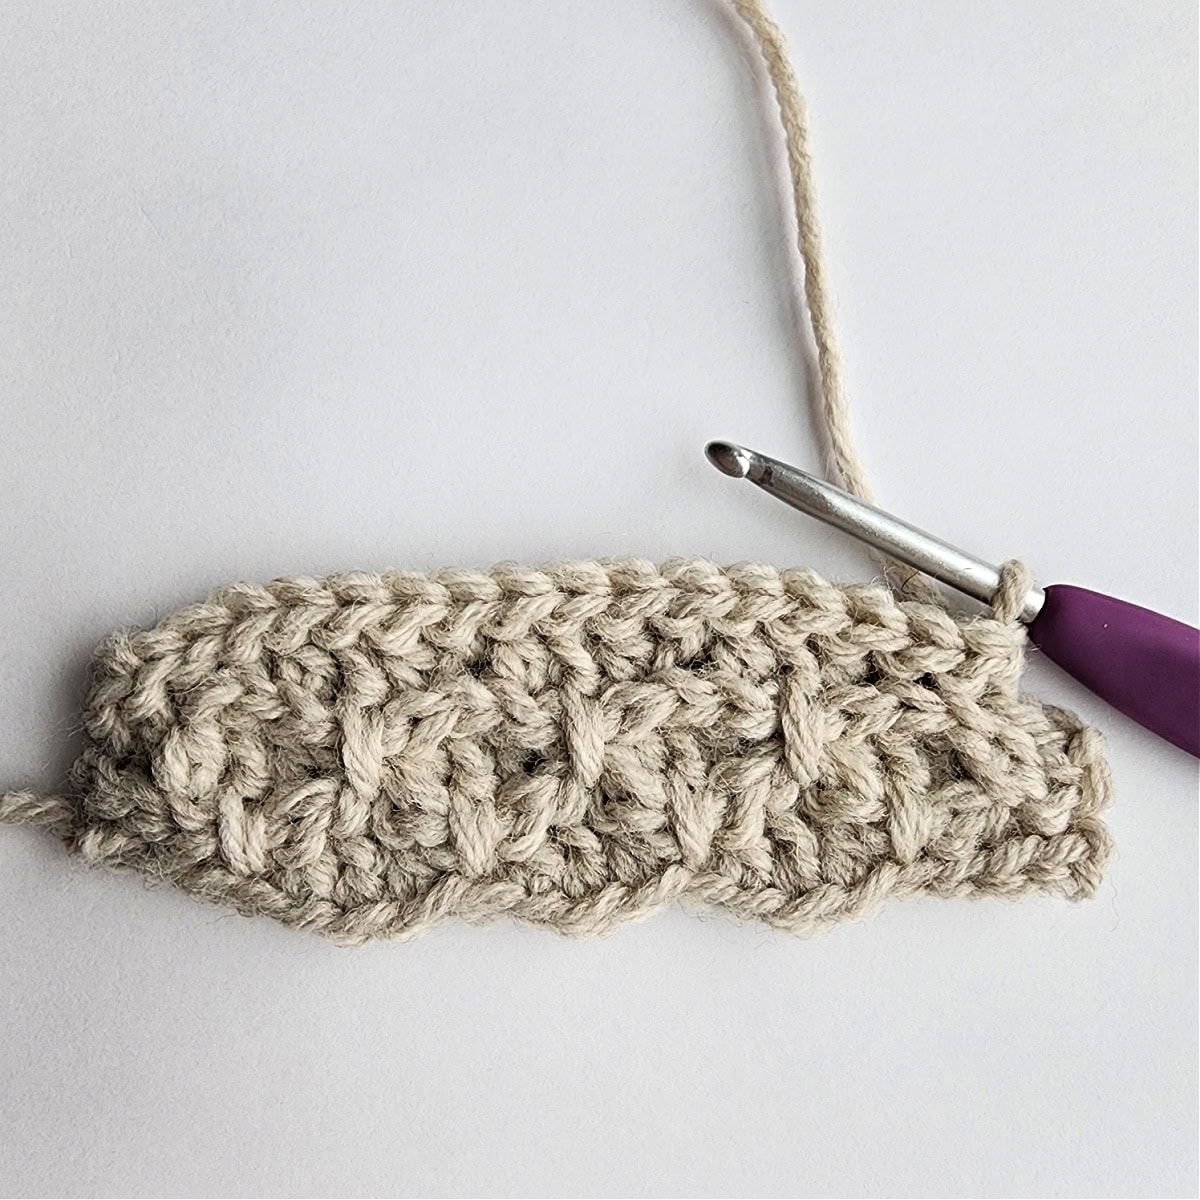
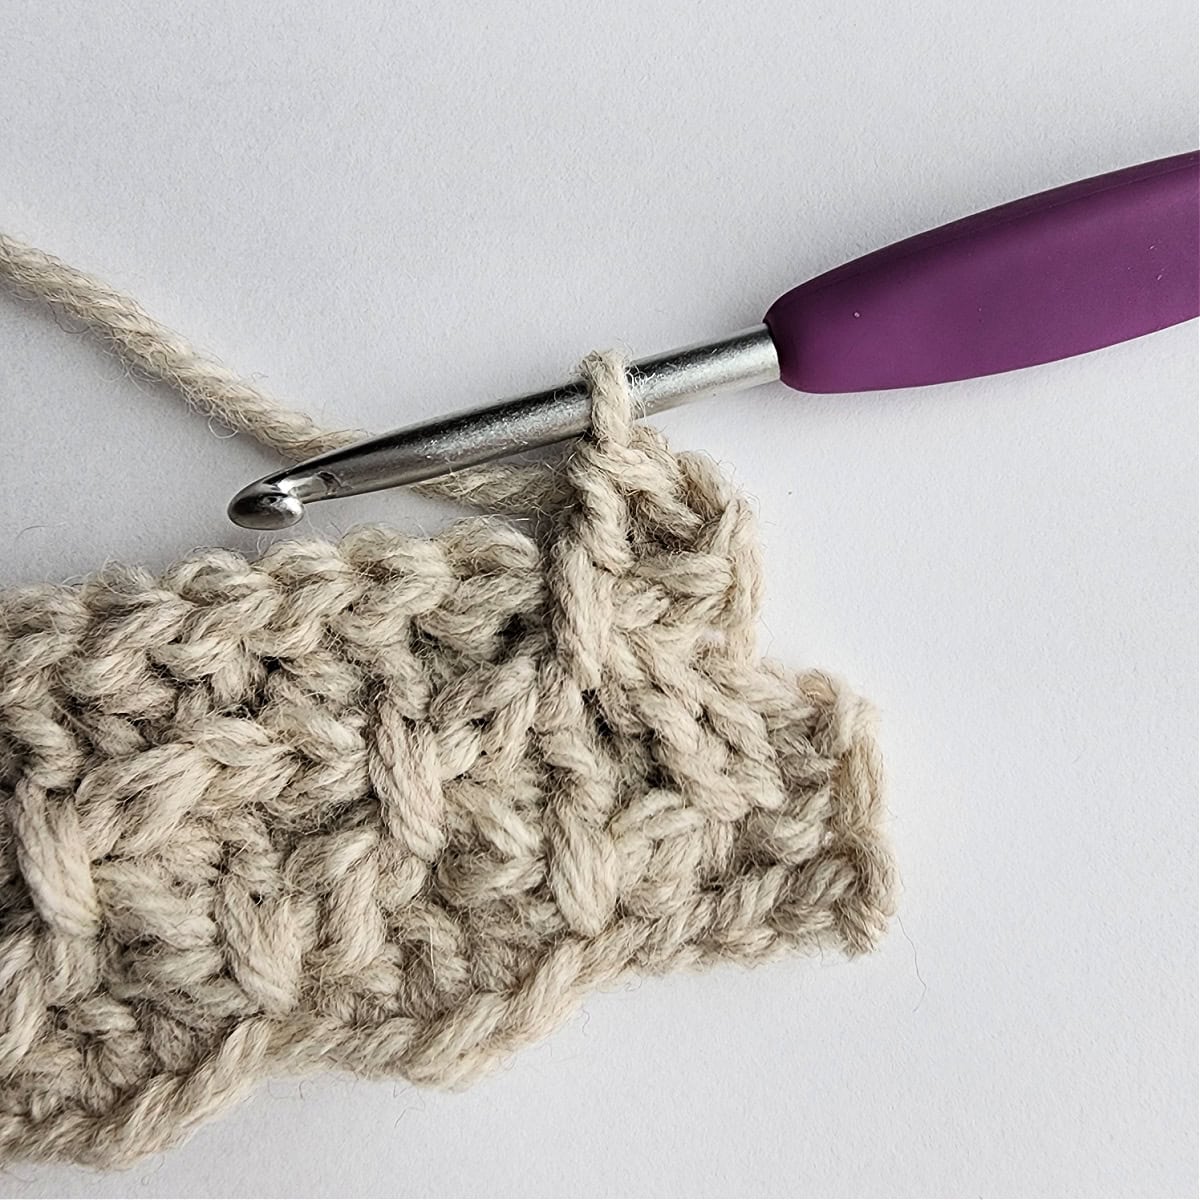
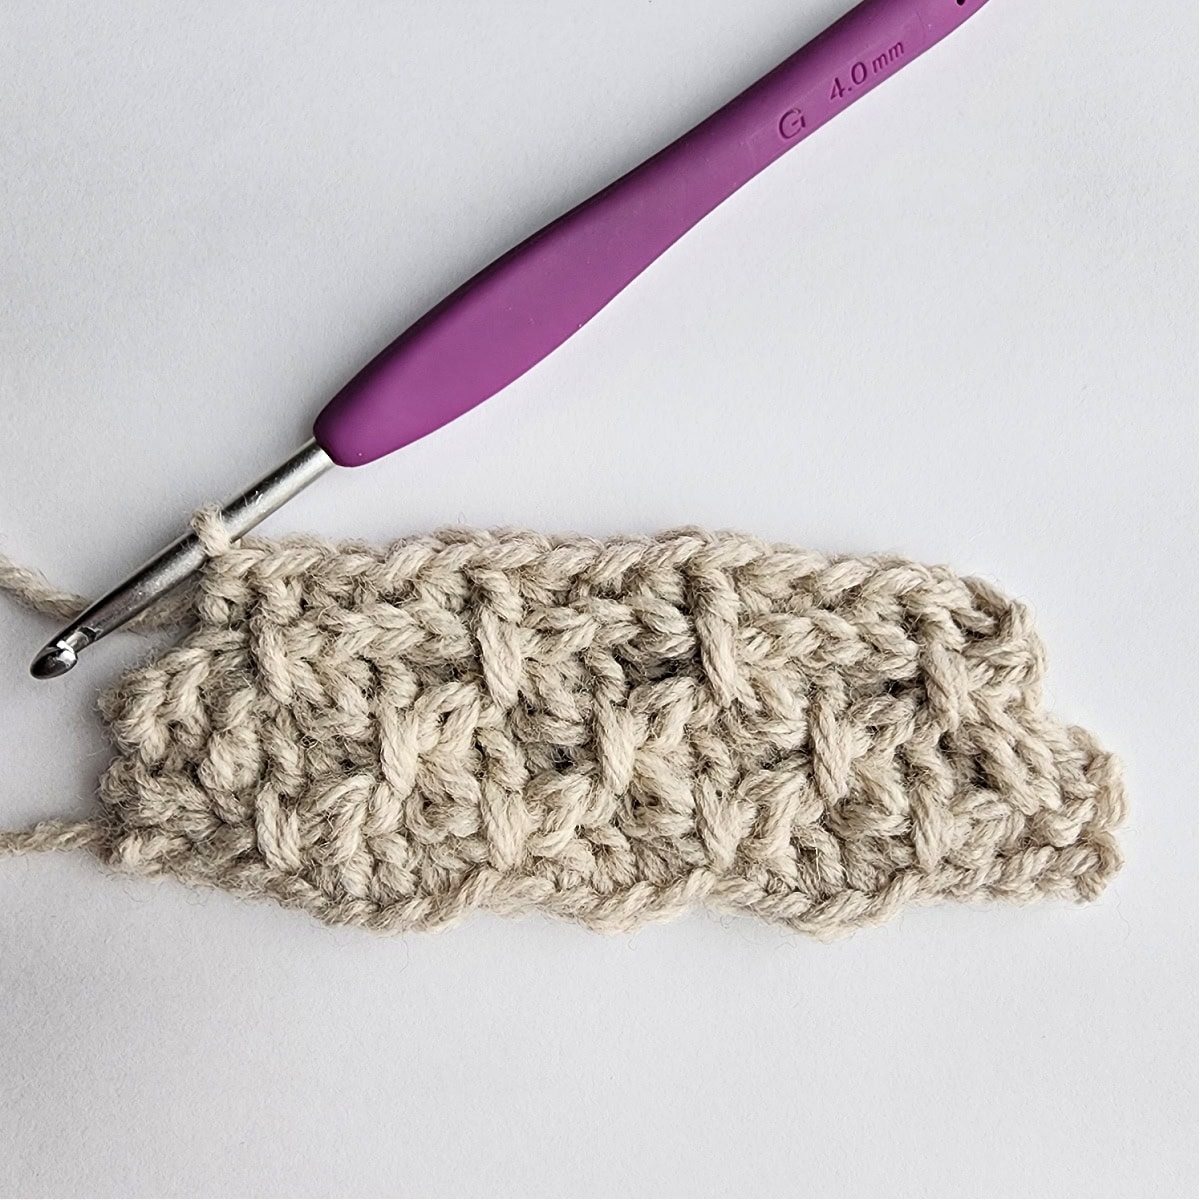
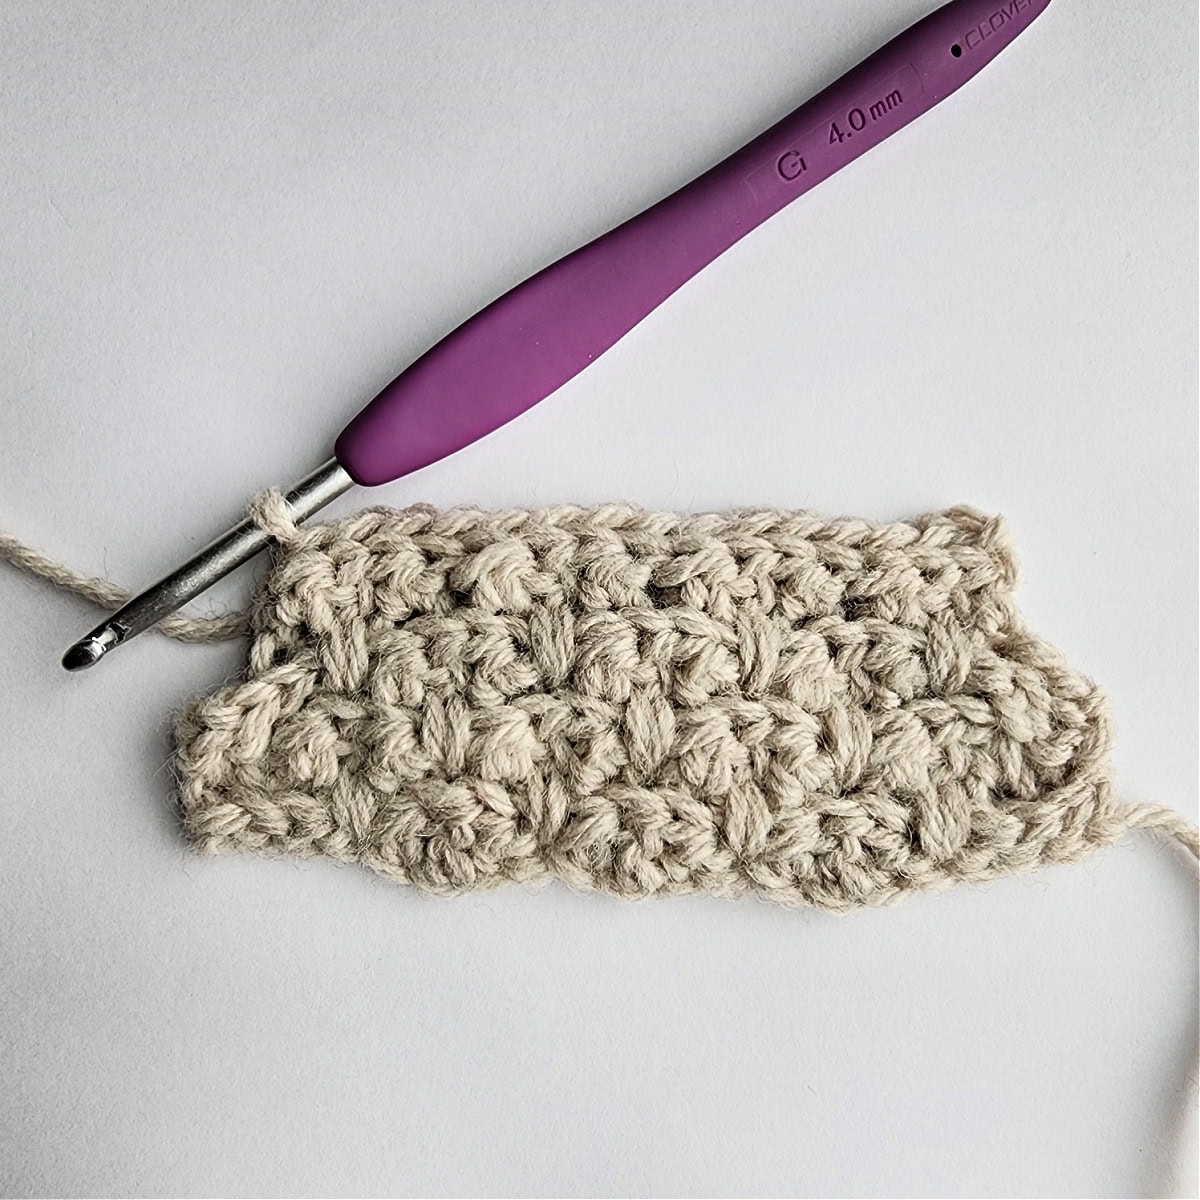
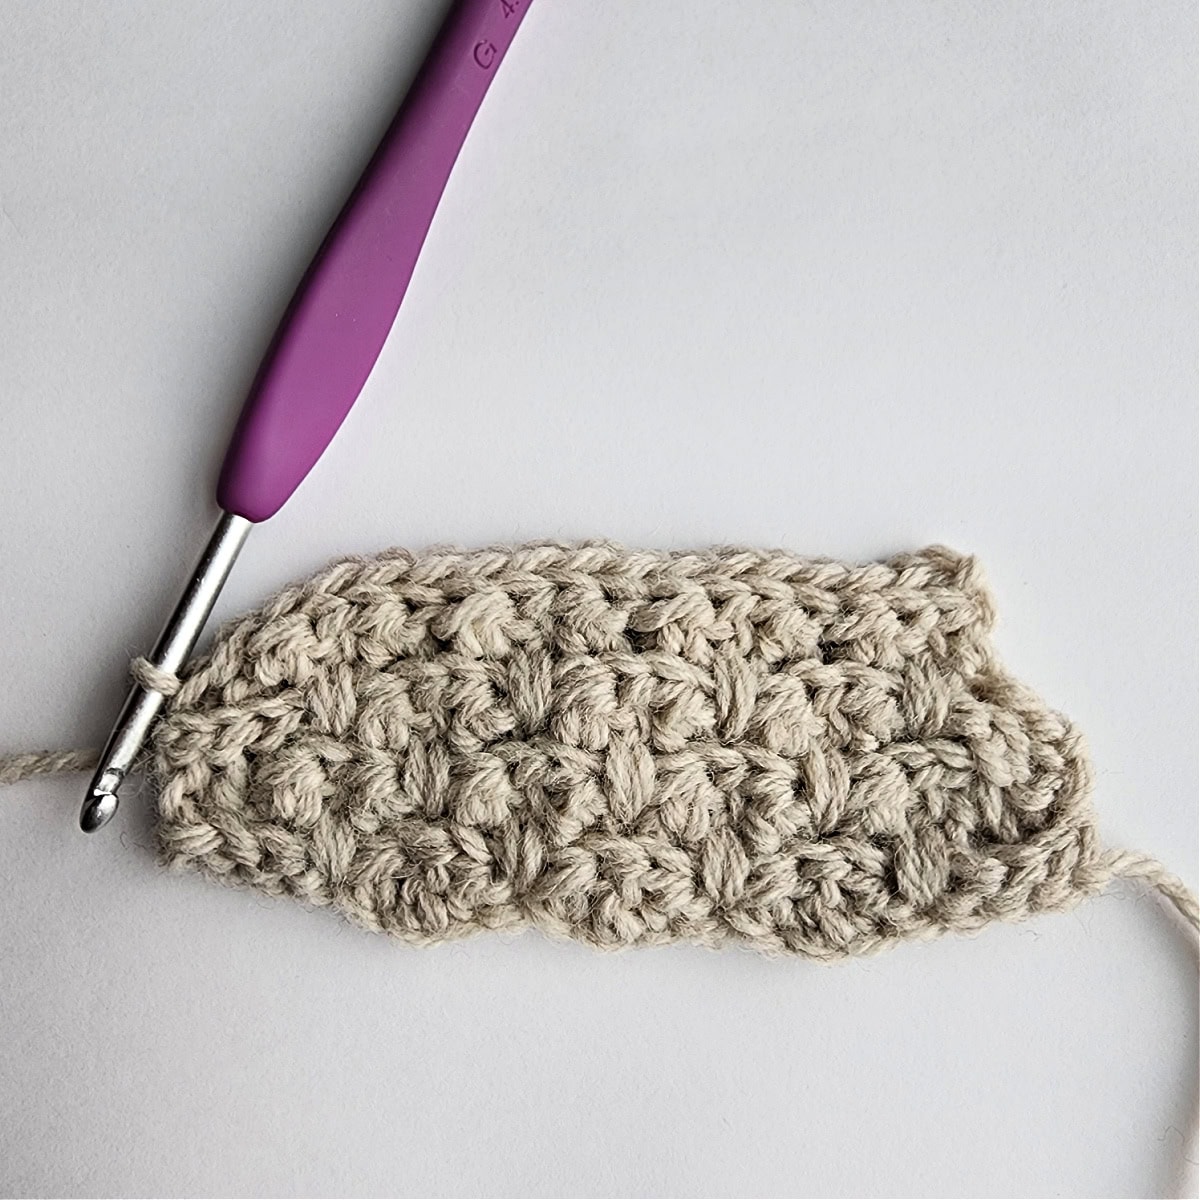
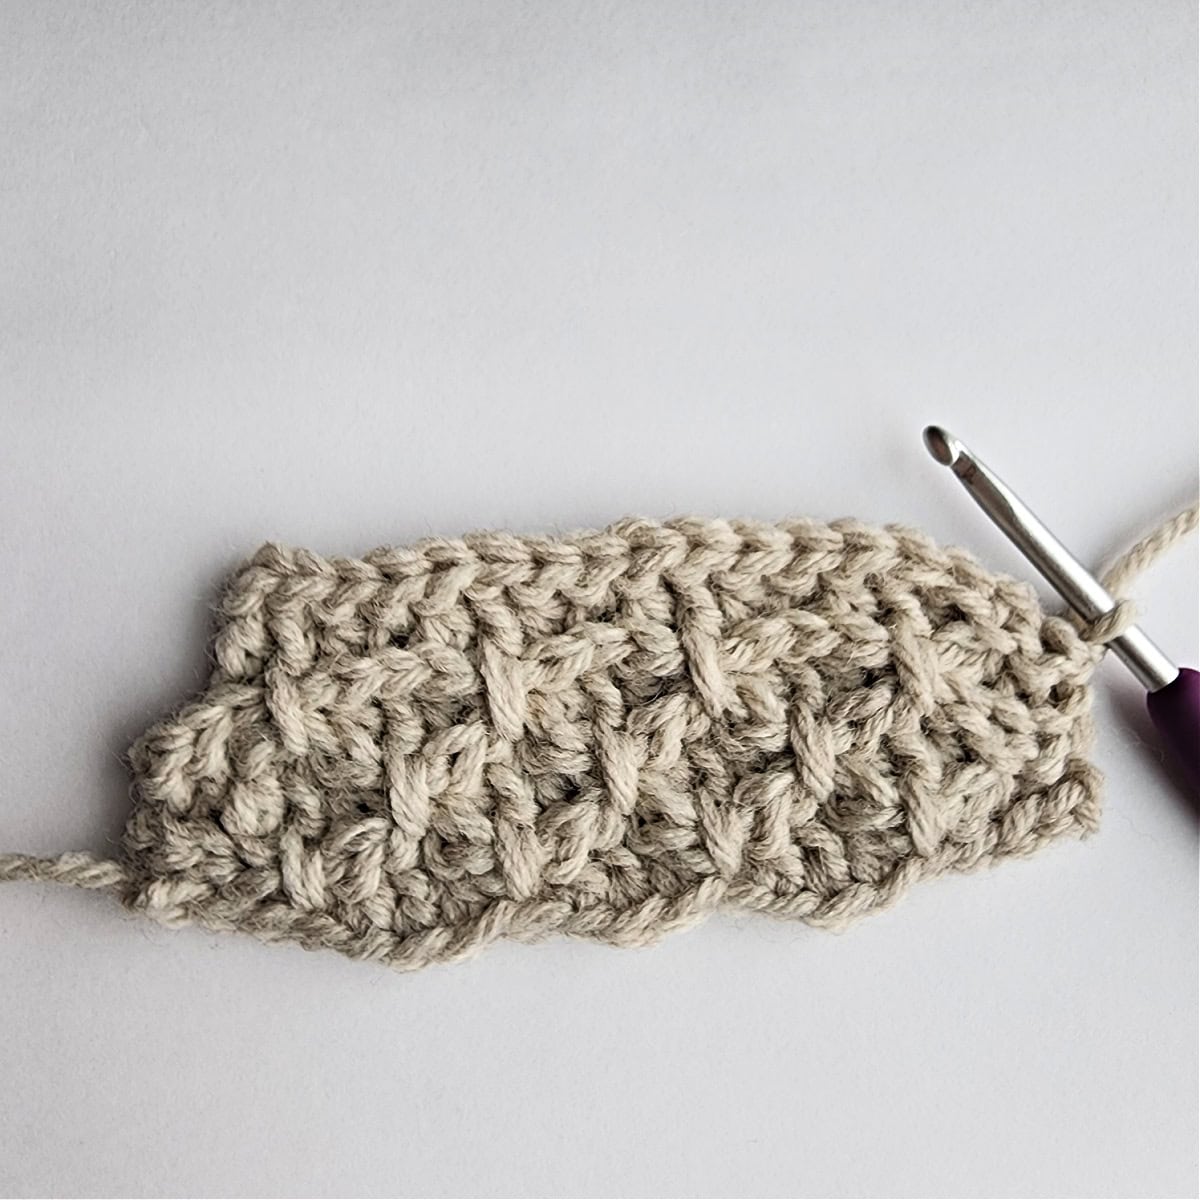
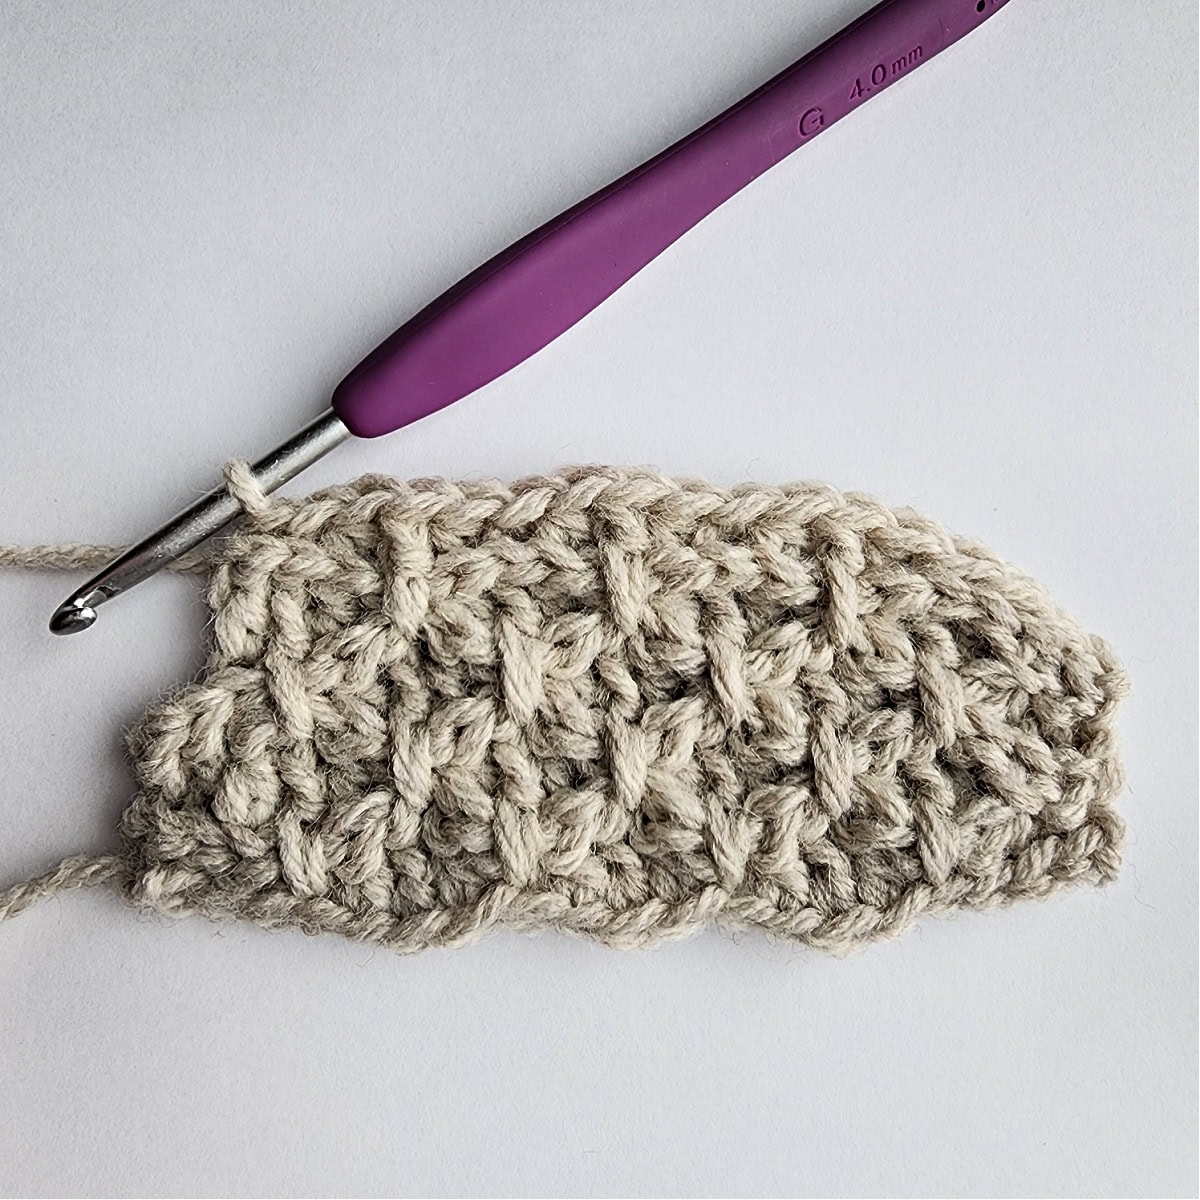
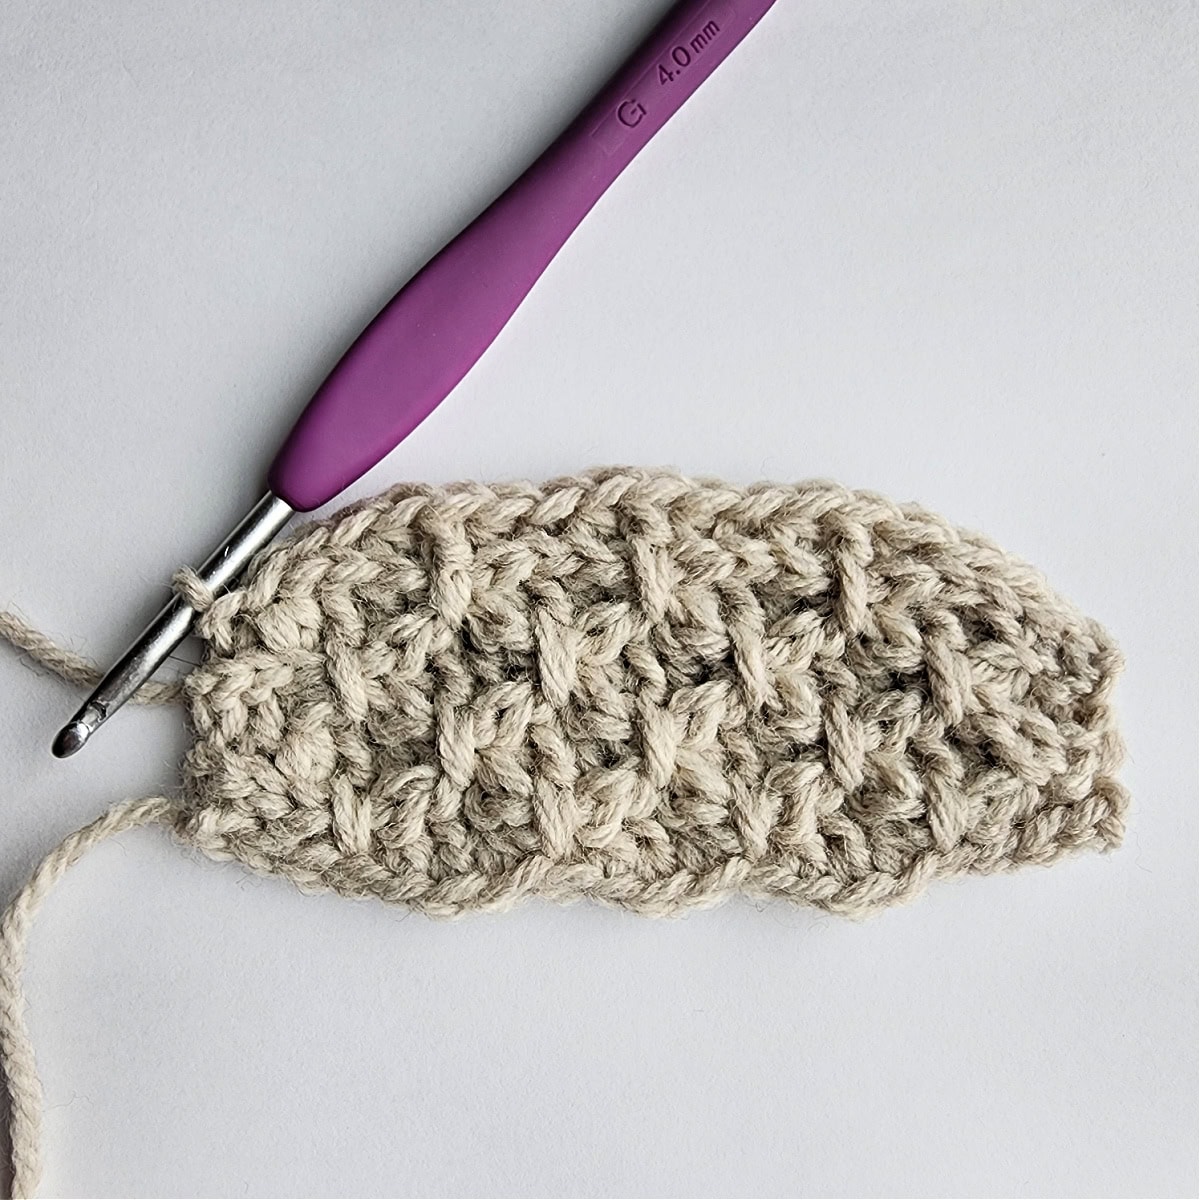
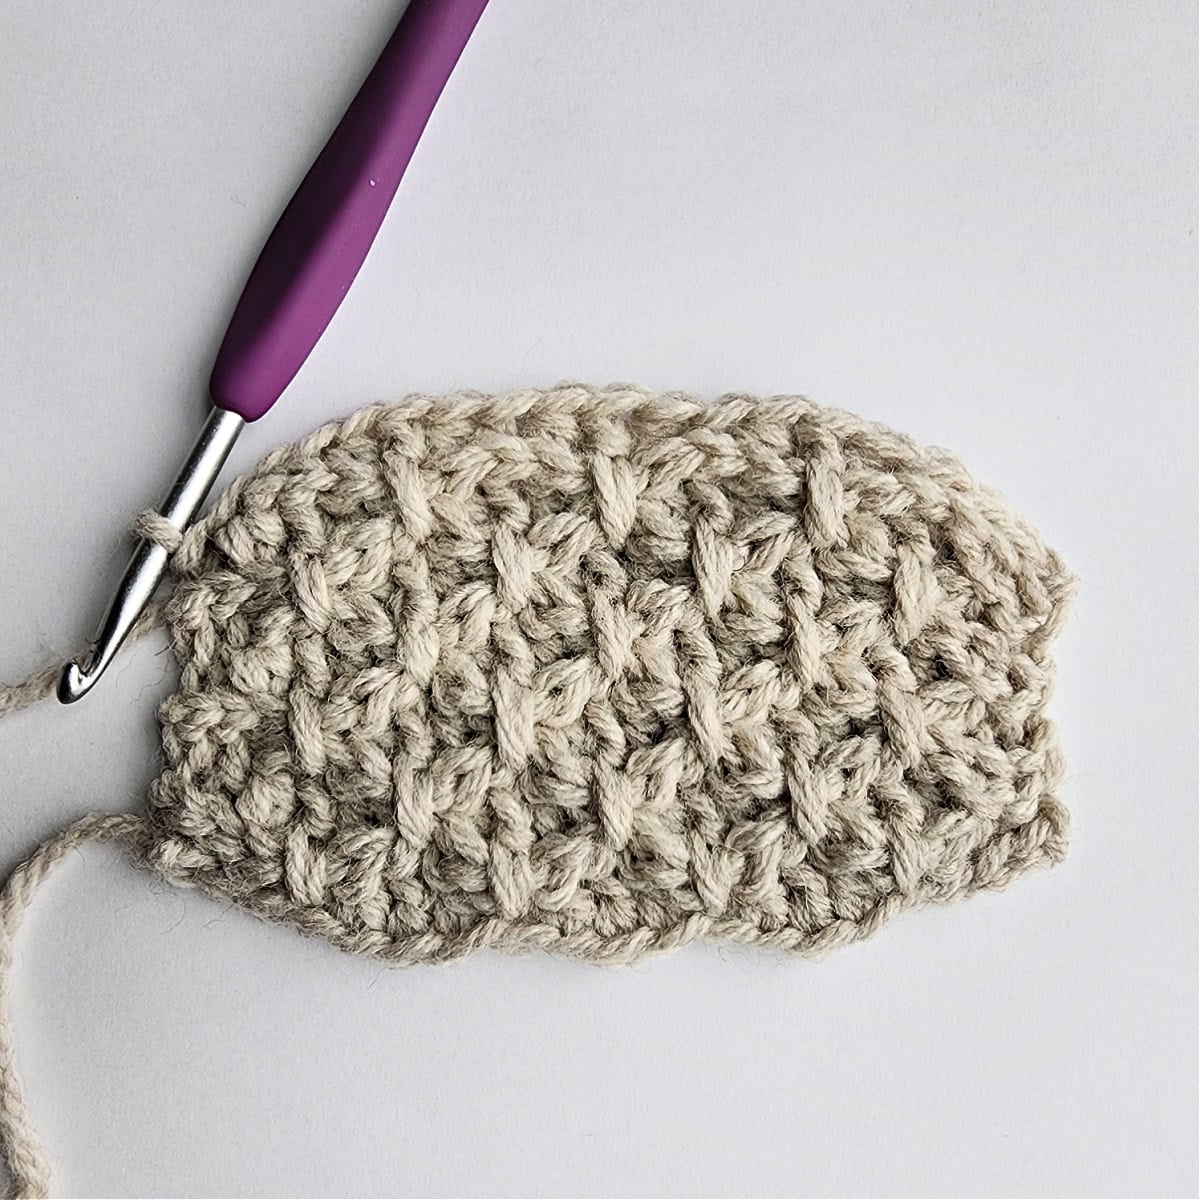
Progression Photos
The photos below show the progression of the Fireside Crochet Bauble from Row 1 through completion. The tutorial also includes how to work a smoothing slip stitch.
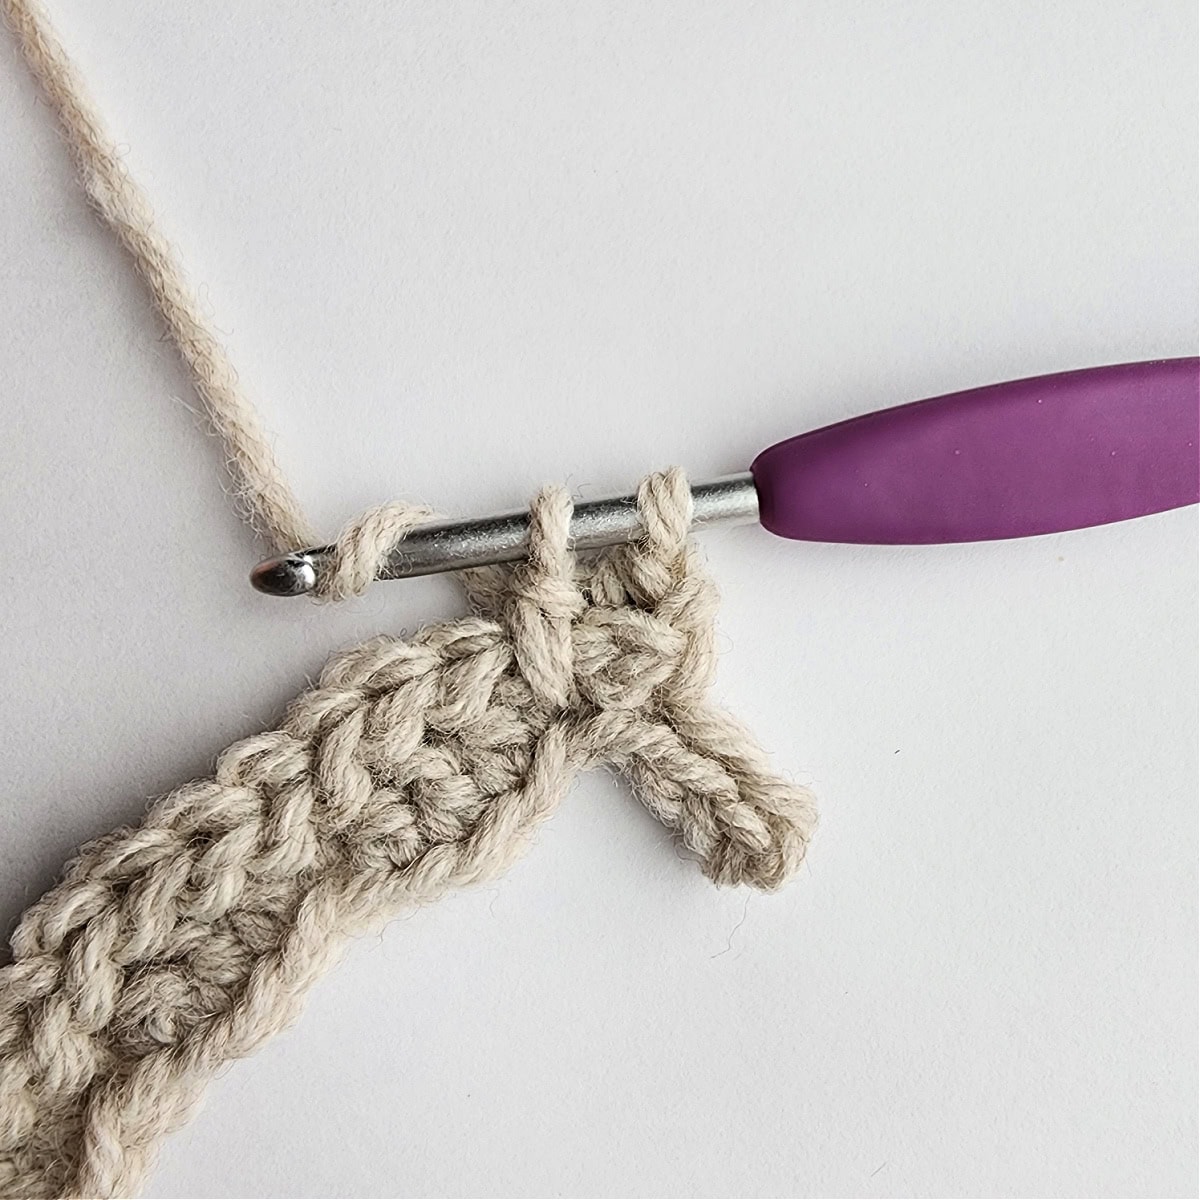
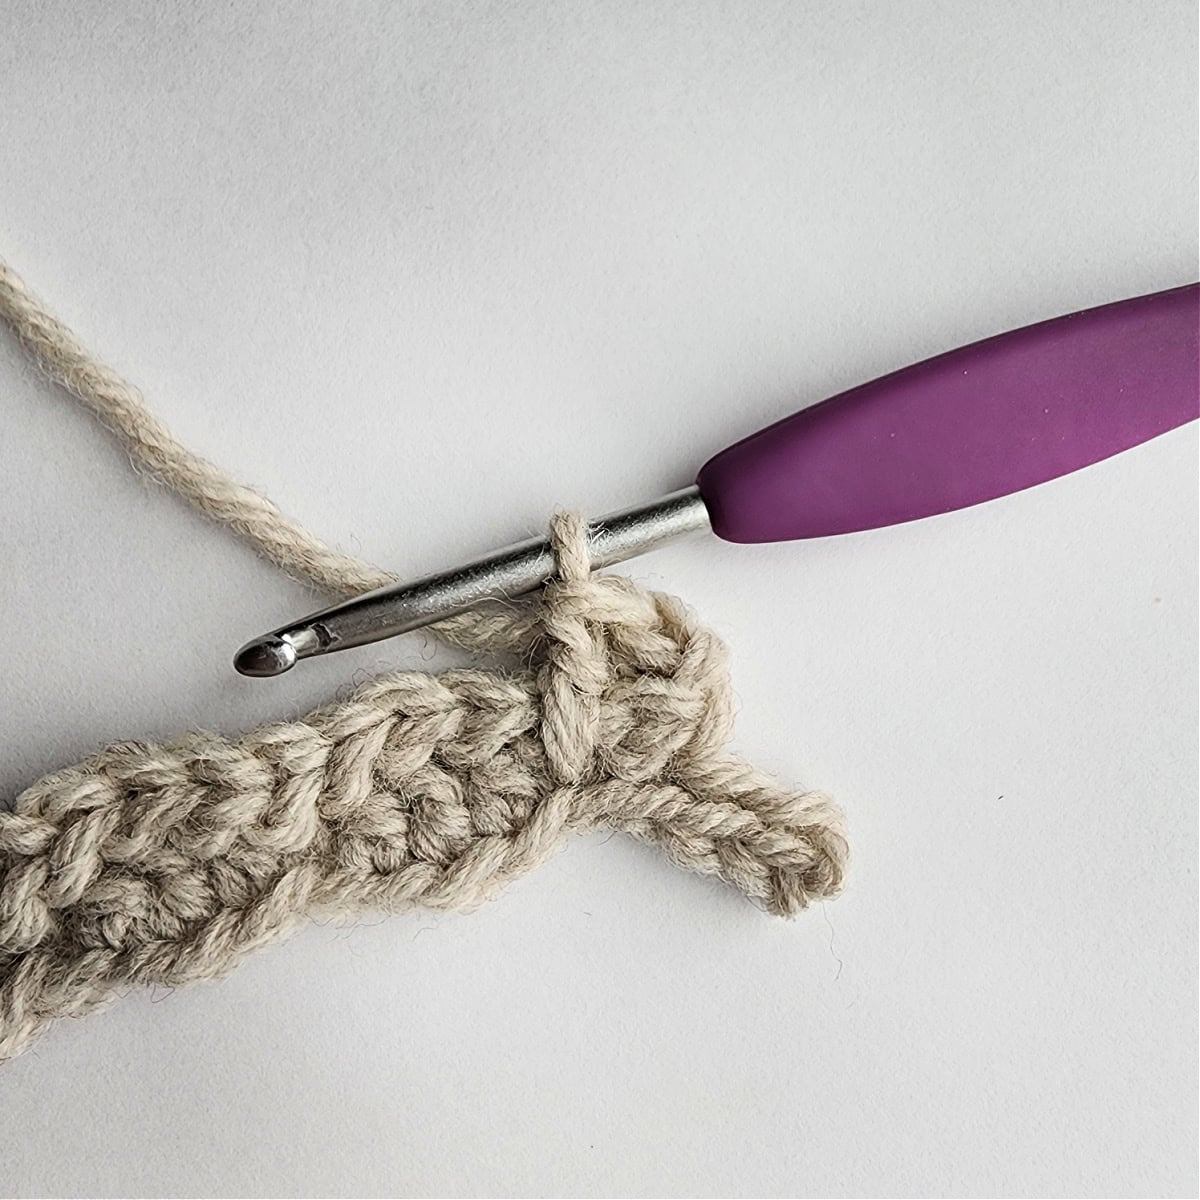
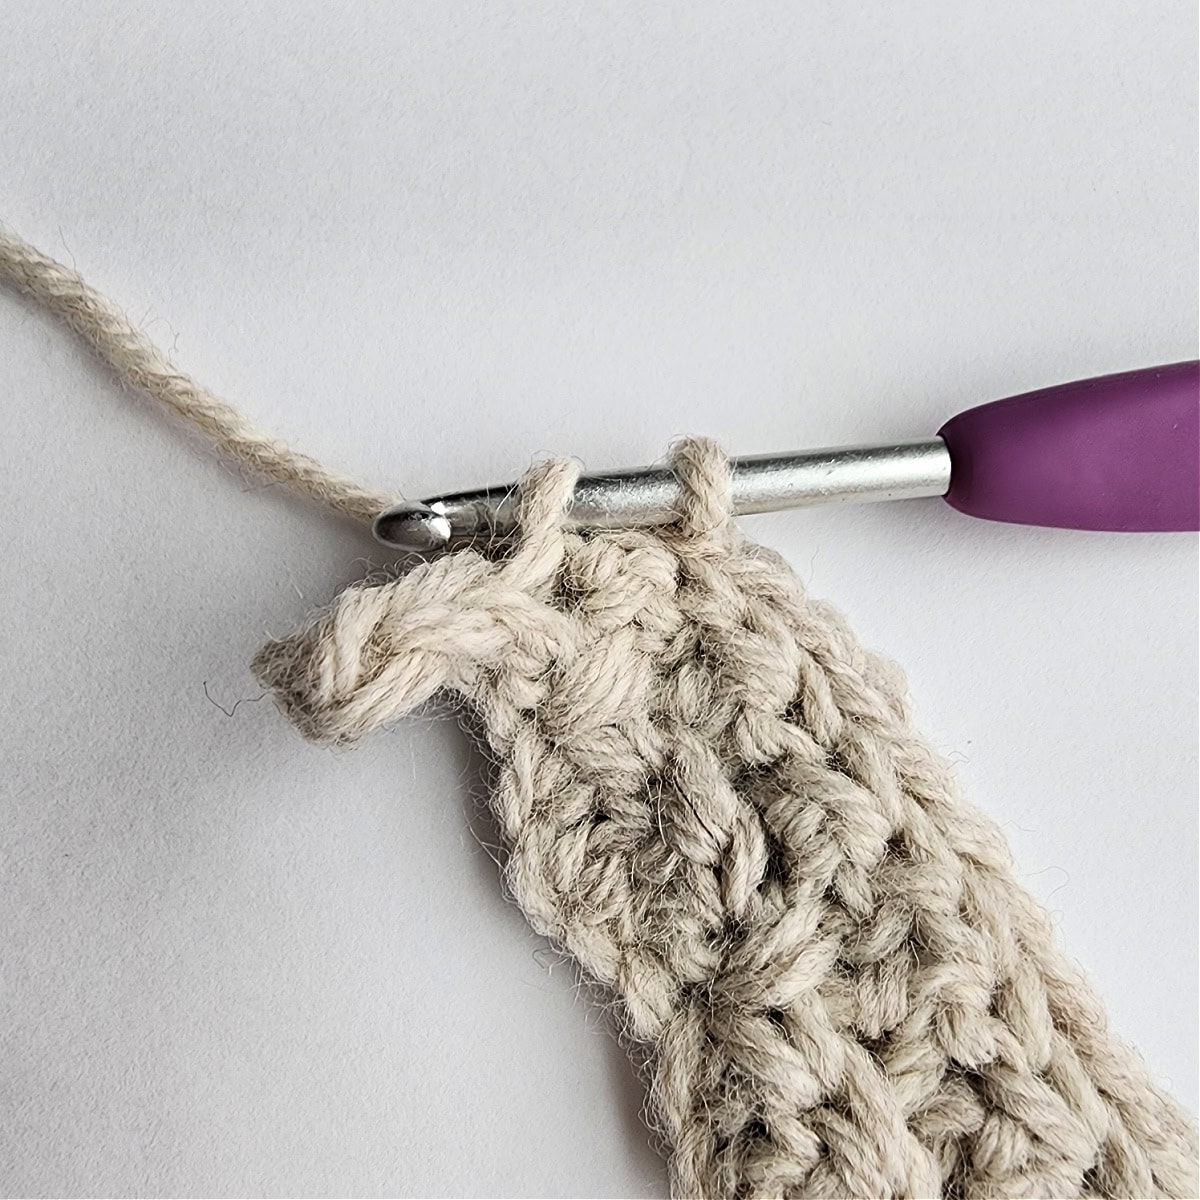
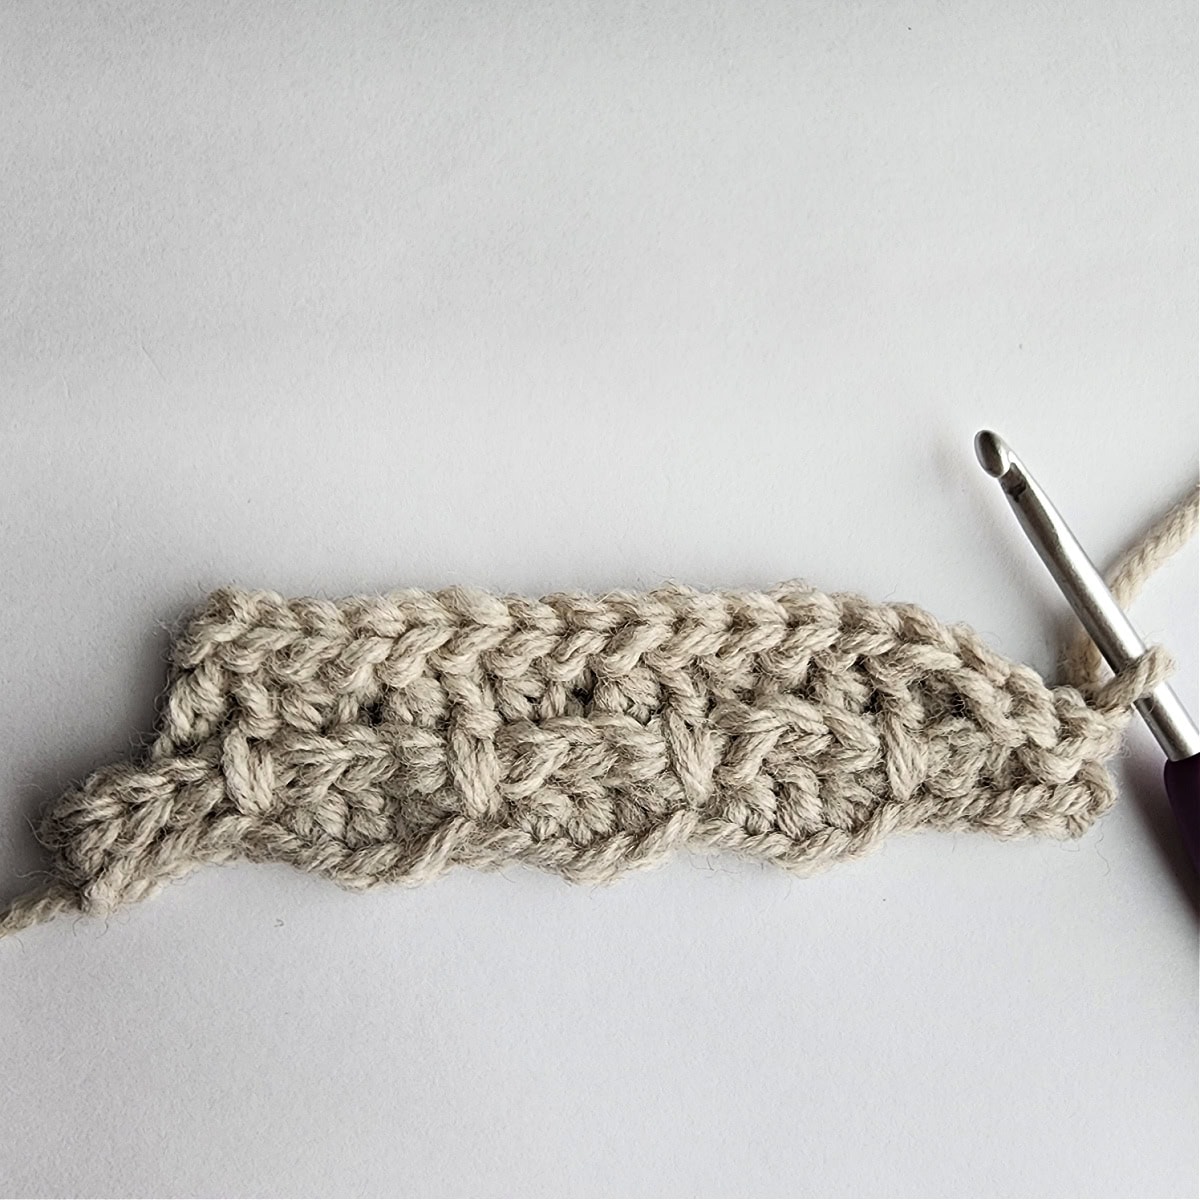
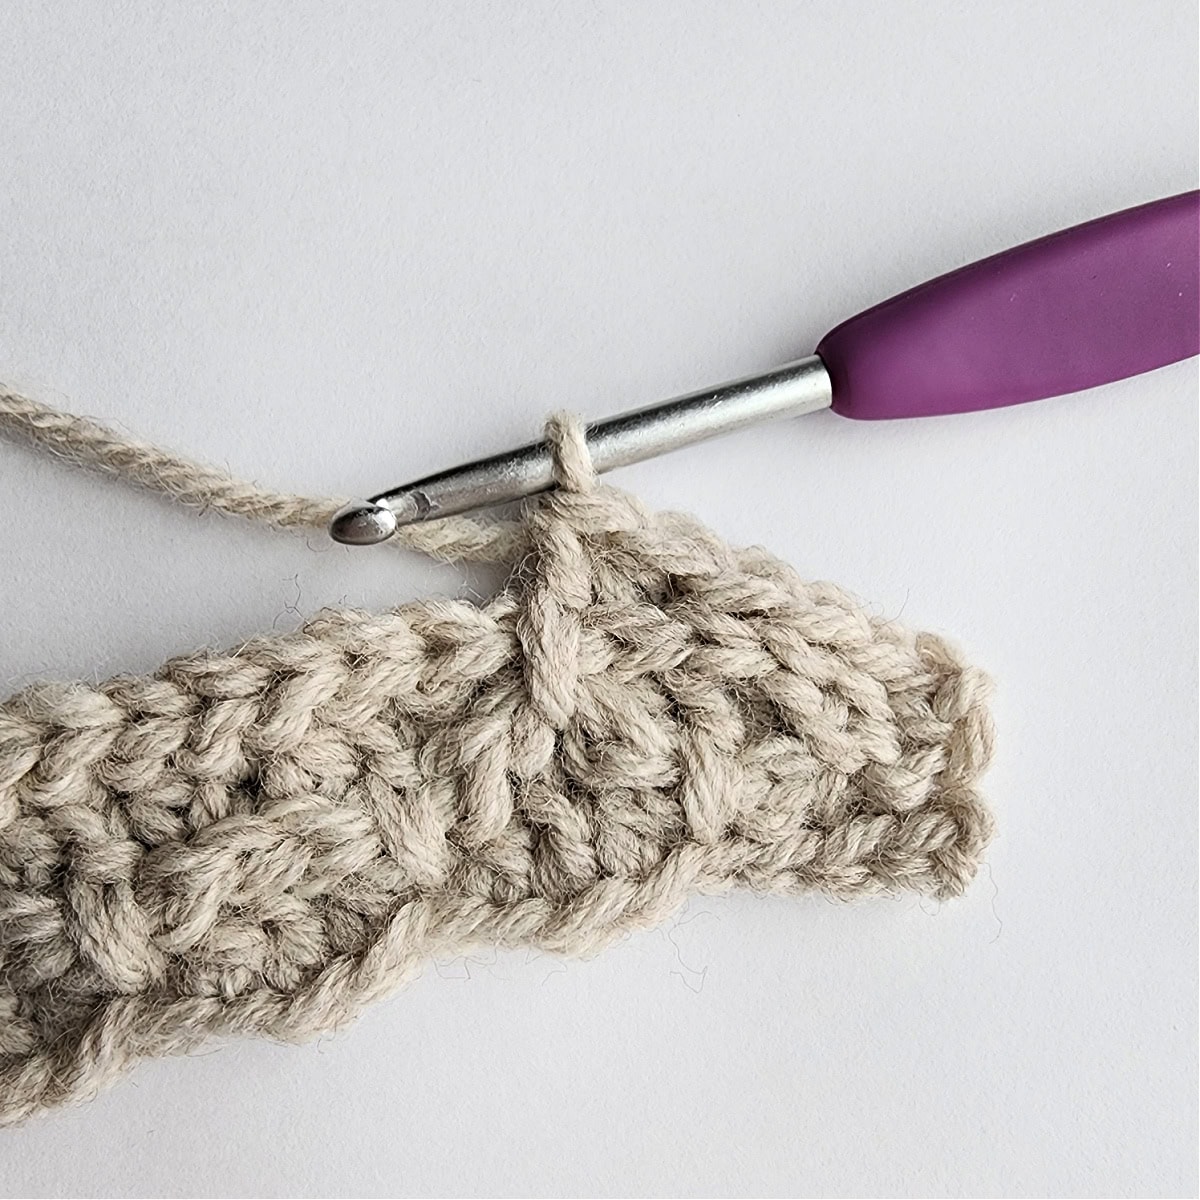
How to Work a Smoothing Slip Stitch
Now that we’ve worked a couple short rows, how do we seamlessly transition from a short row to a regular row? With this one simple trick, we will learn how to work a “smoothing slip stitch”. A smoothing slip stitch seamlessly transitions from short rows to regular rows without leaving unsightly bumps between the rows.
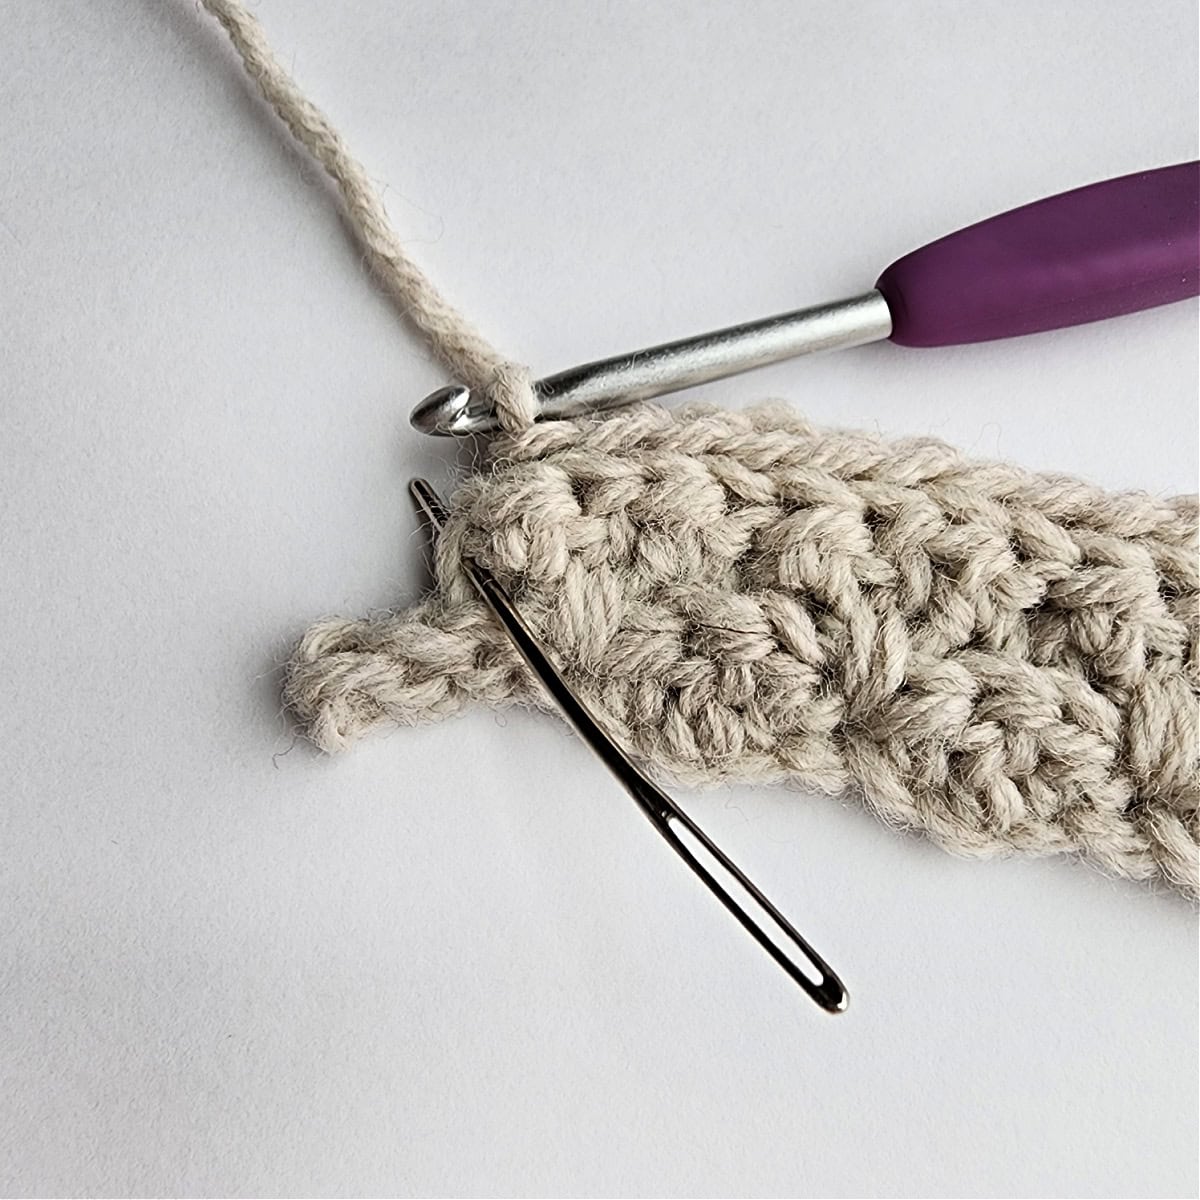


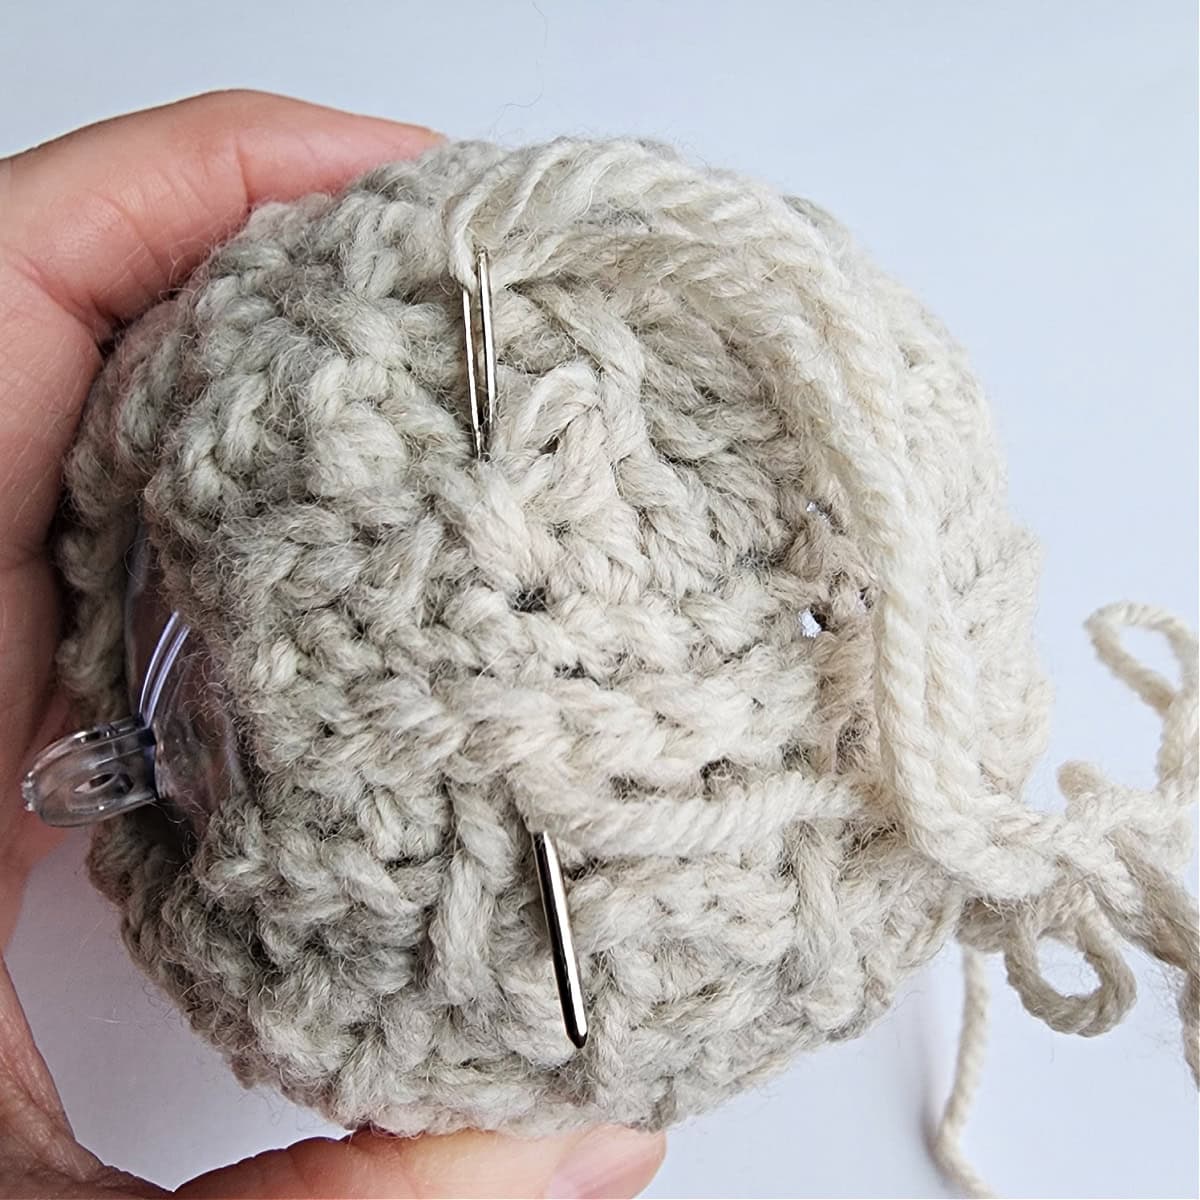
Nearly Invisible Seam
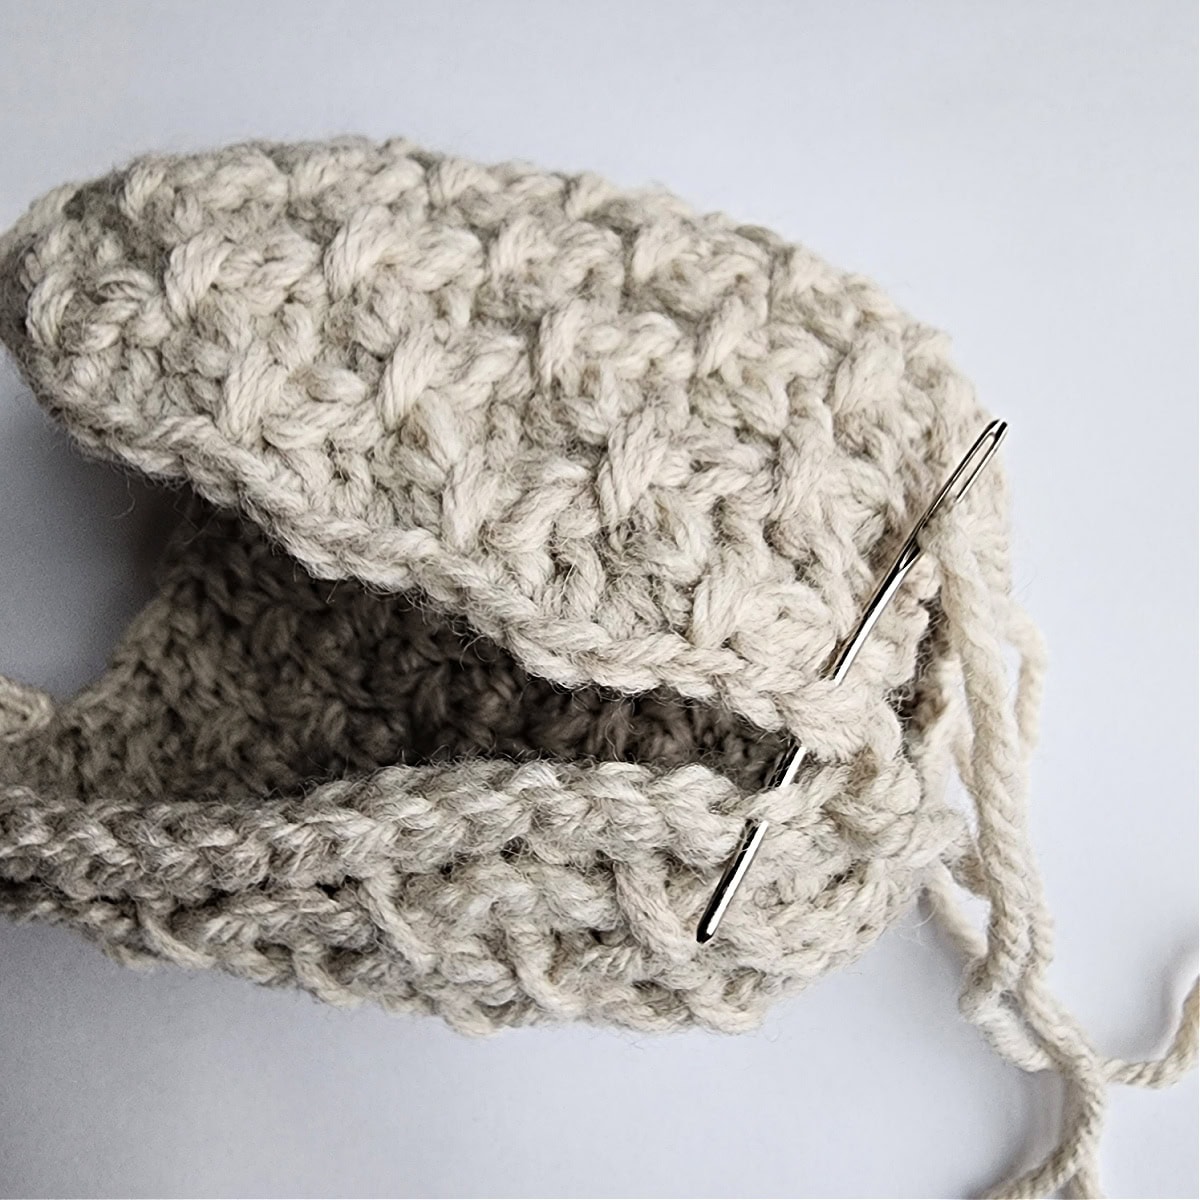
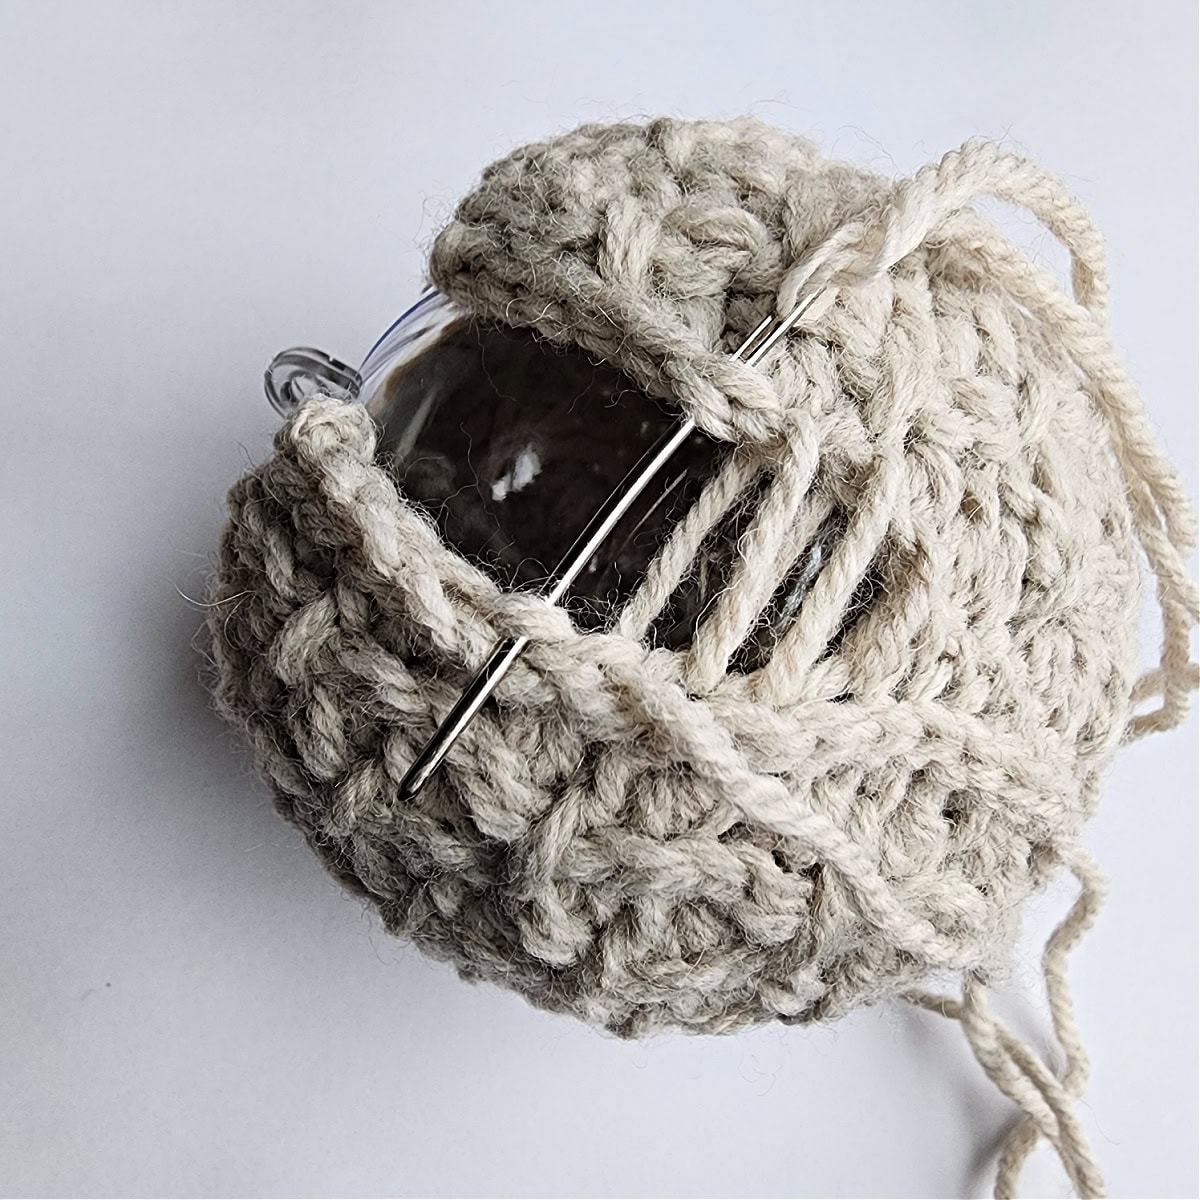
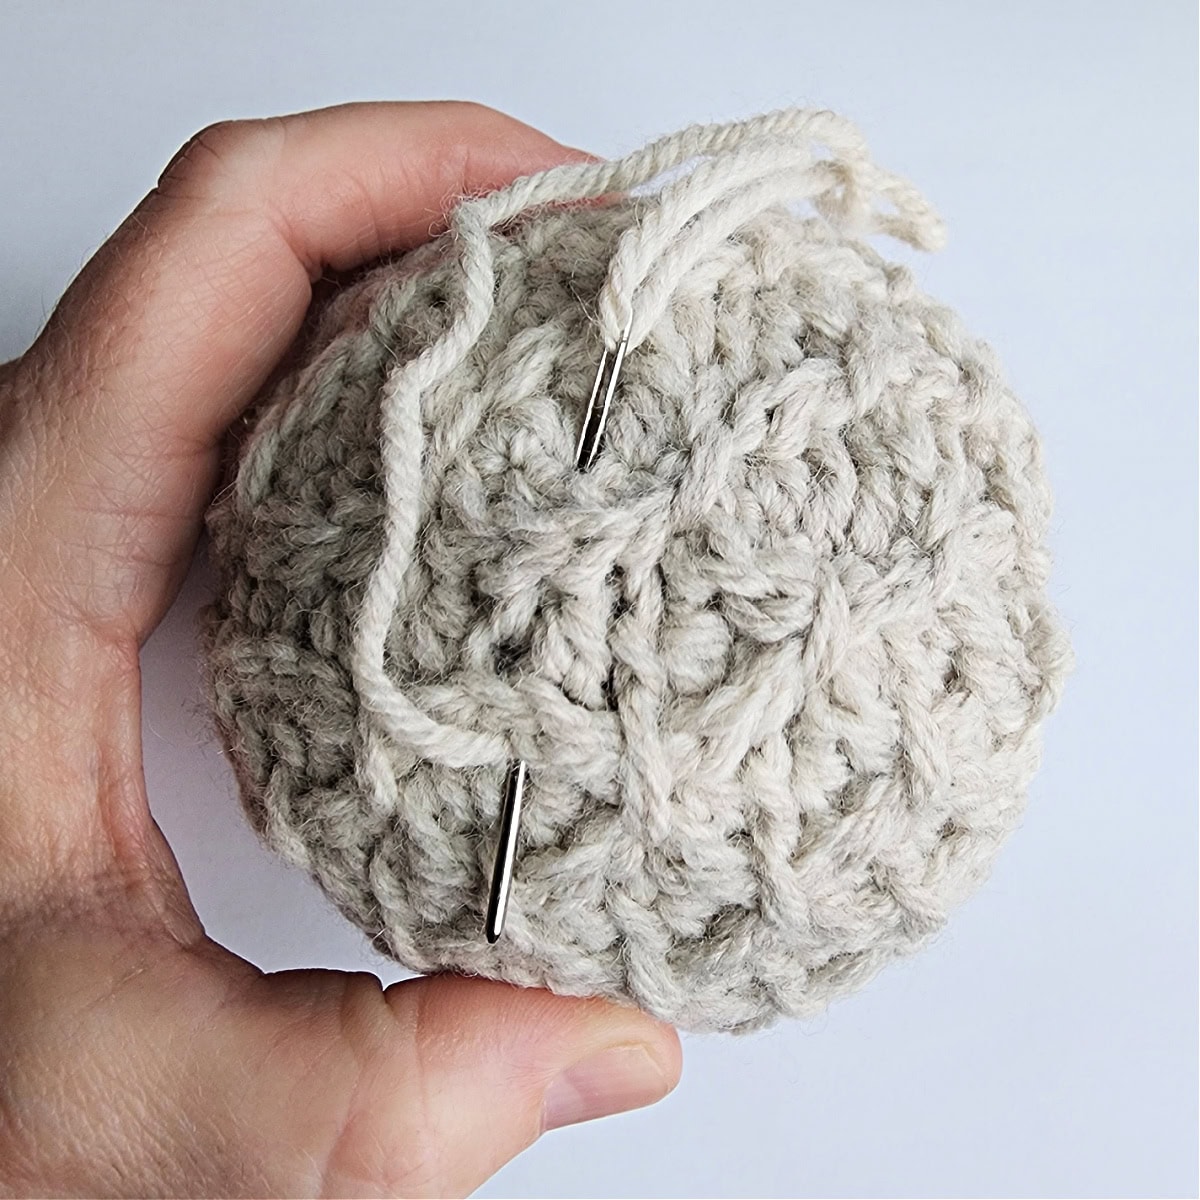
Position Bauble Cover: With the RS facing out, bring the first row up to meet the last row. Make sure the last row is closest to you.
Seam: Using a yarn needle and the tail of yarn left when you fastened off, whipstitch the BOTH LOOPS of the first row to the BLO of the last row.
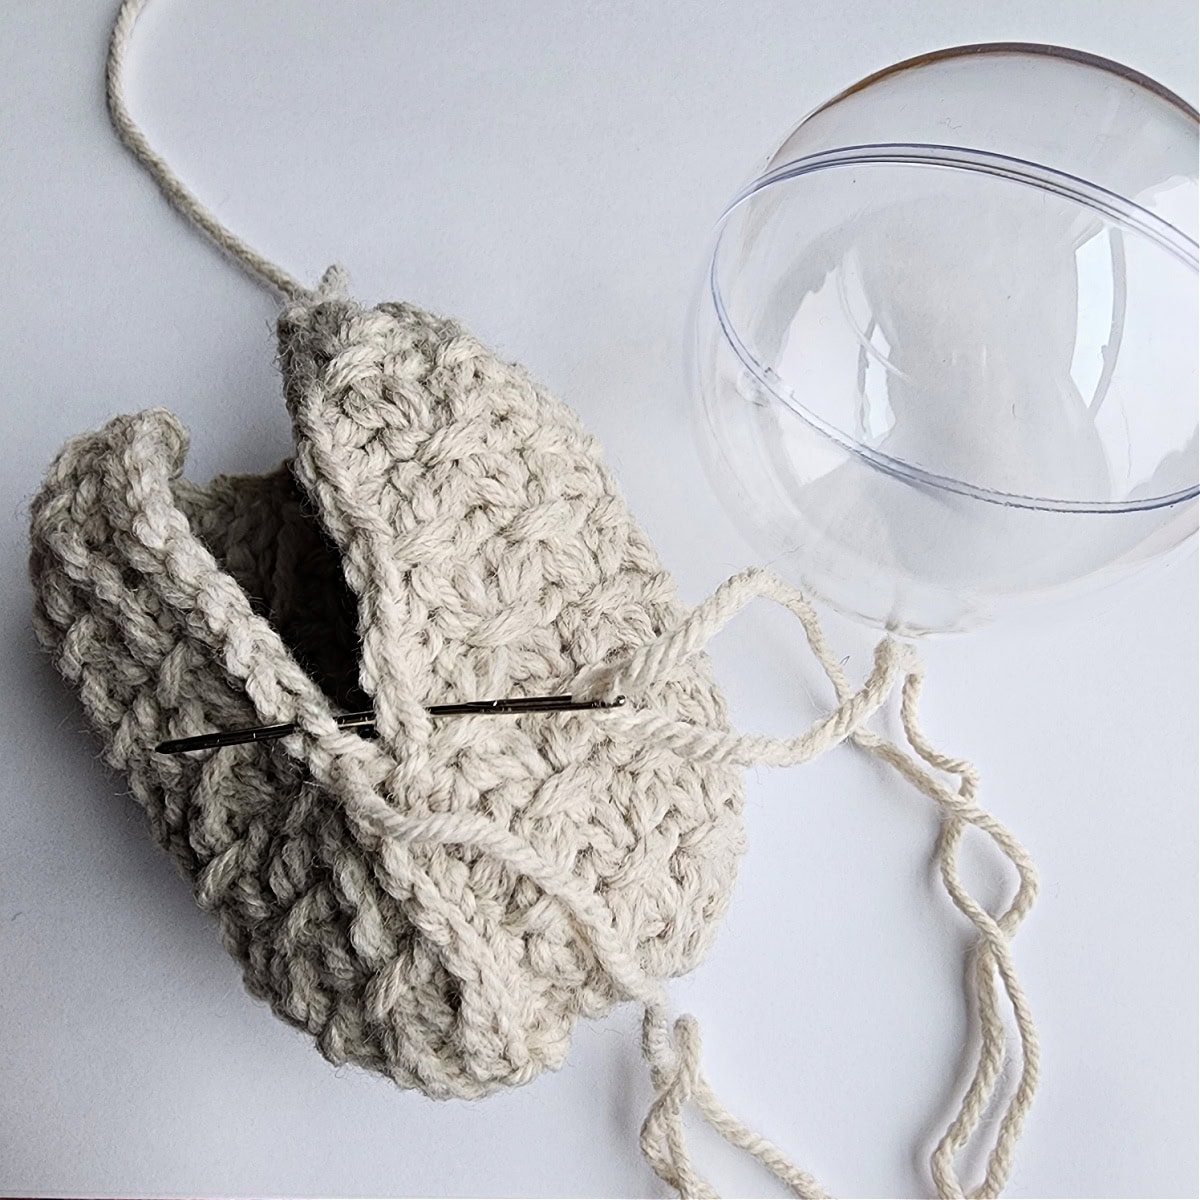
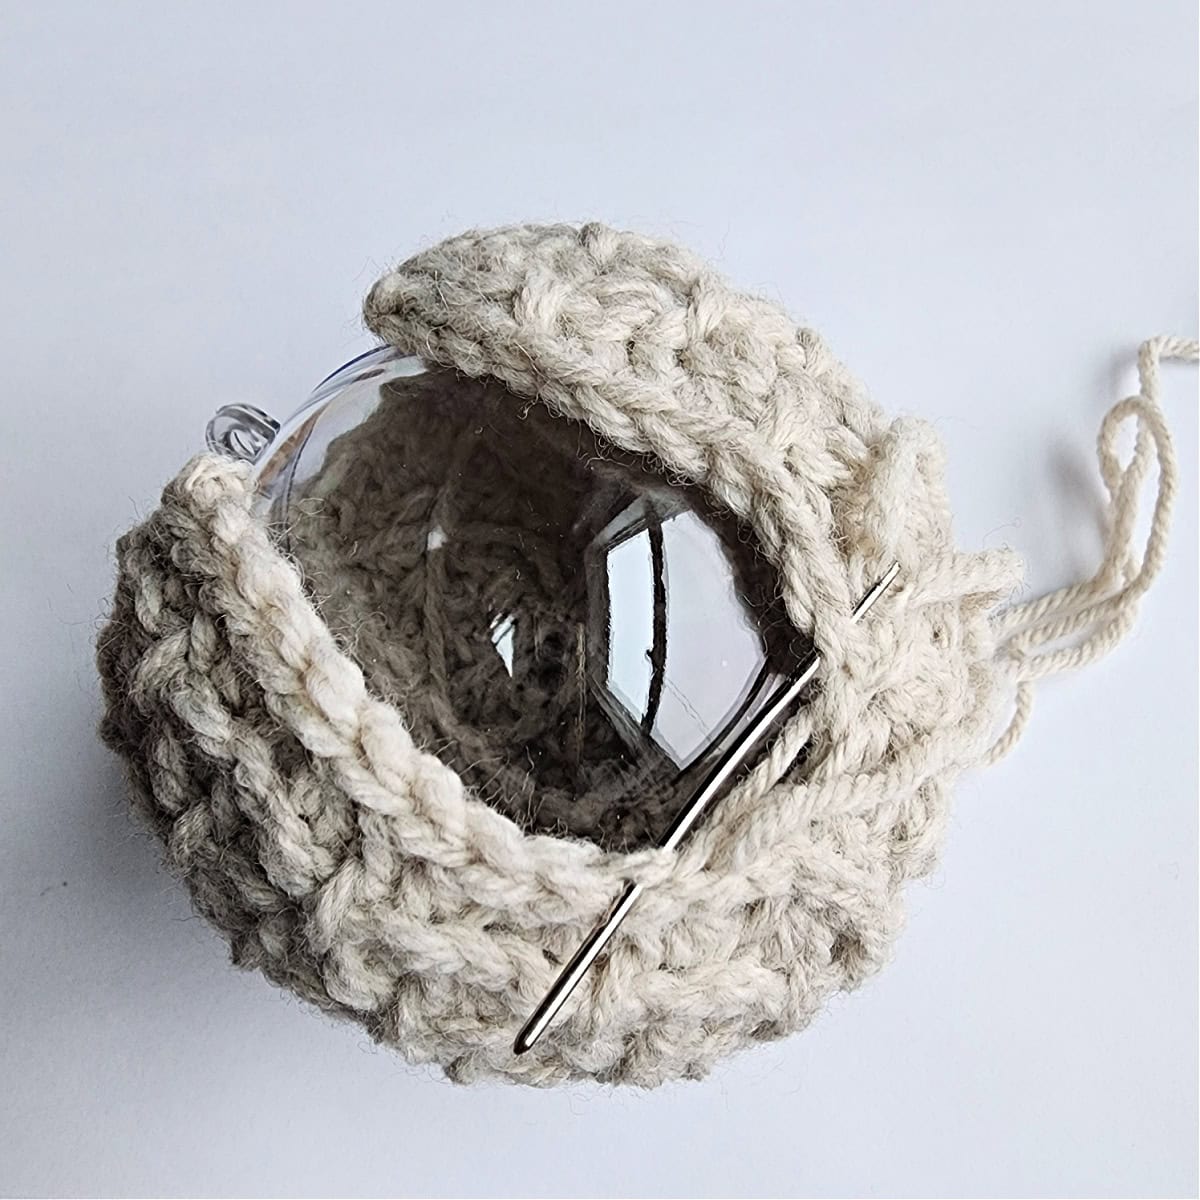
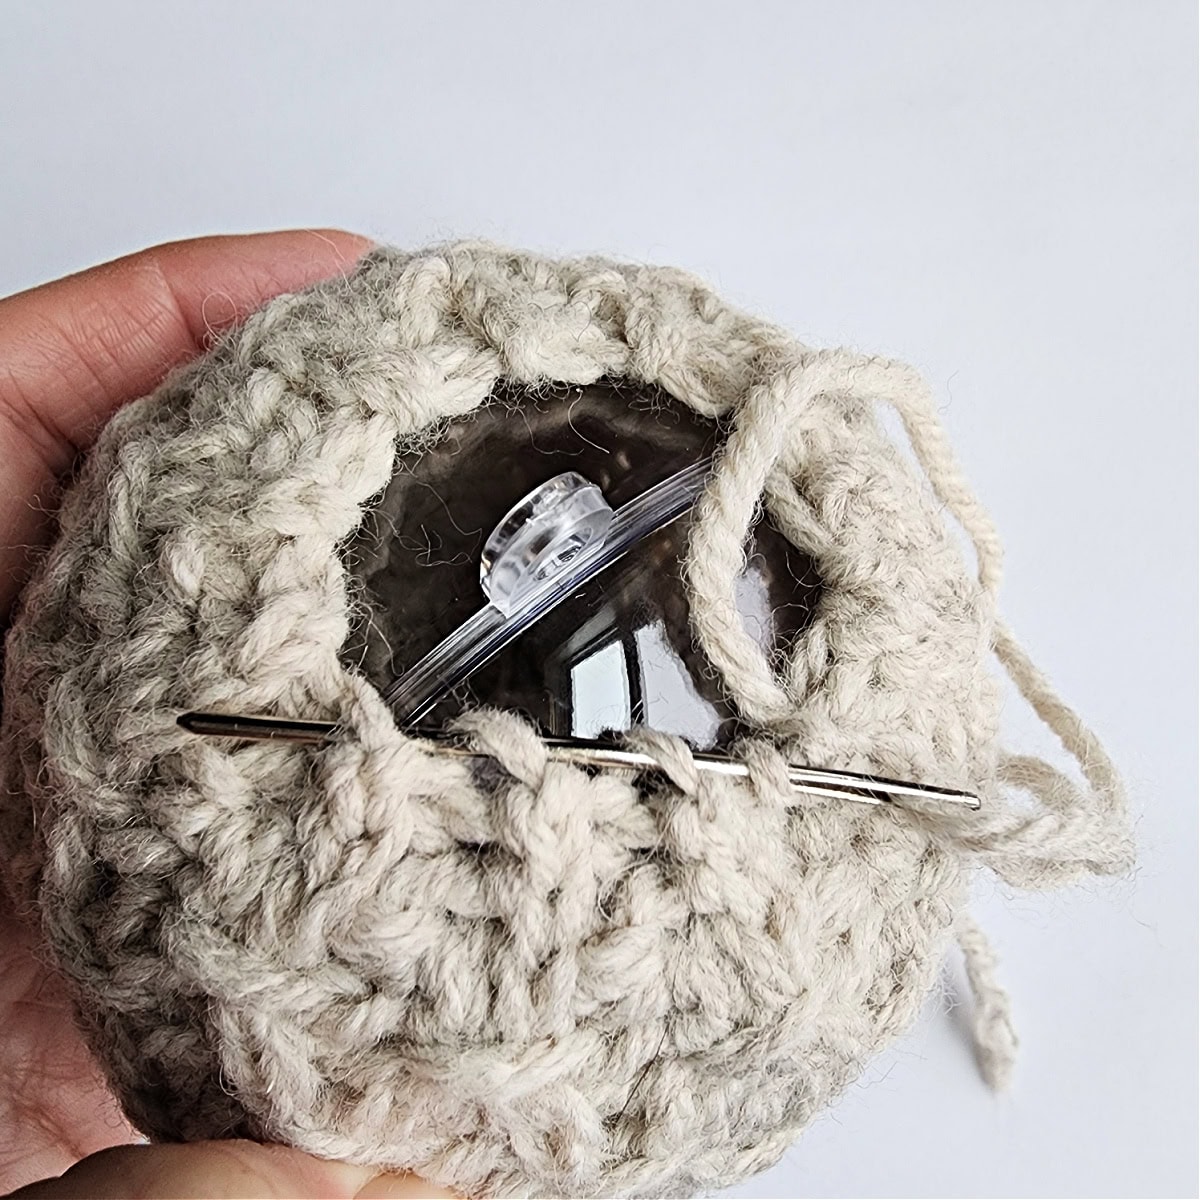
Bauble Insert Option: After you’ve whipstitched approximately half of the seam, insert your bauble and complete the seam.
Fiberfill Option: Complete the seam. Complete the finishing stitches. Then fill your bauble with fiberfill before cinching the top and bottom closed.
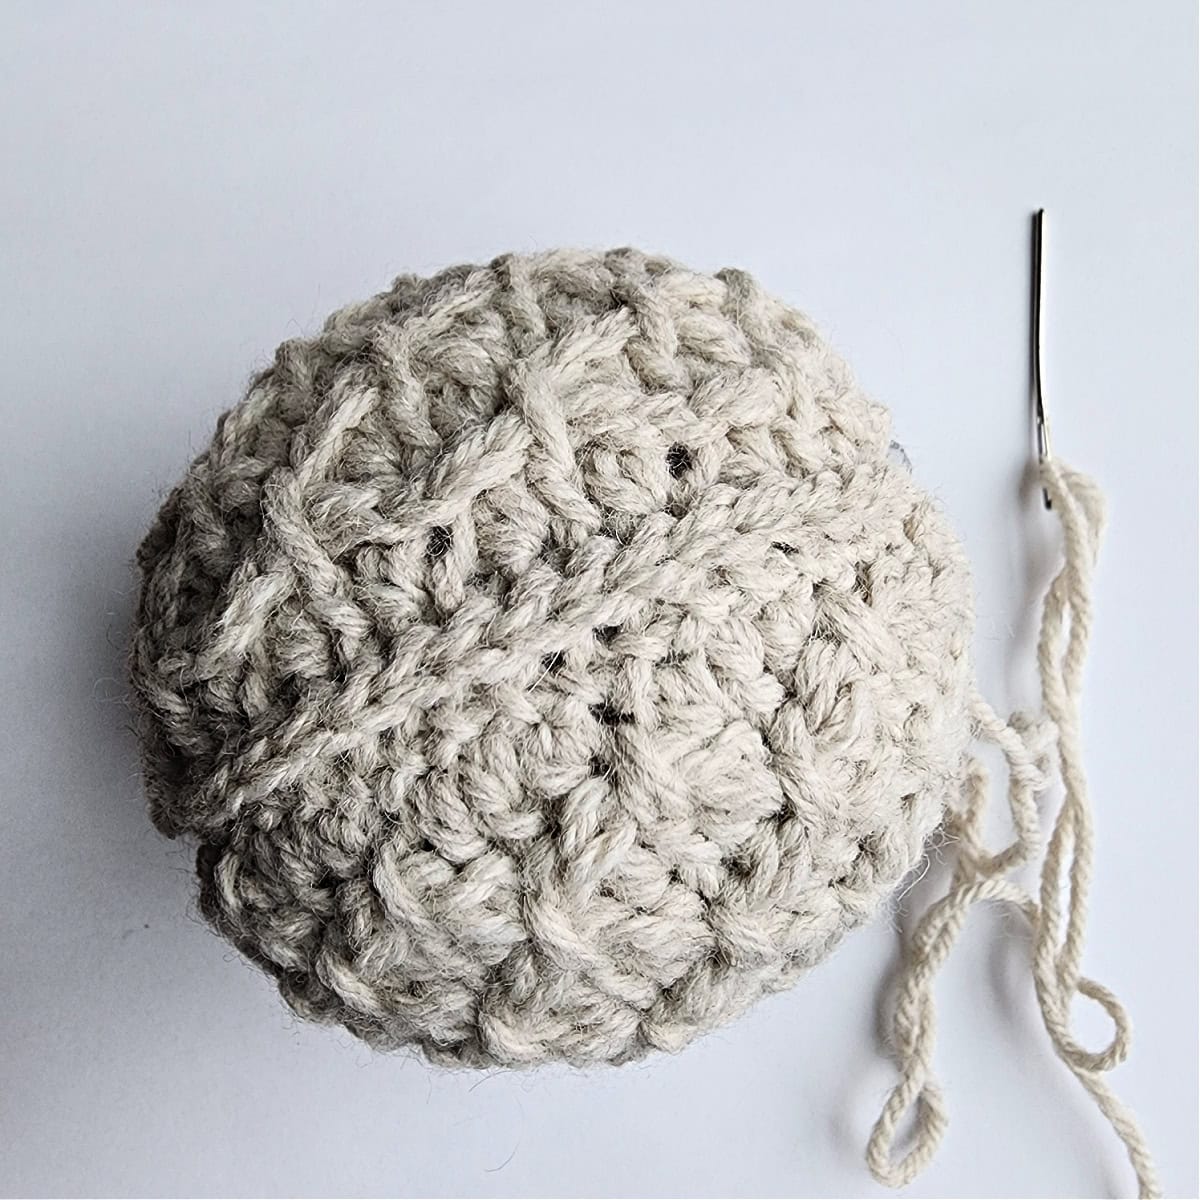
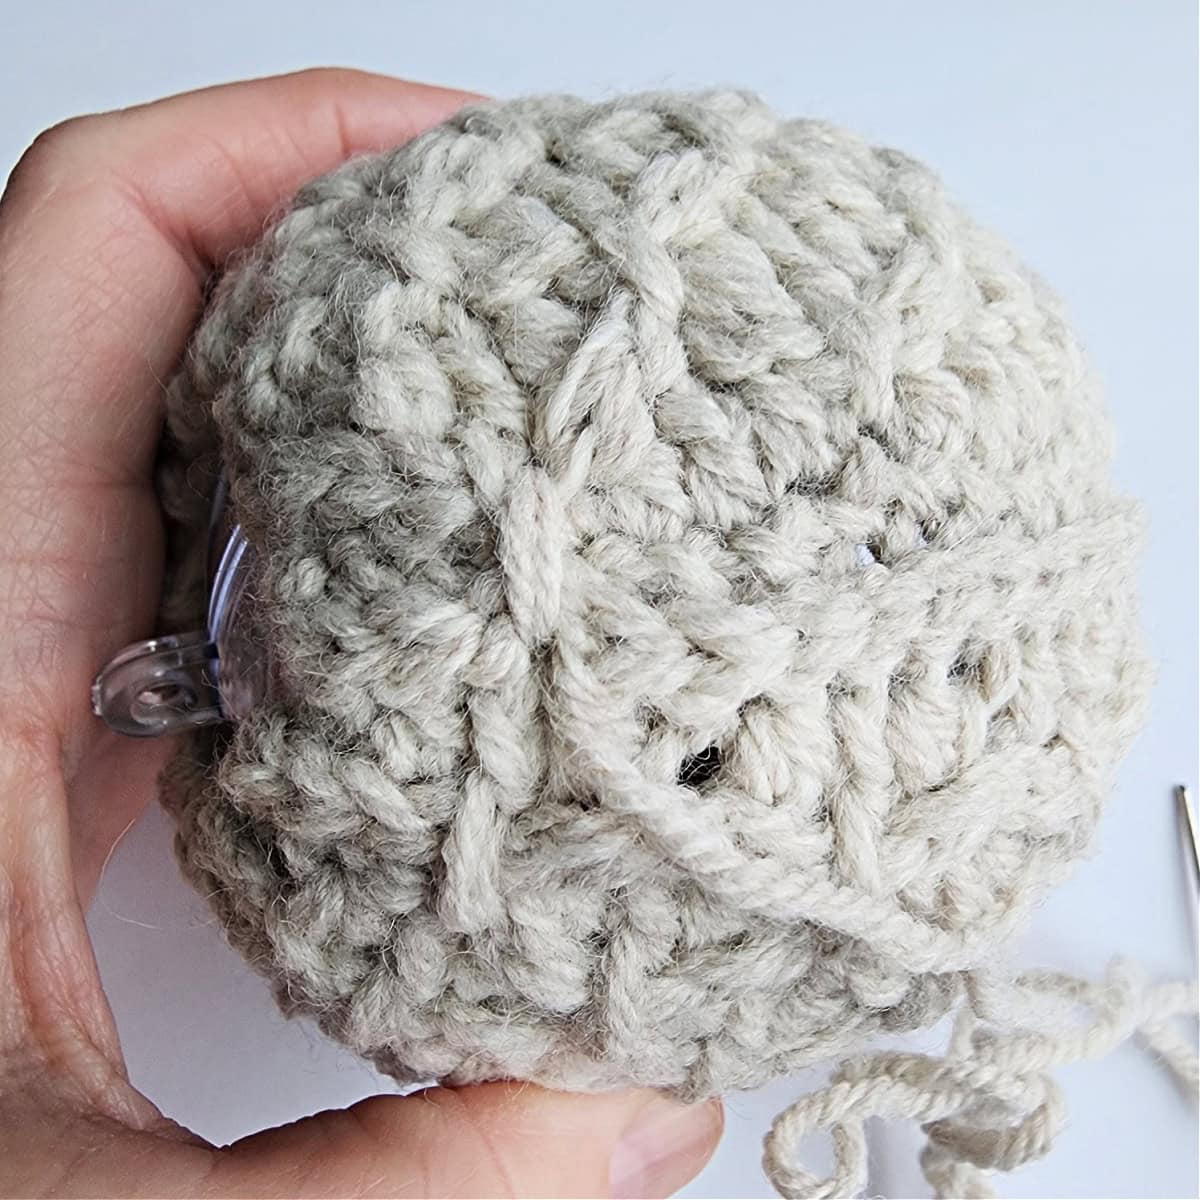
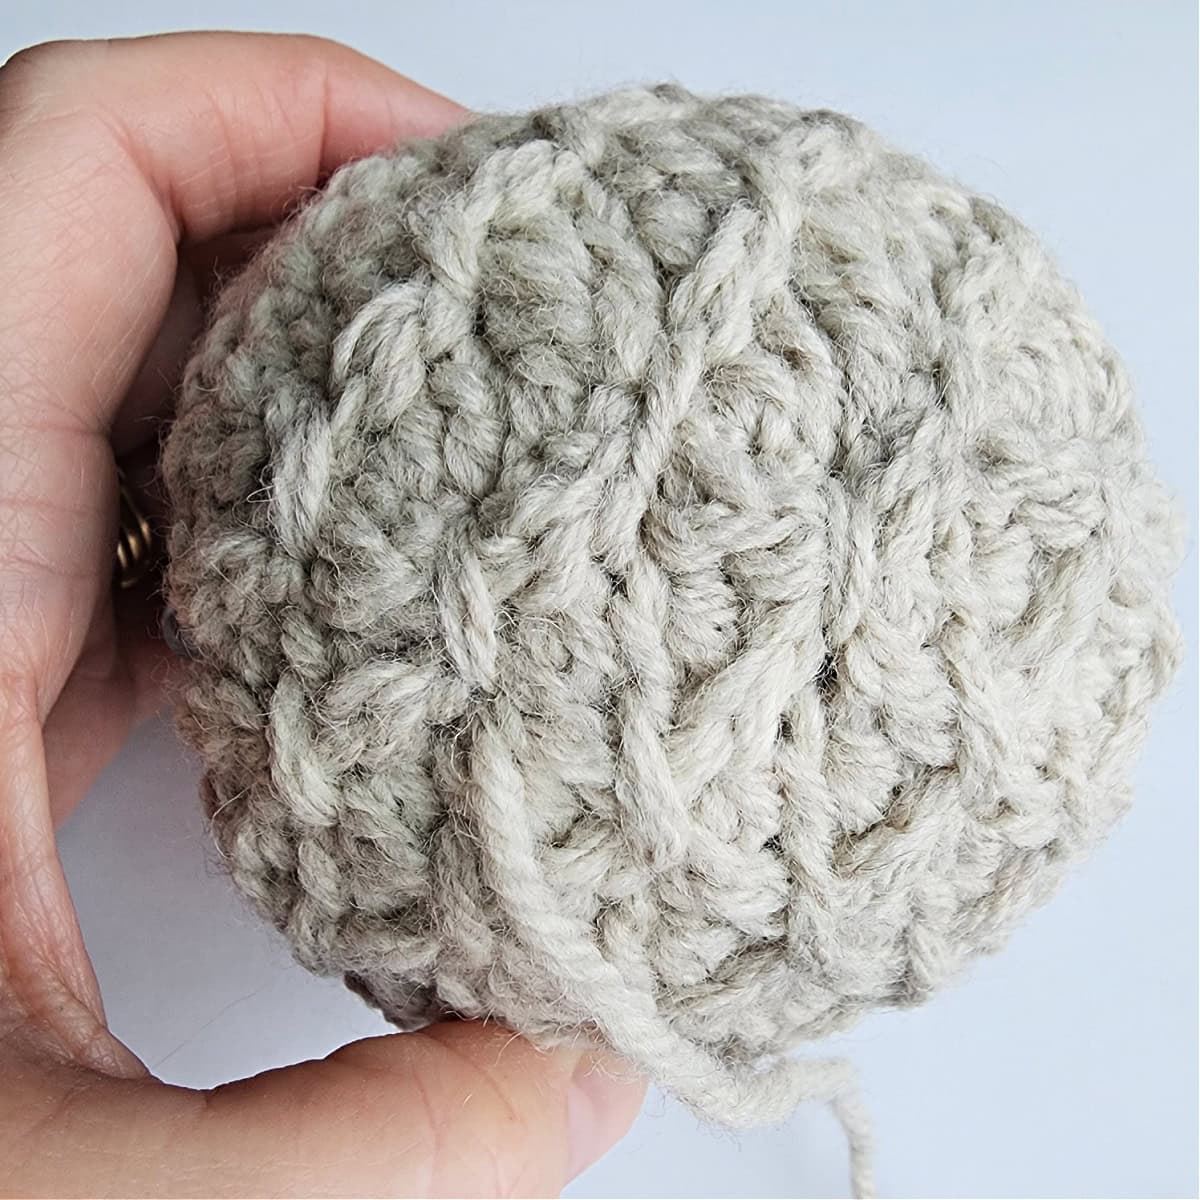
Both Options: Pull on your yarn to tighten the seam. Weave in the ends. Continue on to the Finishing Stitches (do not close the top and bottom gaps). You will do this later.
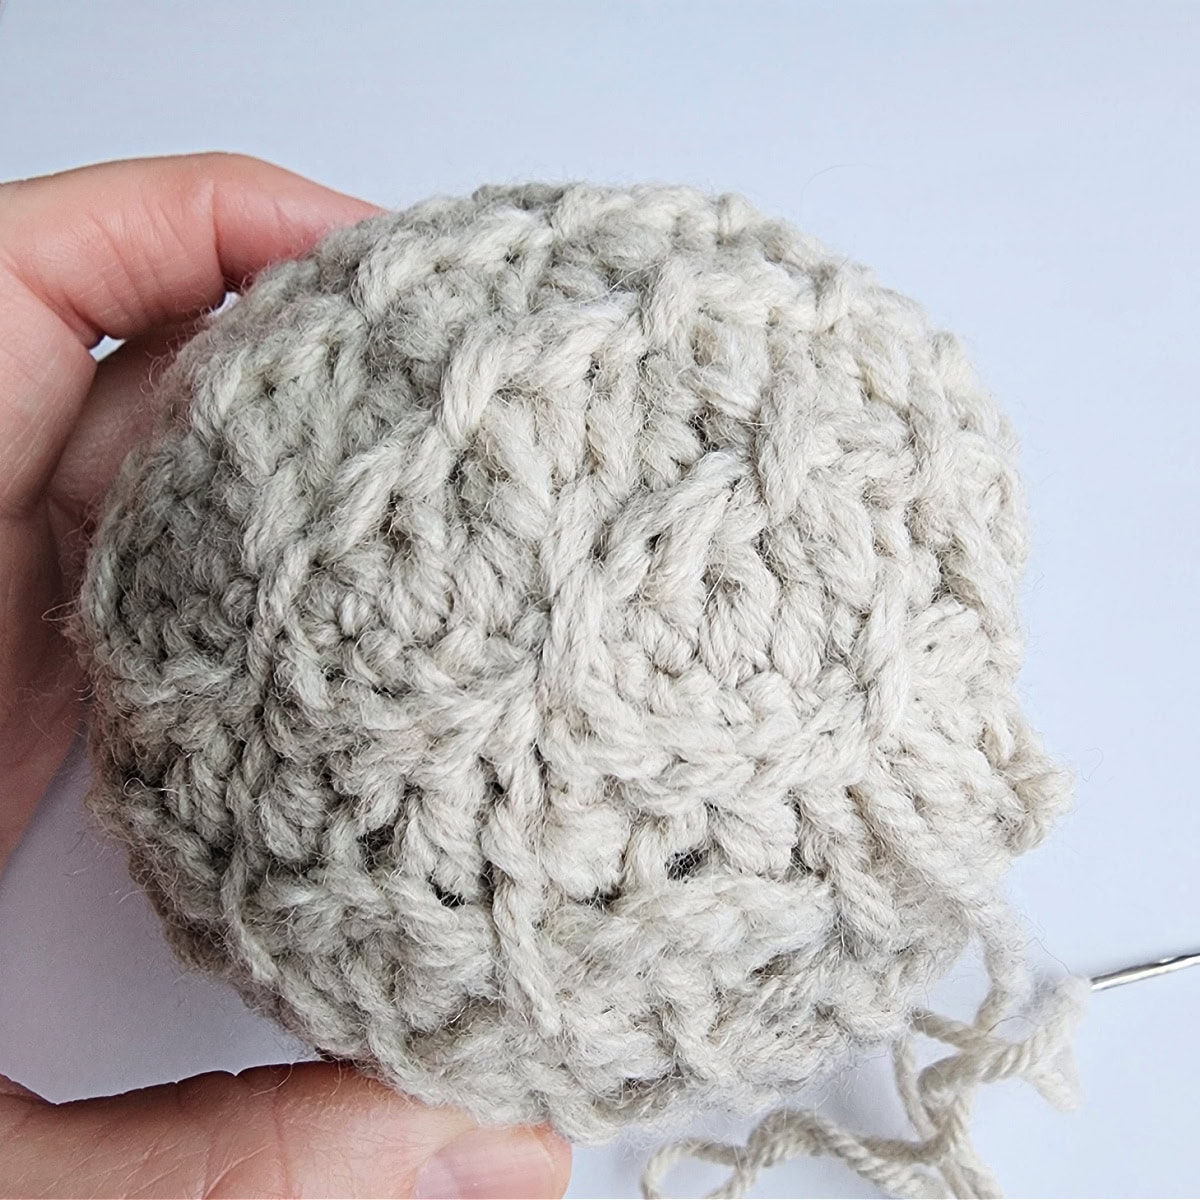
Finishing Stitches
The finishing stitches you’ll be adding are to tie together the first and last rows of the ornament cover. They are decorative stitches that mimic the double crochet stitches you worked 4 rows down throughout the cover. These stitches are made using only a yarn needle and piece of yarn that you will use to connect two rows of stitches.
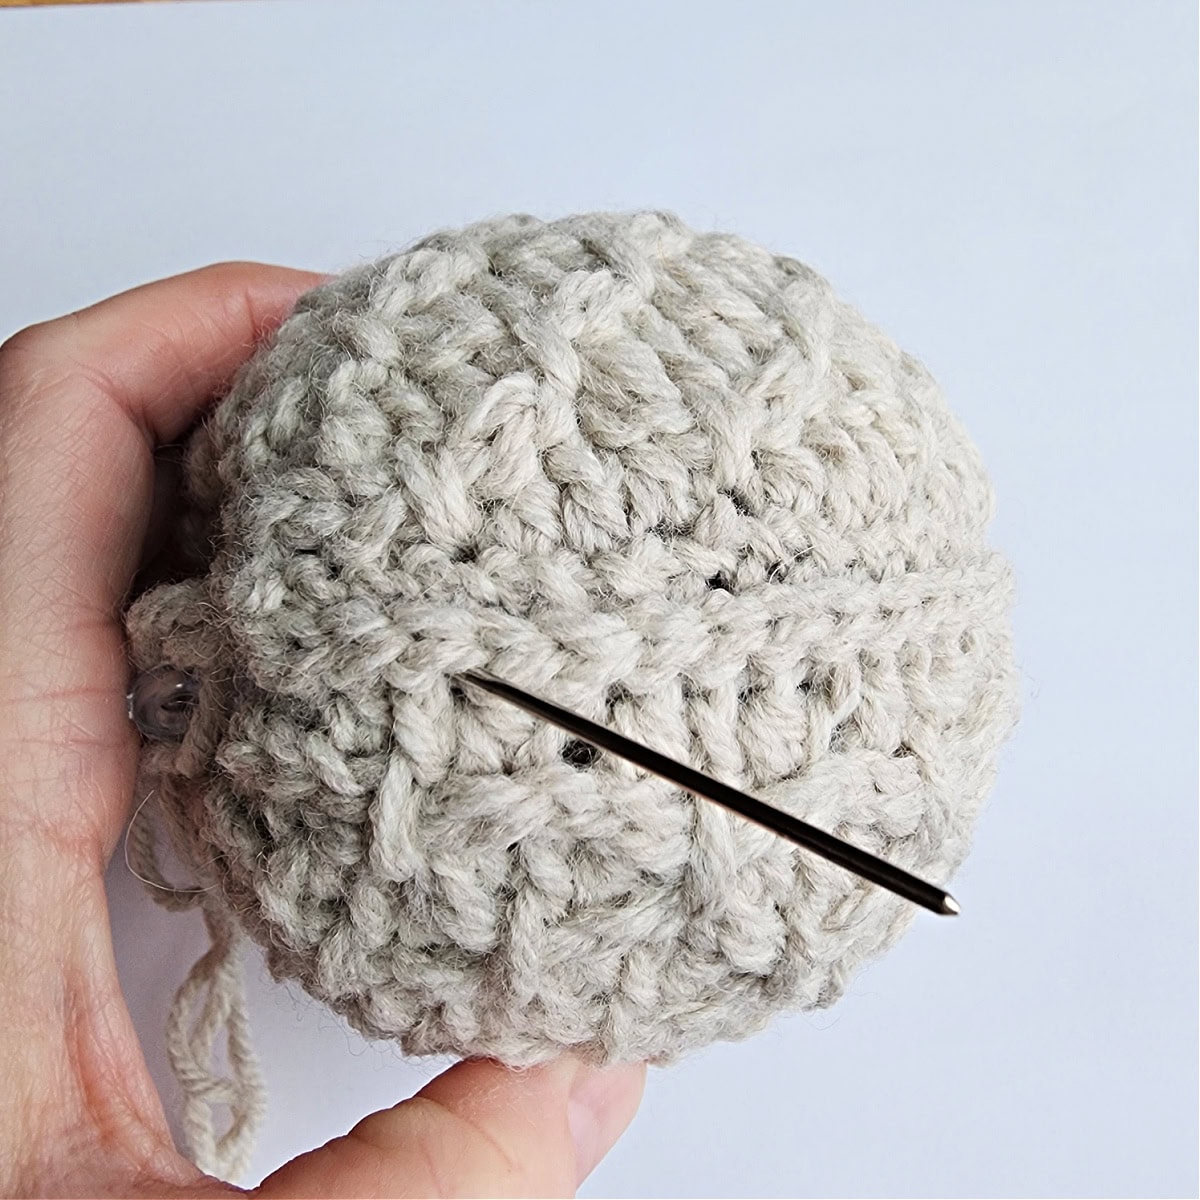
Continue on to work the second set of finishing stitches.
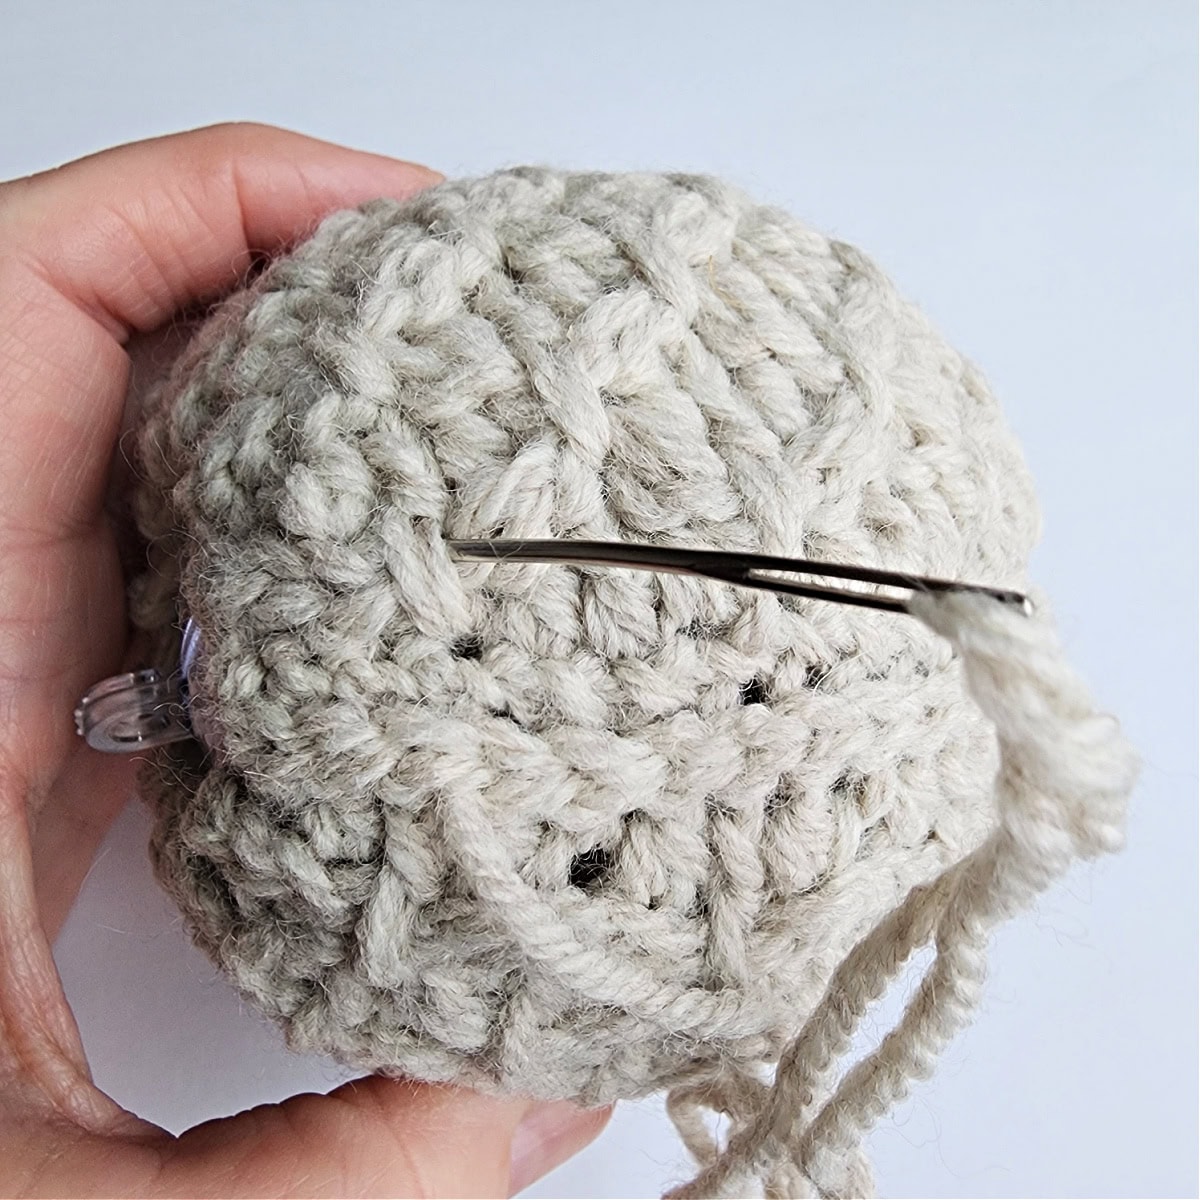
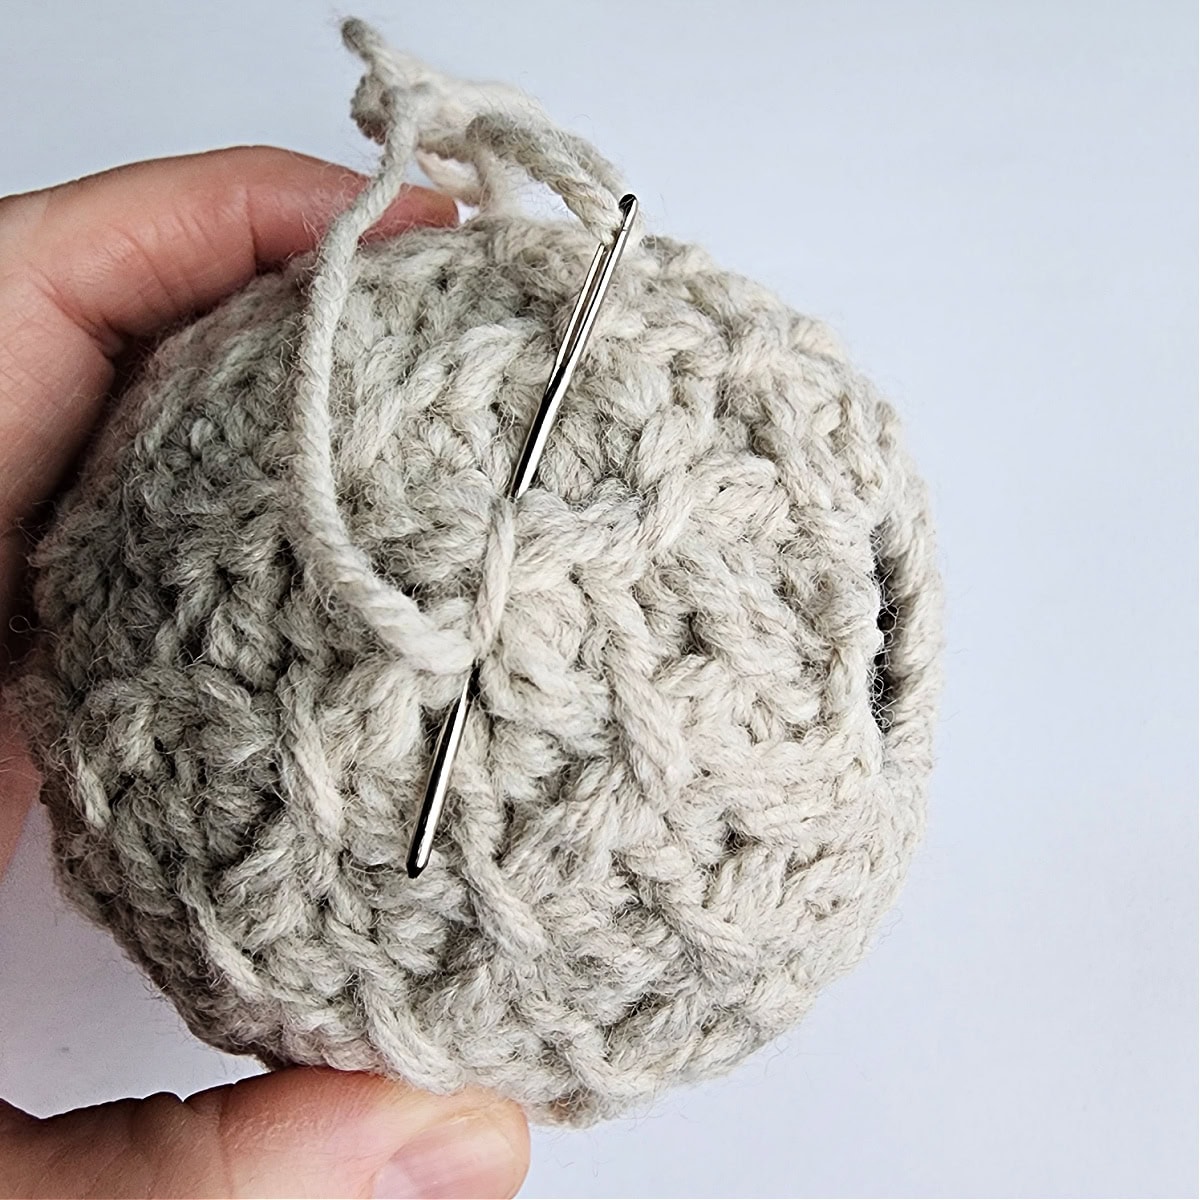
Second Set of Finishing Stitches
The second set of finishing stitches is worked in the top of the dc’s from Row 41 & the bottom of Row 1 dc’s.
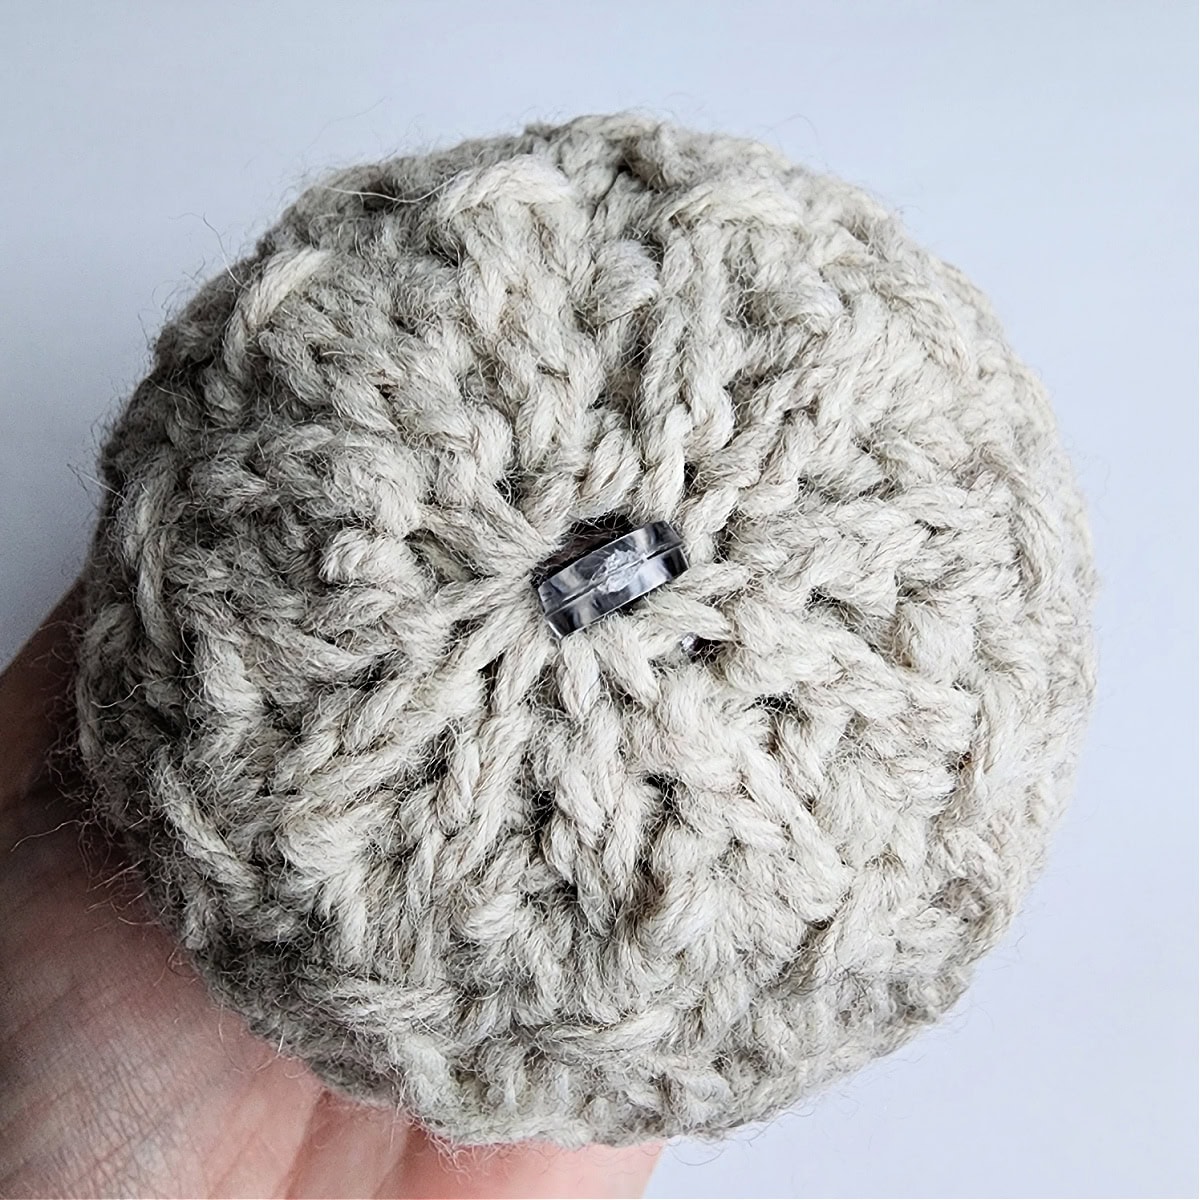
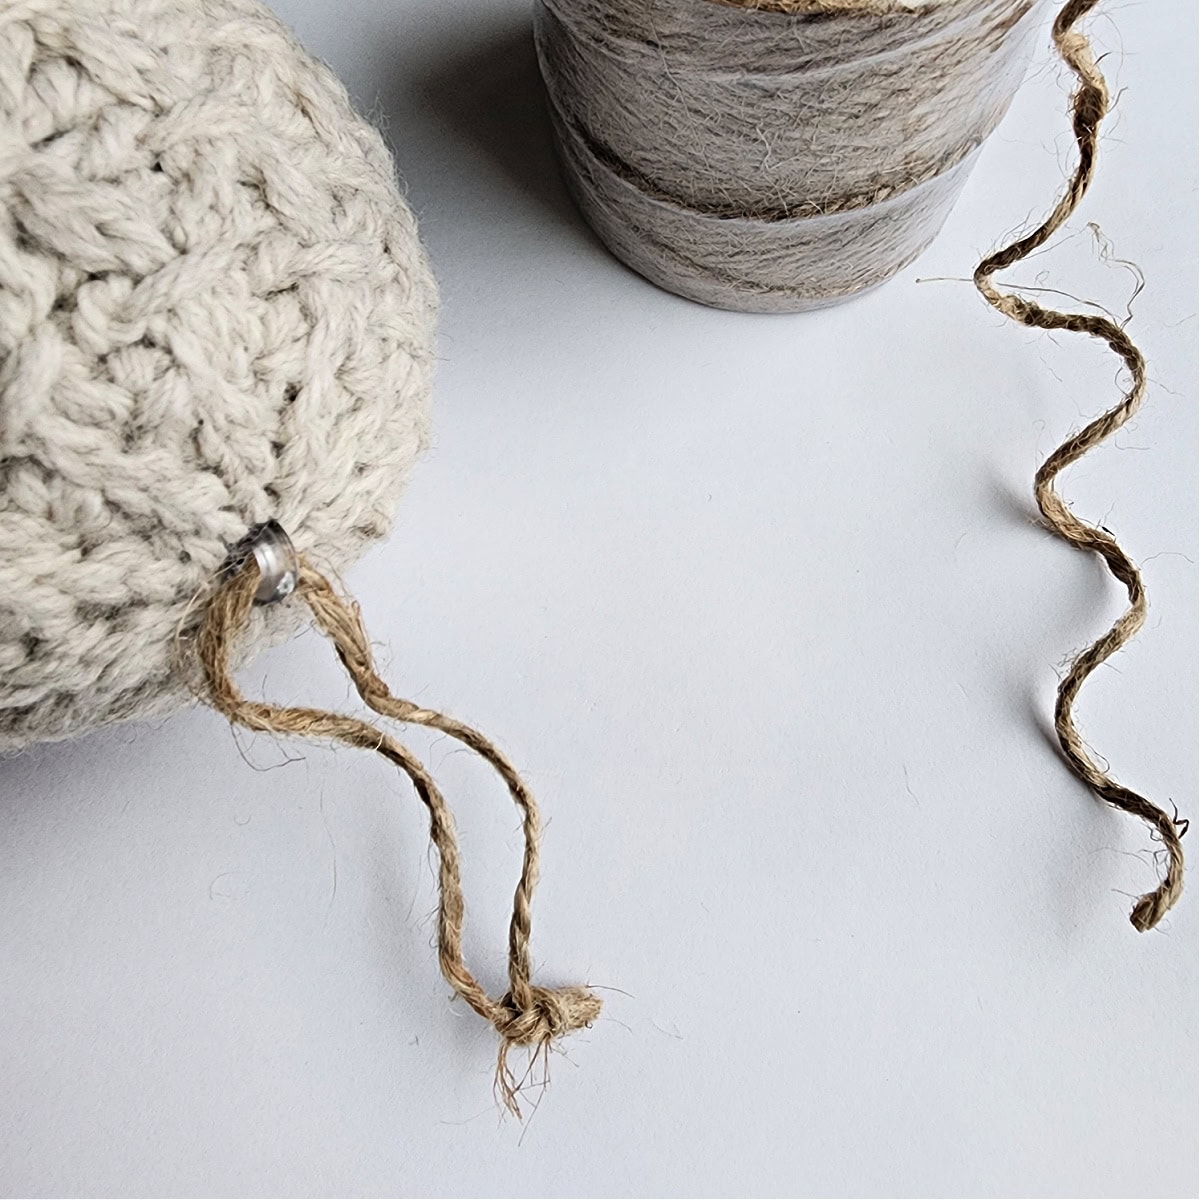
Add a Hanging Loop
Cut a 12″ long piece of twine, or 1/4″ wide burlap ribbon to use as a hanging loop. Insert the ribbon through the hole in the top of the plastic bauble (or through a stitch on top of your bauble if you’re using Fiberfil). Create a loop as big as you’d like and knot the ends of the ribbon to secure it. Trim the ends to even them out.
Your crochet Christmas bauble is now complete!
I MADE IT! NOW WHAT?
Pin this post!: Save this crochet christmas bauble pattern to your Pinterest boards so that you can come back and make it again.
Leave a comment below: We love to hear your feedback.
Share Your Finished Projects on Facebook or Instagram: I love to see your finished projects! Share with us on social media and tag me @acrochetedsimplicity or use the hashtag #ACrochetedSimplicity so I can find your posts.
Join us in the Facebook Community Group!
Come share your finished projects with us in the A Crocheted Simplicity Crochet Community Group on Facebook. Join us for fun community events such as crochet alongs, join in on crochet conversations, ask questions, get advice, and share your love for crochet!

More Crochet Ideas for Christmas Ornaments I Think You’ll Love
- Crochet Santa Boot Ornament
- Crochet Reindeer Jingle Bell Ornament
- Cookies for Santa Christmas Ornament
- Gingerbread Boy & Girl Candy Cane Holder Ornaments
Explore Free Knit-Look Crochet Patterns
Do you love the look of knitting, but you can’t knit a stitch to save your soul? Browse all of our free knit look crochet patterns. You’ll find a variety of knit-look crochet project ideas.