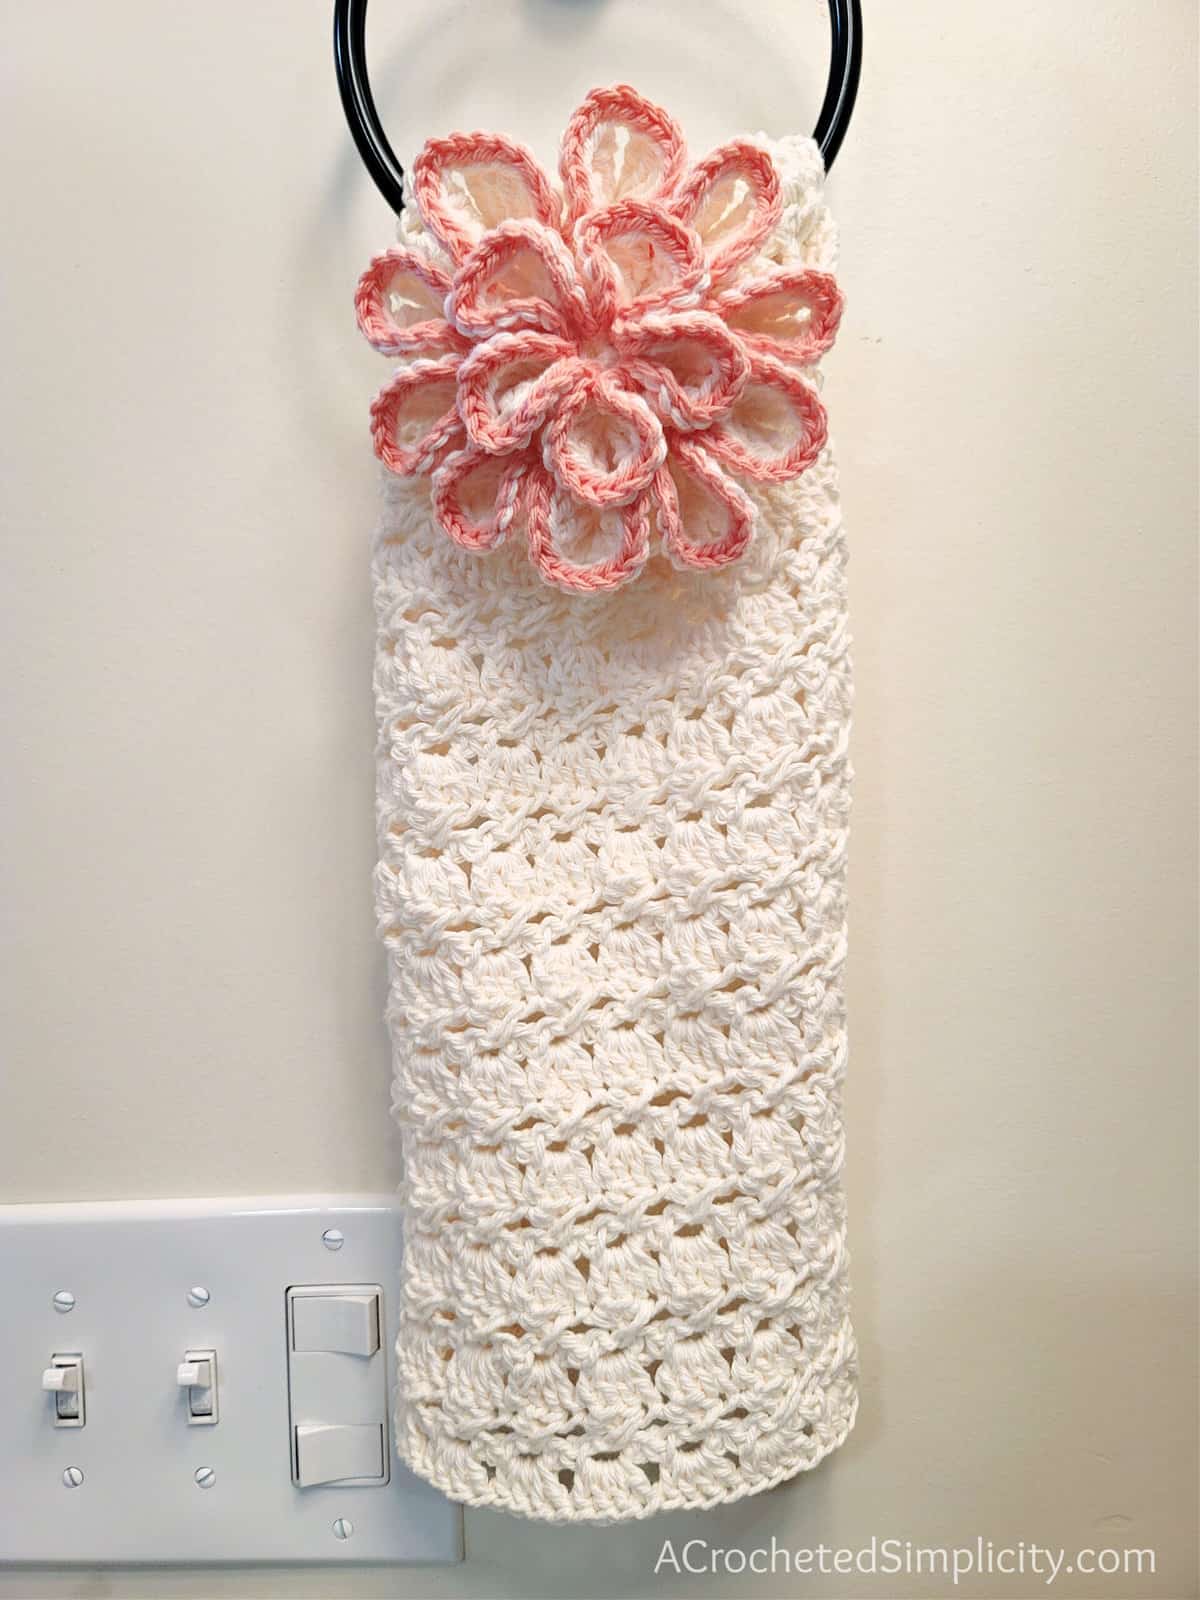
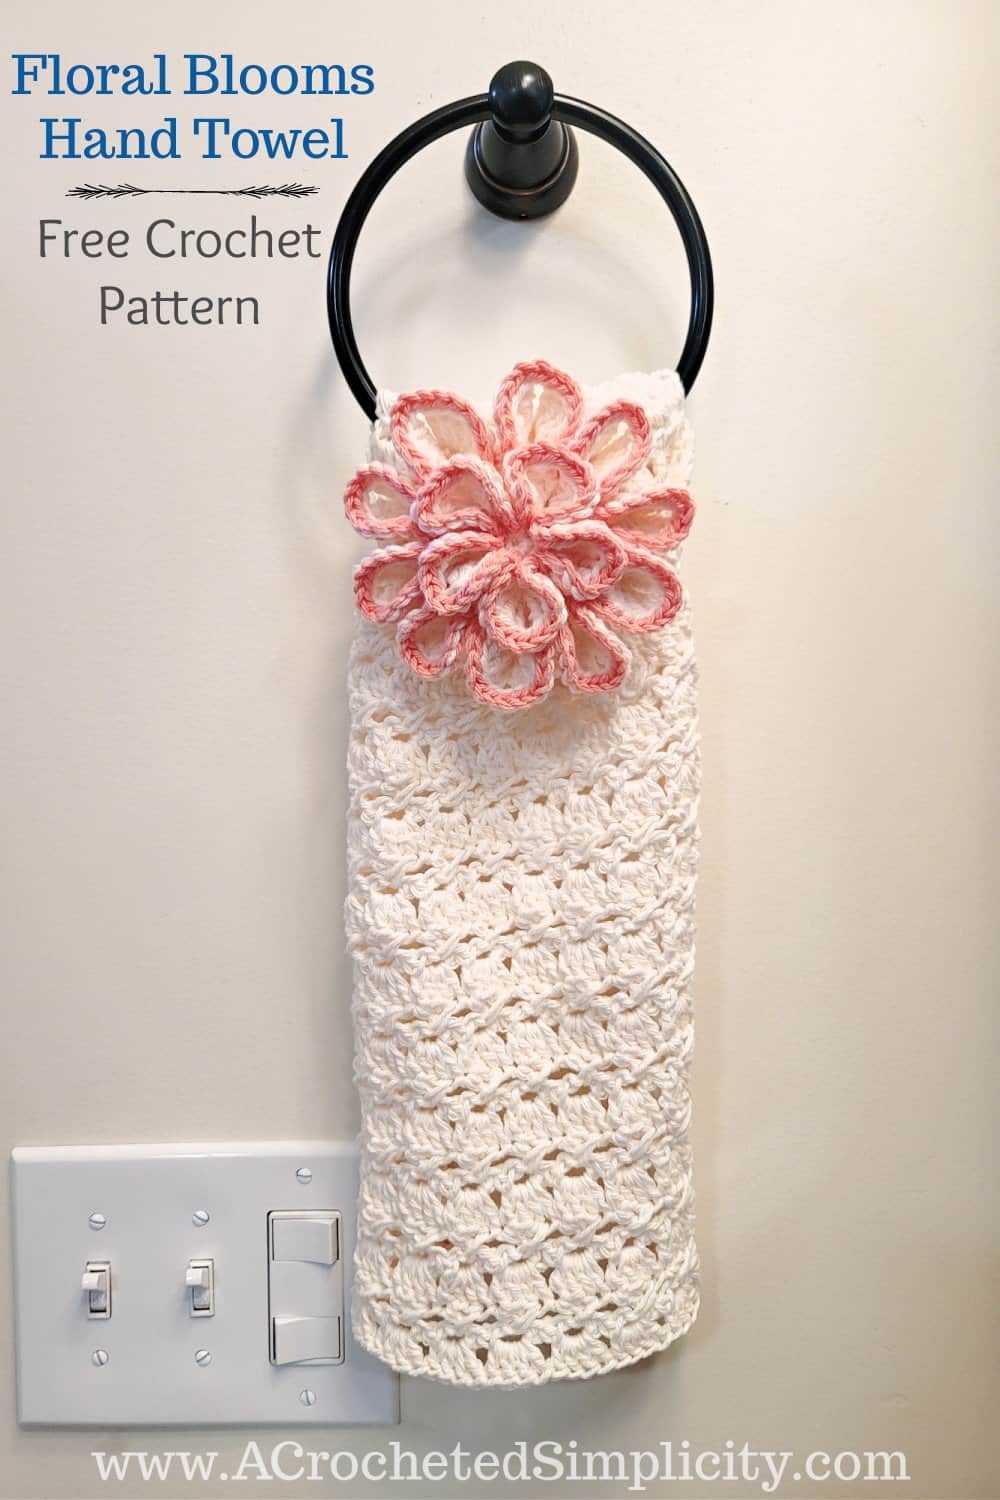
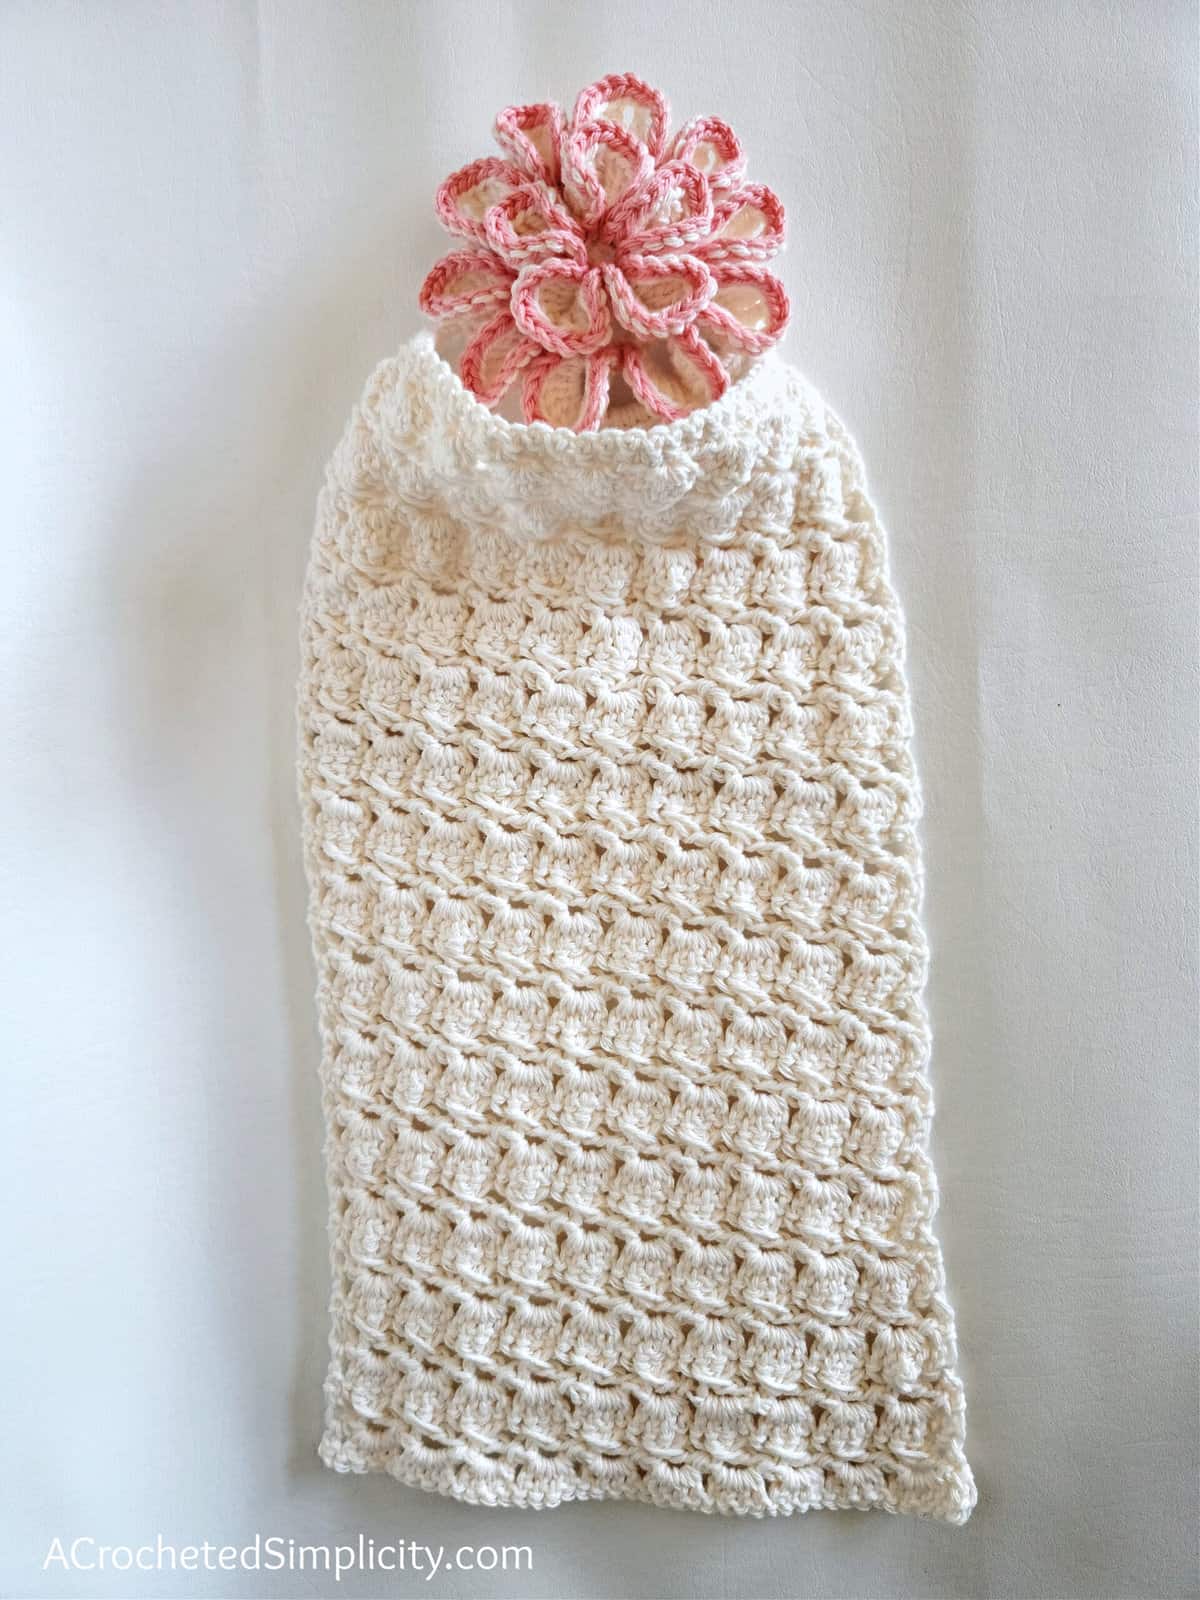
Floral Blooms Hand Towel – Free Crochet Pattern
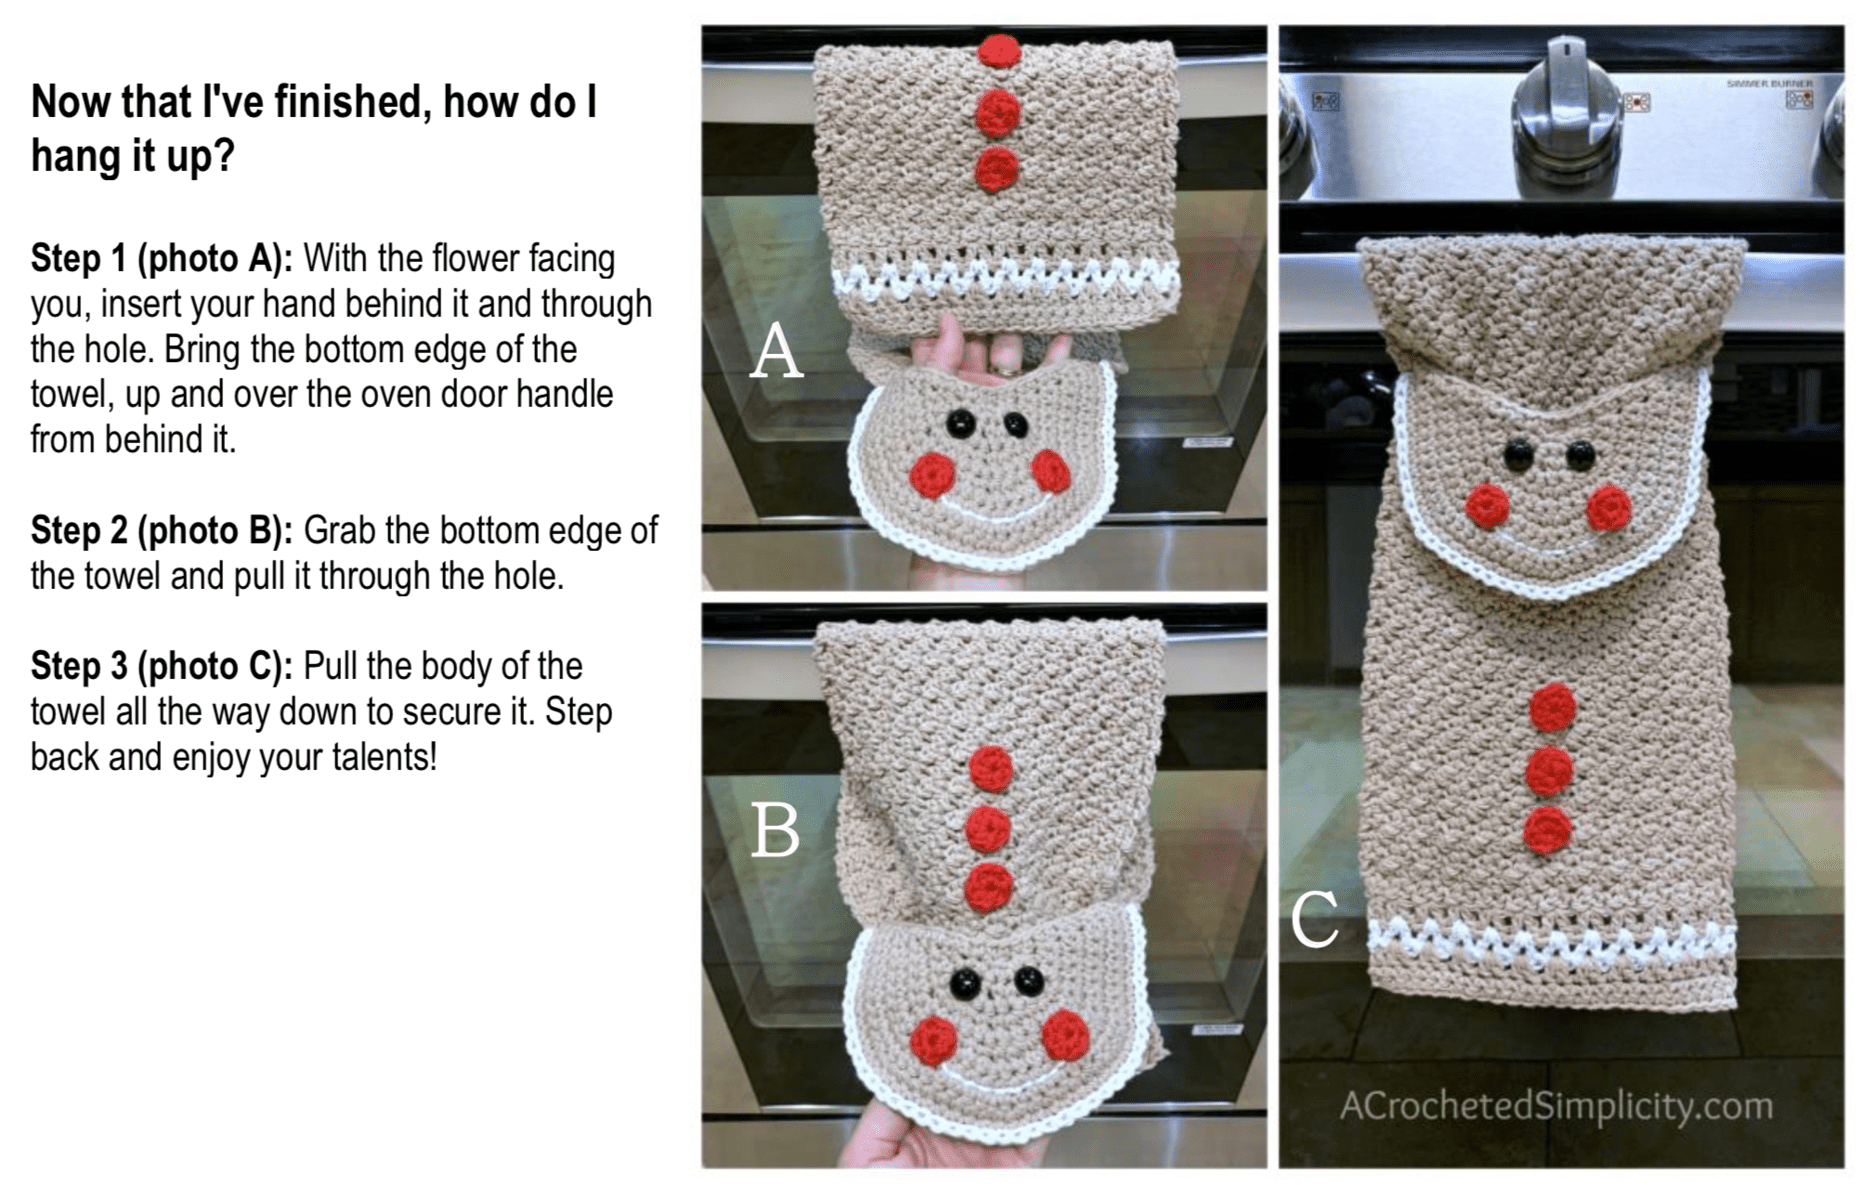
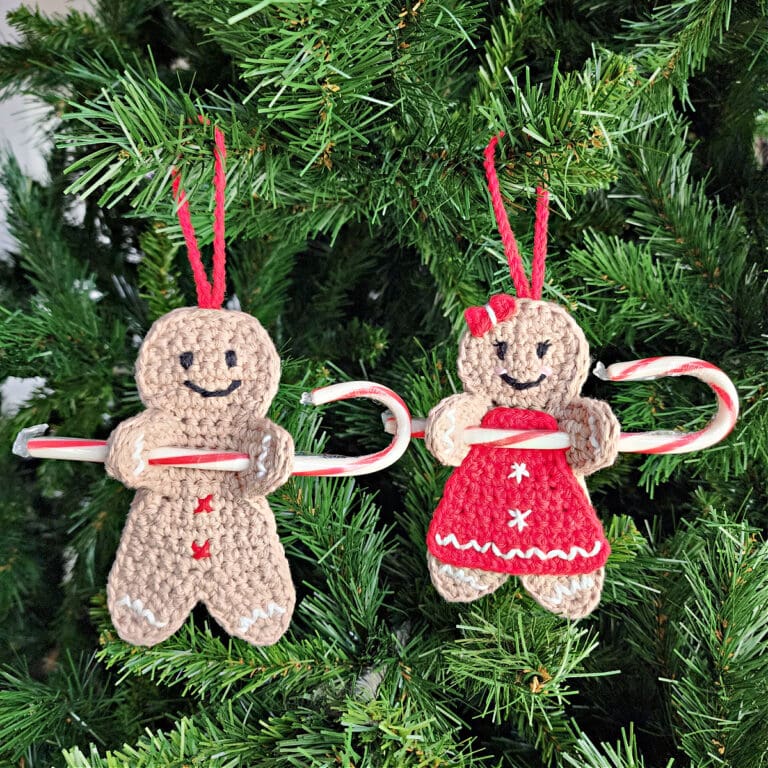
Ever since designing the Gingerbread Man Towel, I’ve had many ask if I could design towels that hang the same way for year-round use. The Floral Blooms Hand Towel is the first in a fun, new series of crochet towels. You can find the free crochet towel pattern in this post below, or an ad-free print friendly version on Love Crafts here, Ravelry here, or on Etsy here.
>> CLICK HERE TO SIGN-UP TO RECEIVE OUR NEWSLETTER <<
After nearly a year hiatus, our Mini-Mystery Crochet Alongs are back! Because we started again just before Mother’s Day weekend, it was only fitting that our MMCAL project would make a great gift for your favorite mom. First, you’ll begin by crocheting a base for the flower. Next, you’ll create the petals on the flower. Lastly, you’ll crochet the body of the towel.
Yarn
Cotton is the go-to fiber for crochet dish cloths, dish towels, and handtowels as it’s the most absorbent. There are several cotton yarns out there that would be perfect for this project, but I chose to use Lily Sugar n’ Cream 100% worsted weight cotton yarn. Lily Sugar n’ Cream is available in 39 colors so I was able to find all of the colors I needed for this project within the same yarn line.
FLORAL BLOOMS HAND TOWEL – FREE CROCHET TOWEL PATTERN
The free pattern is below, but if you love to work offline, or need to order your yarn, I’ve got a couple other great options for you.
Purchase the ad-free, printable PDF that includes all photo tutorials, on Love Crafts here, Ravelry here, or Etsy here.
Save this pattern to your Ravelry favorites here.
Pin it for later here.
This post contains affiliate links.
MATERIALS
- Yarn: Worsted Weight Cotton Yarn /4 / such as Lily Sugar n’ Cream
- Main Color: Soft Ecru (230 yards)
- Contrasting Color: Tea Rose (7 yards)
- Crochet Hook: H/8/5.00mm (My favorite crochet hooks are the Clover Amour Hooks, I’ve never had an ache in my hand since switching)
- Scissors
- Yarn Needle
- Measuring Tape
Many of these materials are available for purchase through our affiliates below:
 Lily Sugar 'N Cream Super S...Shop on Amazon
  Clover Amour Crochet Hook: ...Shop on Amazon
  Clover 1045/G Purple Amour ...Shop on Amazon
  Clover 3672 Amour Crochet H...Shop on Amazon
  Fiskars 154110-1001 Non-sti...Shop on Amazon
  Lion Brand Yarn 400-5-5002 ...Shop on Amazon
ABBREVIATIONS (US TERMS)
- ch(s): chain(s)
- sl st(s): slip stitch(es)
- st(s): stitch(es)
- sc: single crochet
- dc: double crochet
- tr: treble crochet
- yo: yarn over
- sp(s): space(s)
- rep: repeat
- Rnd: round
- RS: right side
- MC: Main Color
- CC: Contrasting Color
- Alt-dc: alternate double crochet (click HERE for tutorial)
SIZE
- One Size: 9.25″ W x 18″ L
NOTES
- Turning chains are not included in stitch count, unless noted otherwise.
- Lily Sugar n’ Cream, worsted weight cotton yarn, was used for the sample. (2.5 oz / 60.9 g / 120 yds / 109 m / 100% cotton)
- Yardage – 180 yards of a single color OR:
- Main Color (Soft Ecru): 230 yards
- Contrasting Color (Tea Rose): 7 yards
- This hand towel is worked from the top down. First, you’ll create the flower part of the towel top. Then you’ll attach yarn to the back of the flower and begin working the towel portion.
Special Stitch
- Alternate Double Crochet (Alt-dc): Do not ch, instead, insert your hook into the first st, yo, pull up a loop, yo, pull thru both loops, insert your hook between the legs of the st just made, yo, pull up a loop, yo, pull thru one loop, yo, pull thru remaining loops. Click HERE for tutorial.
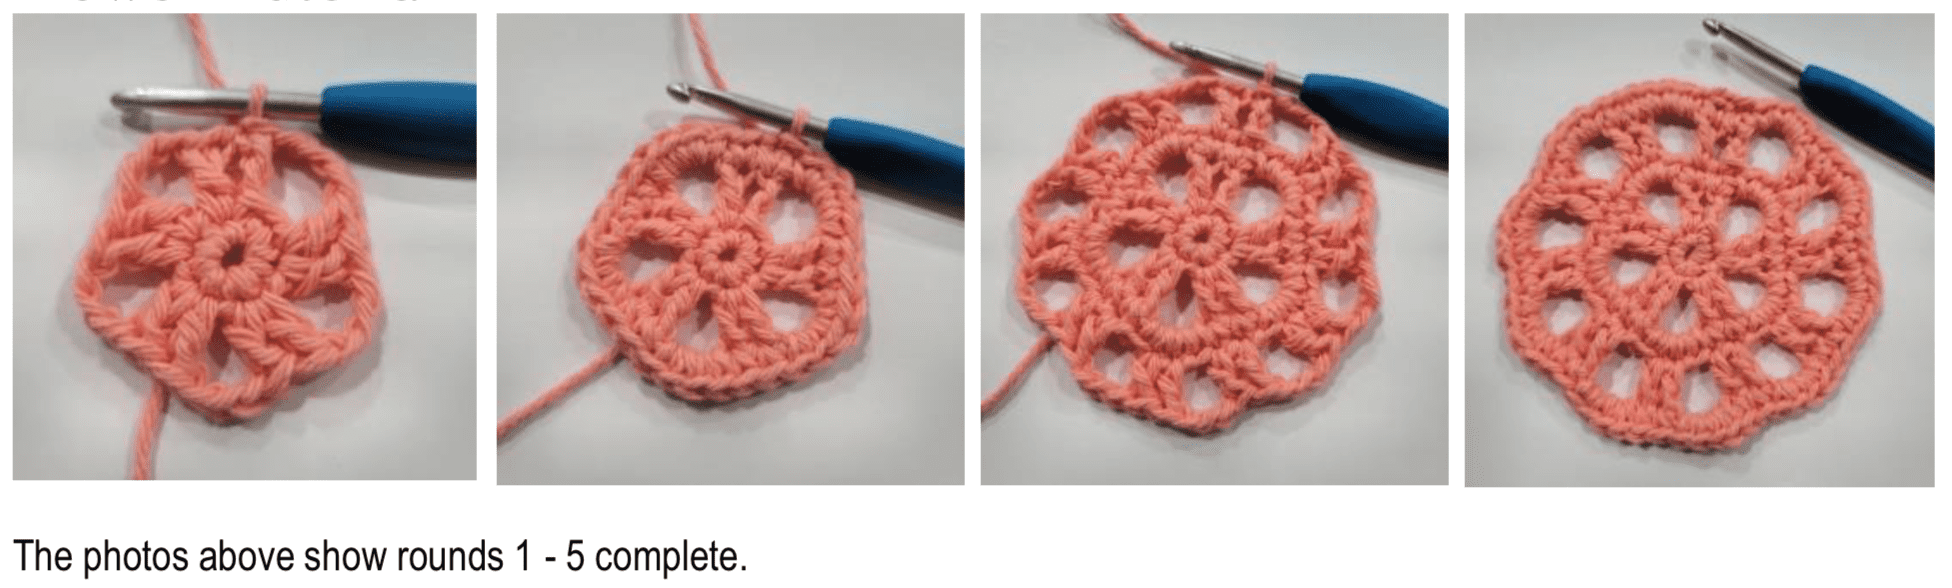
Flower Base
Rnd 1 (RS): Using a 5.00 mm crochet hook & MC, ch 2, work 5 sc into the 2nd ch from your hook. Join with a sl st to the 1st st. (5 sts)
Rnd 2: Ch 3 (counts as 1st dc), dc in the same st, ch 3, (2 dc in the next st, ch 3) rep from ( to ) around. Join with a sl st to the top of the ch 3. (10 sts + 5 ch-3’s)
Rnd 3: Ch 1, sc in each of the first 2 sts, 4 sc in the next ch-3 sp, (sc in each of the next 2 dc, 4 sc in the next ch-3 sp) rep from ( to ) around. Join. (30 sts)
Rnd 4: Ch 3 (counts as 1st dc), dc in the next st, ch 3, skip the next st, (dc in each of the next 2 sts, ch 3, skip the next st) rep from ( to ) around. Join to the top of the ch 3. (20 sts + 10 ch-3’s)
Rnd 5: Ch 1, sc in each of the first 2 sts, 4 sc in the next ch-3 sp, (sc in each of the next 2 dc, 4 sc in the next ch-3 sp) rep from ( to ) around. Join. (60 sts)
Fasten off. Weave in ends. Continue on to Flower Petals.
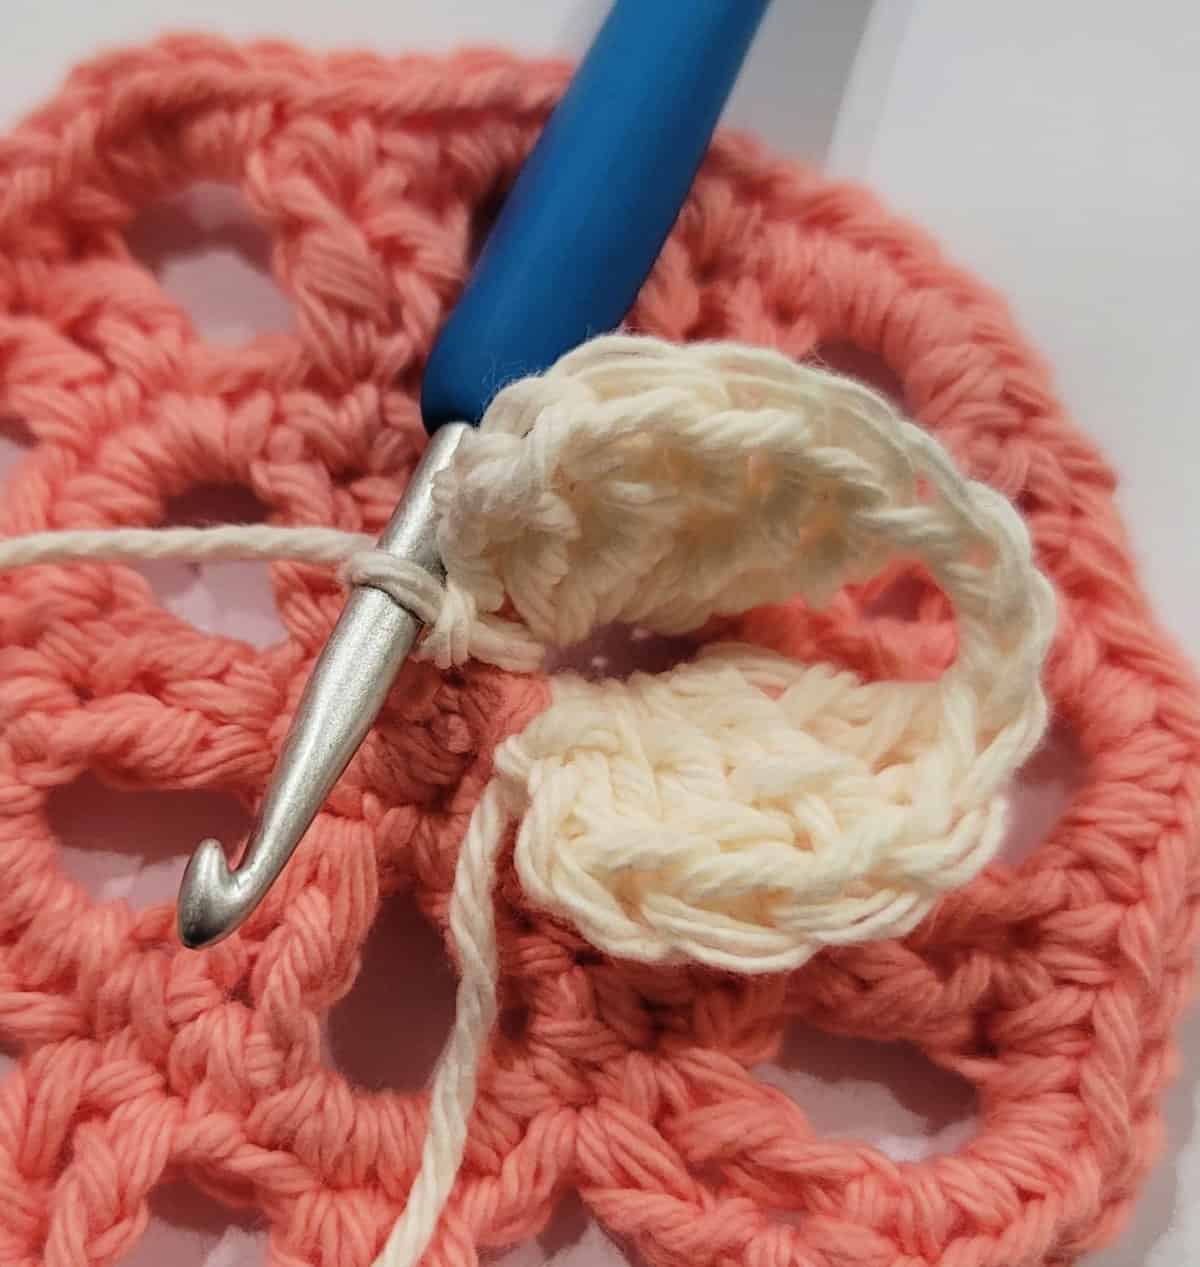
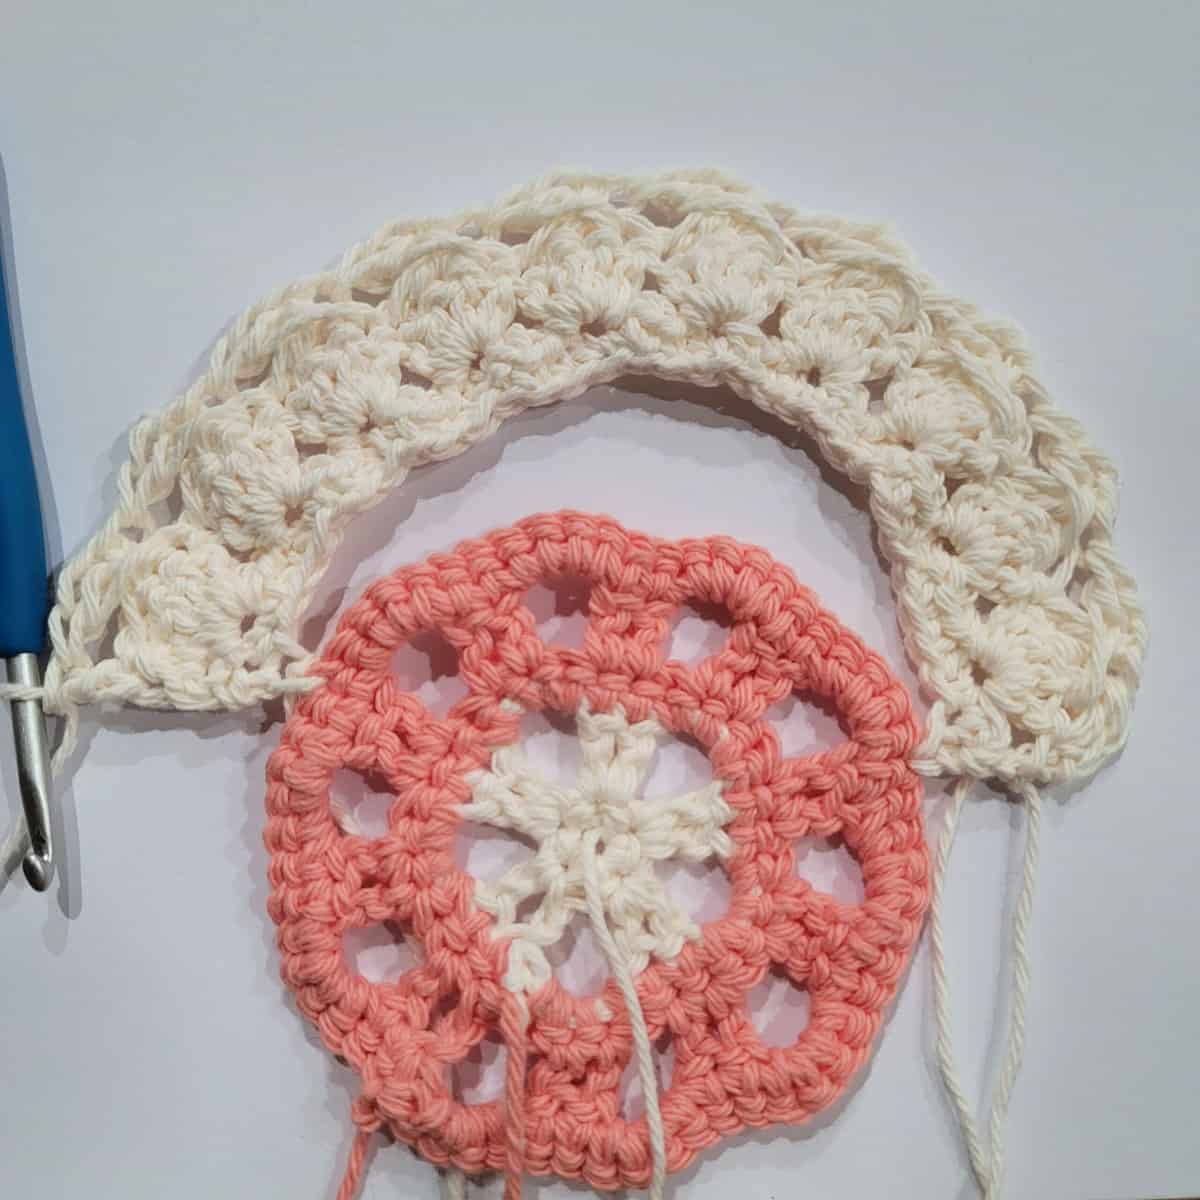
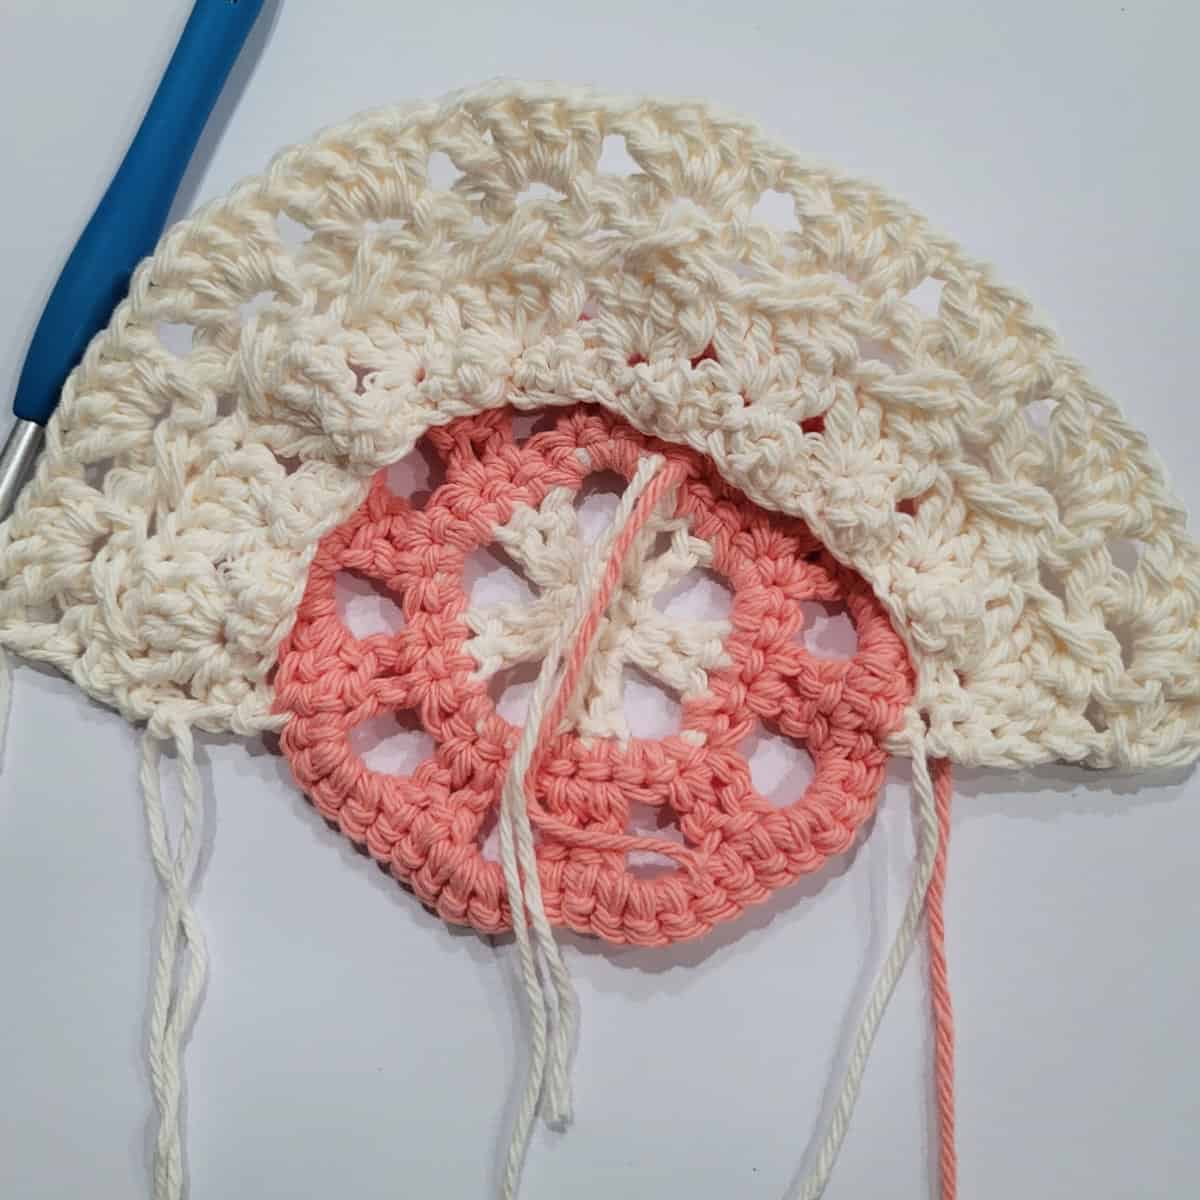
Flower Petals
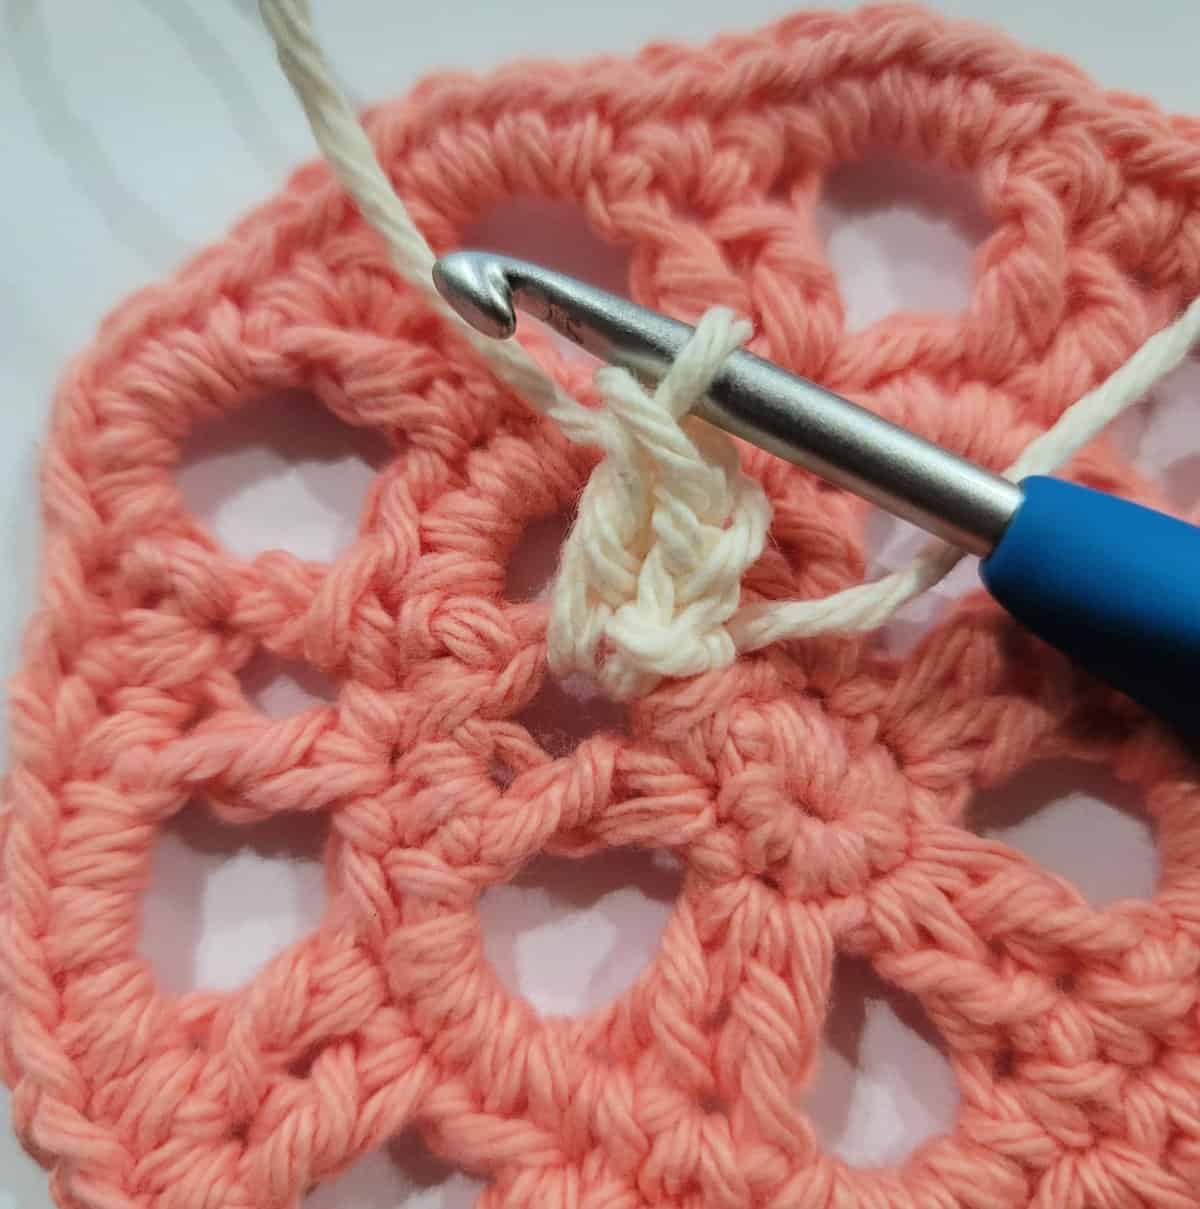
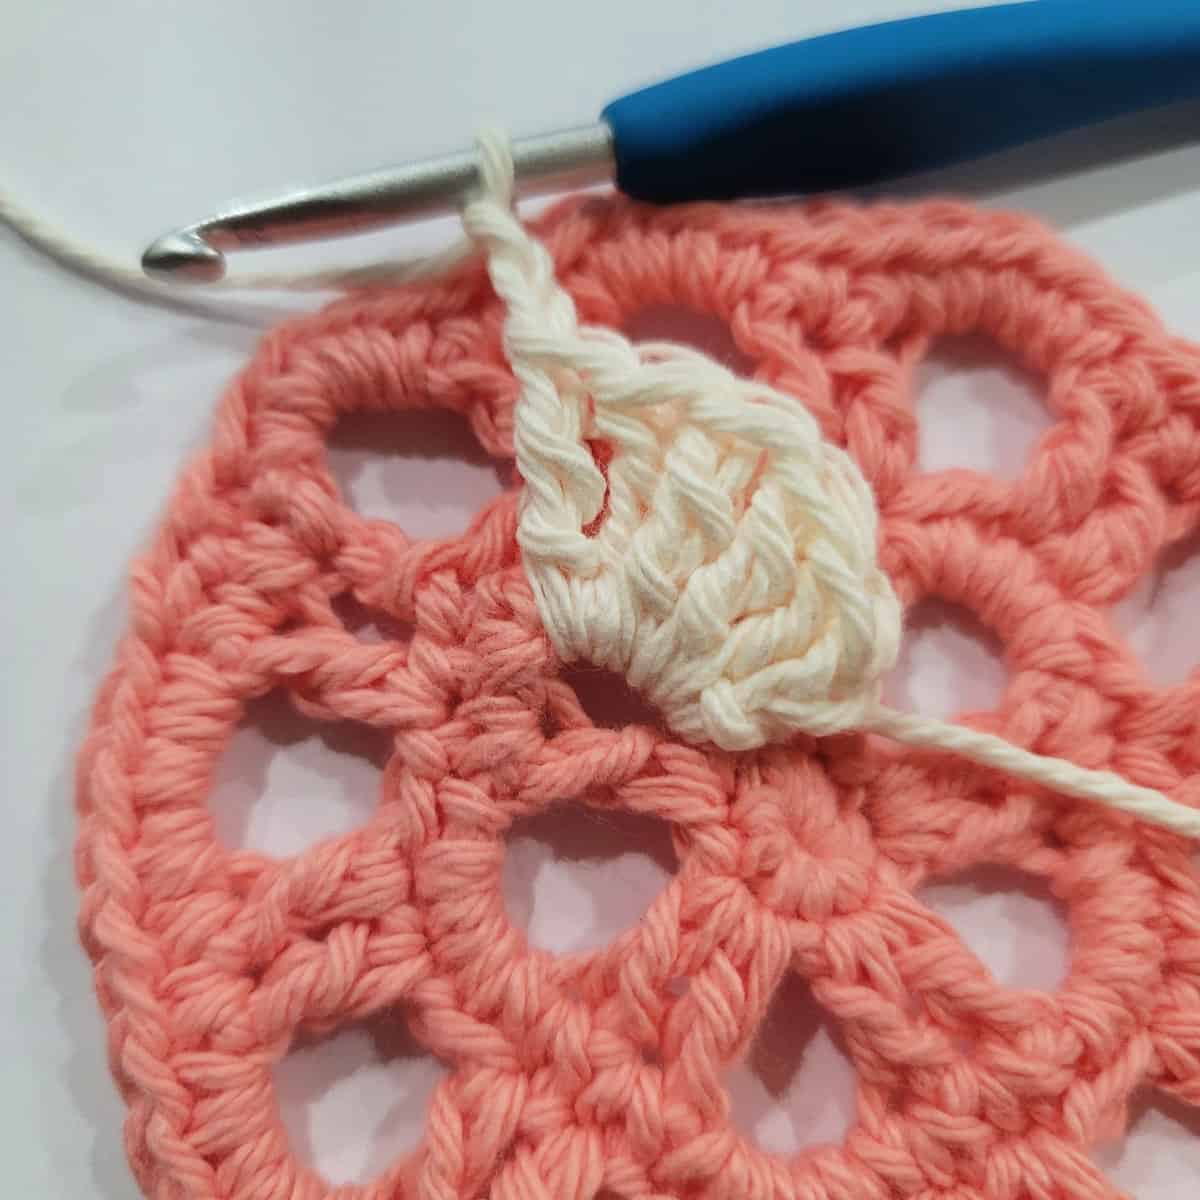
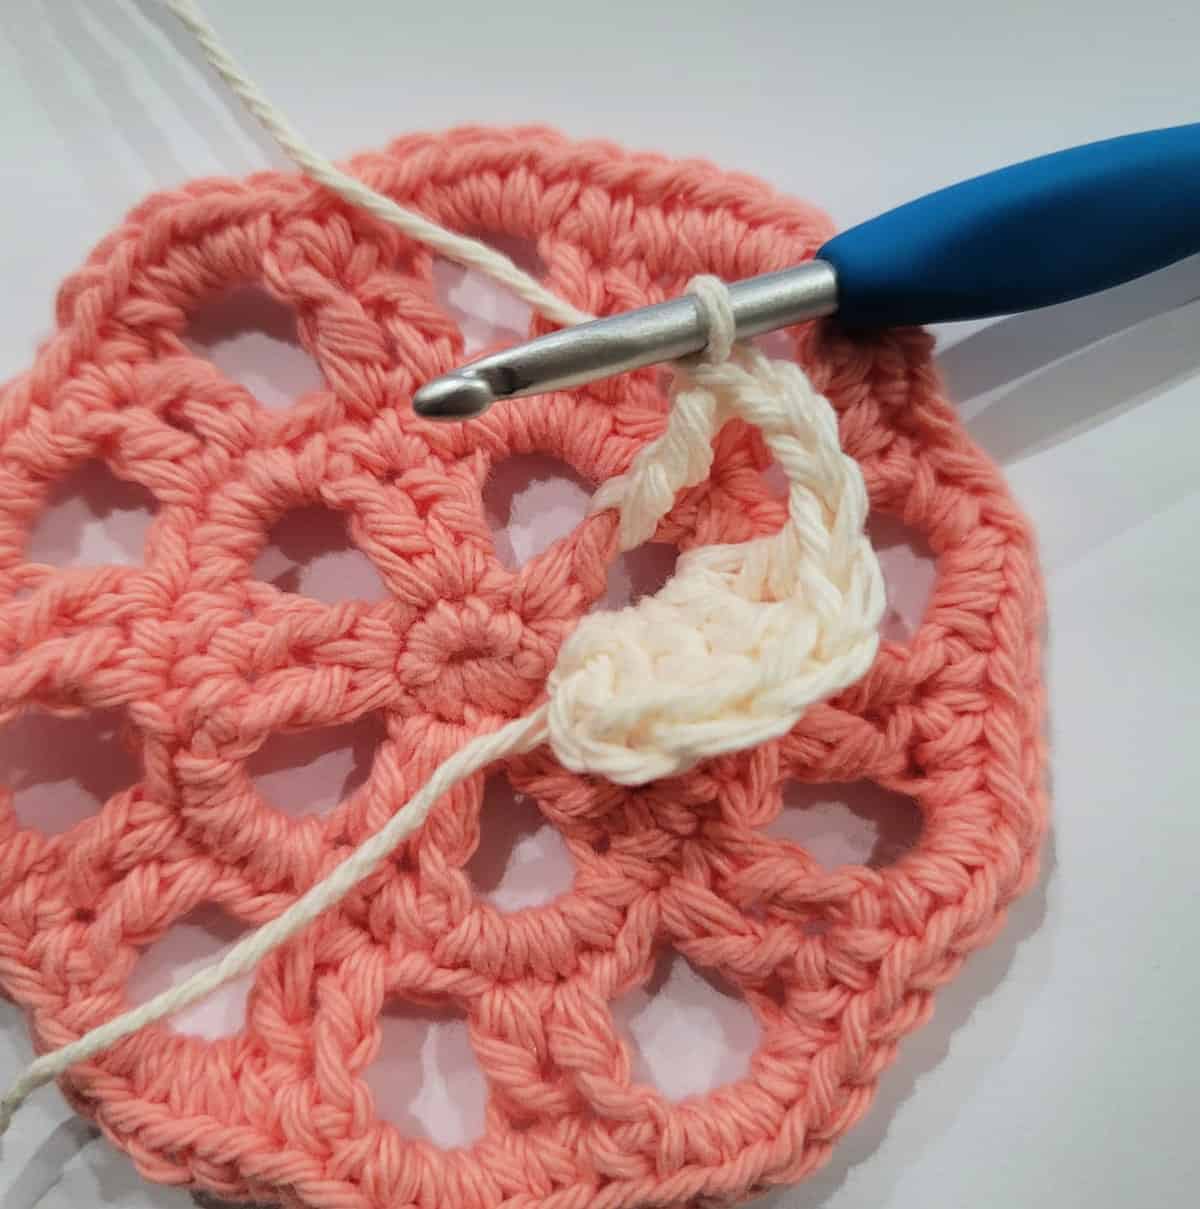
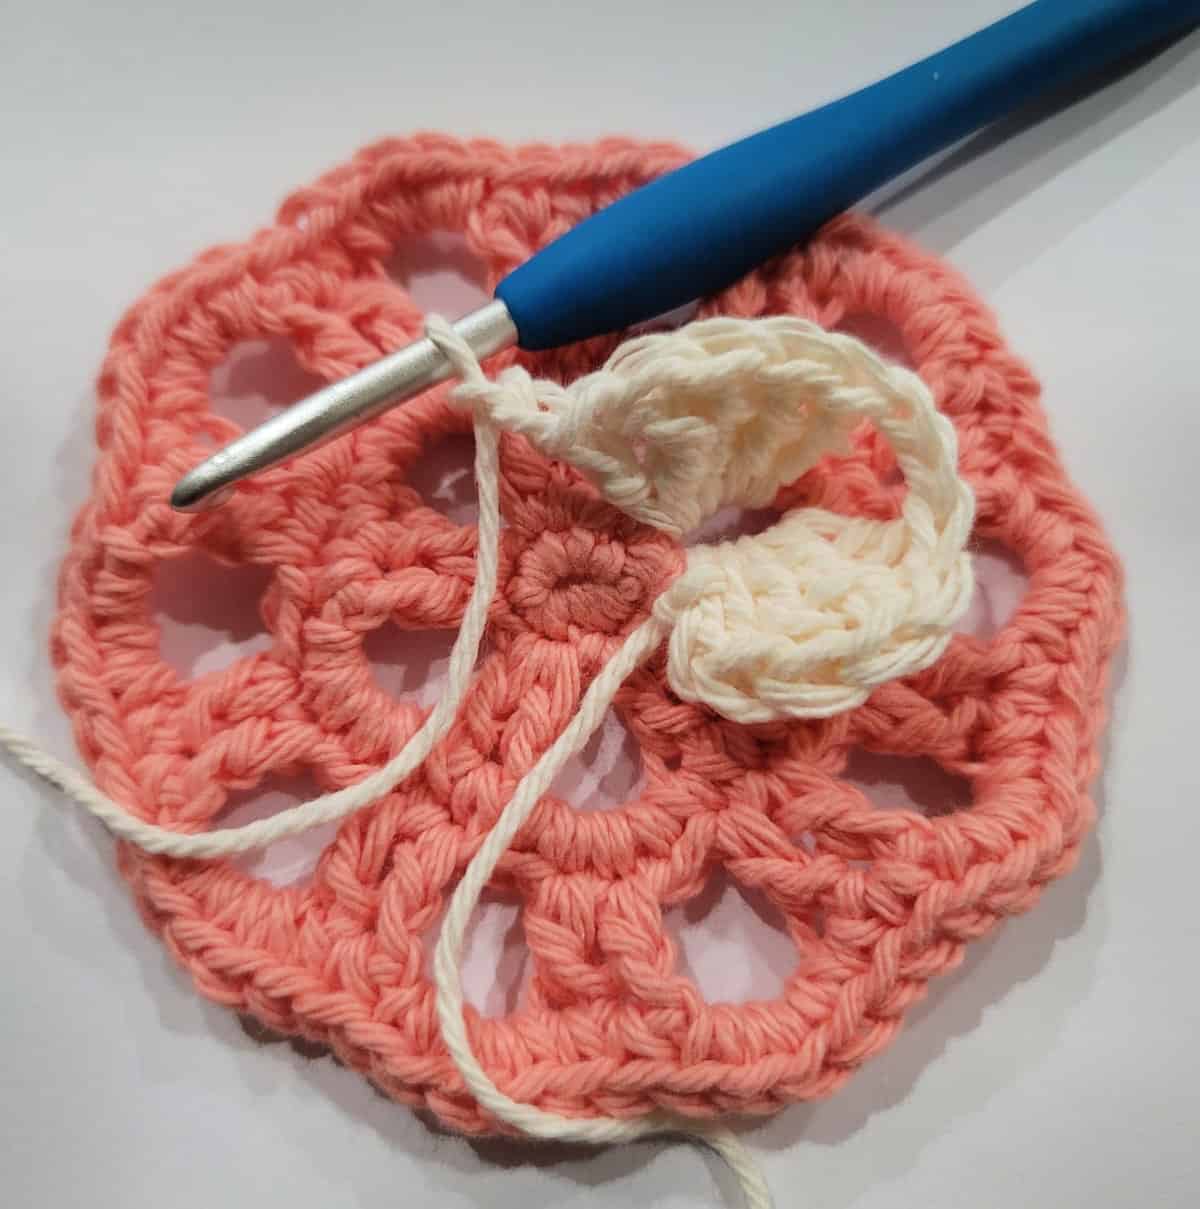
Note: I used a contrasting color for the petals in the photos so that it was easier to show stitch placement. But for my sample, I used MC for the flower base and petals. I chose to make my flower base and petals in MC because it made my flower look more full.
Petals worked around Round 2 dc’s
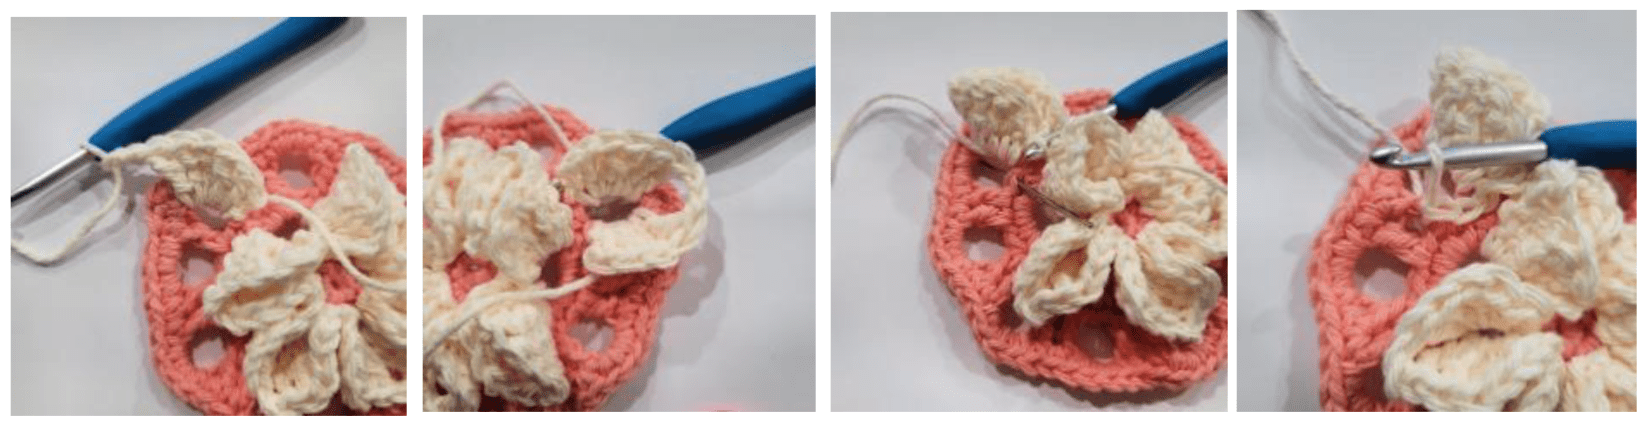
• Using MC and a 5.00mm crochet hook, join yarn with a sl st around the base of the post of the first dc of rnd 2, ch 2, work 1 dc & 4 tr around the post of the same dc, ch 2, turn to work sts around the post of the next dc, work 4 tr & 1 dc around the post of the next dc, ch 2, sl st around the post of the same dc, (sl st around the base of the post of the next dc, ch 2, work 1 dc & 4 tr around the post of the same dc, ch 2, turn to work sts around the post of the next dc, work 4 tr & 1 dc around the post of the next dc, ch 2, sl st around the post of the same dc) rep from ( to ) until you have 5 petals. Fasten off. Weave in ends.
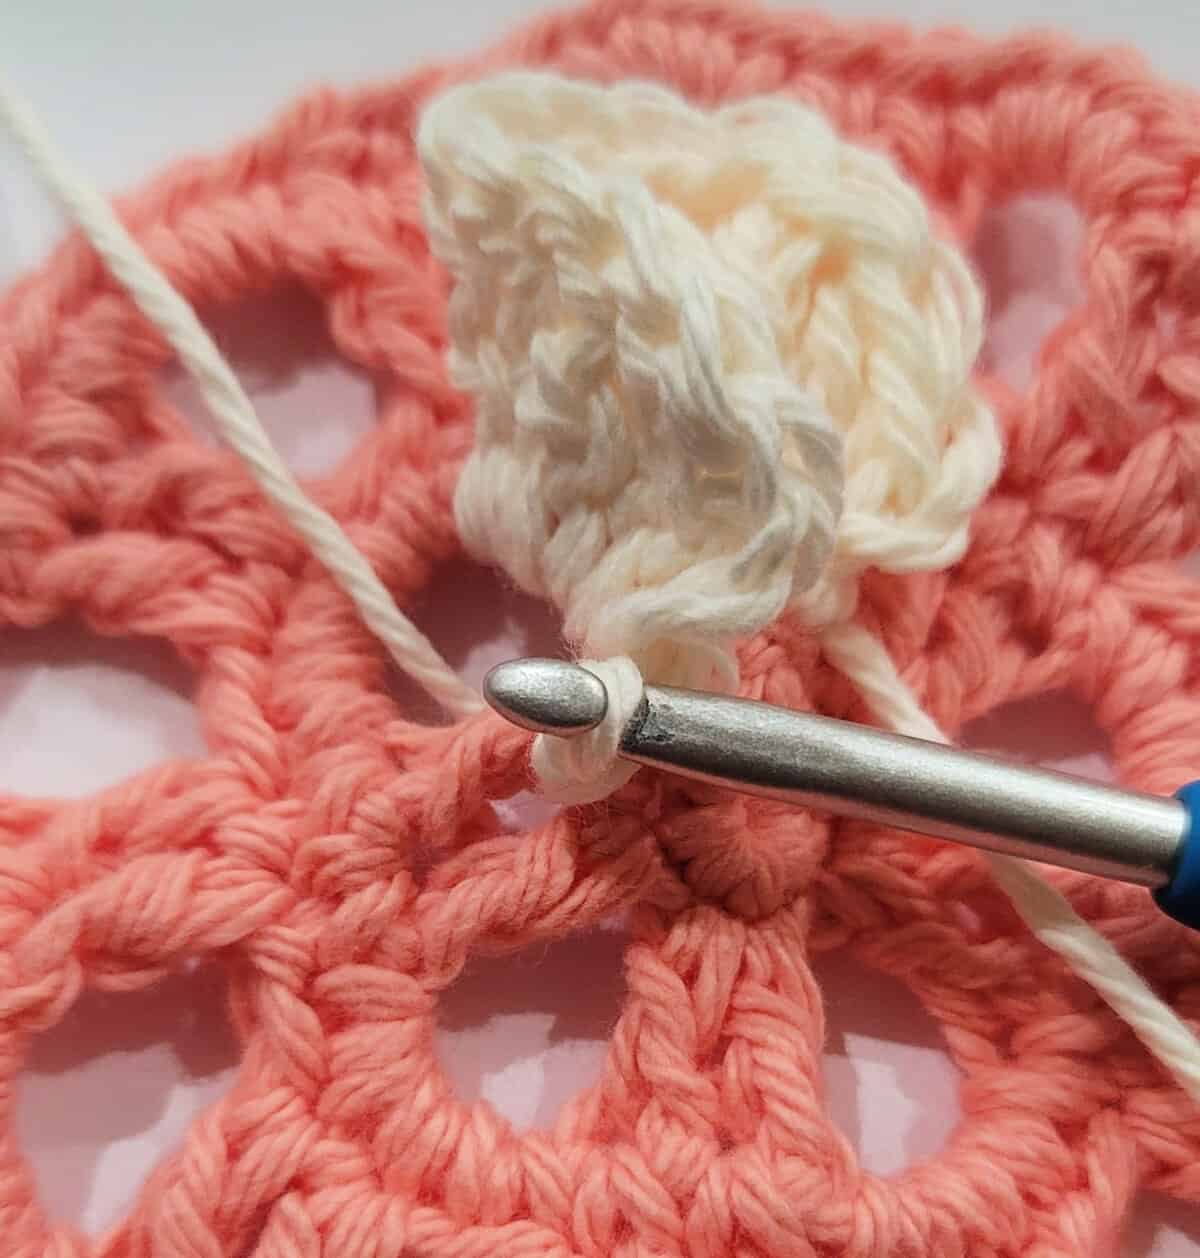
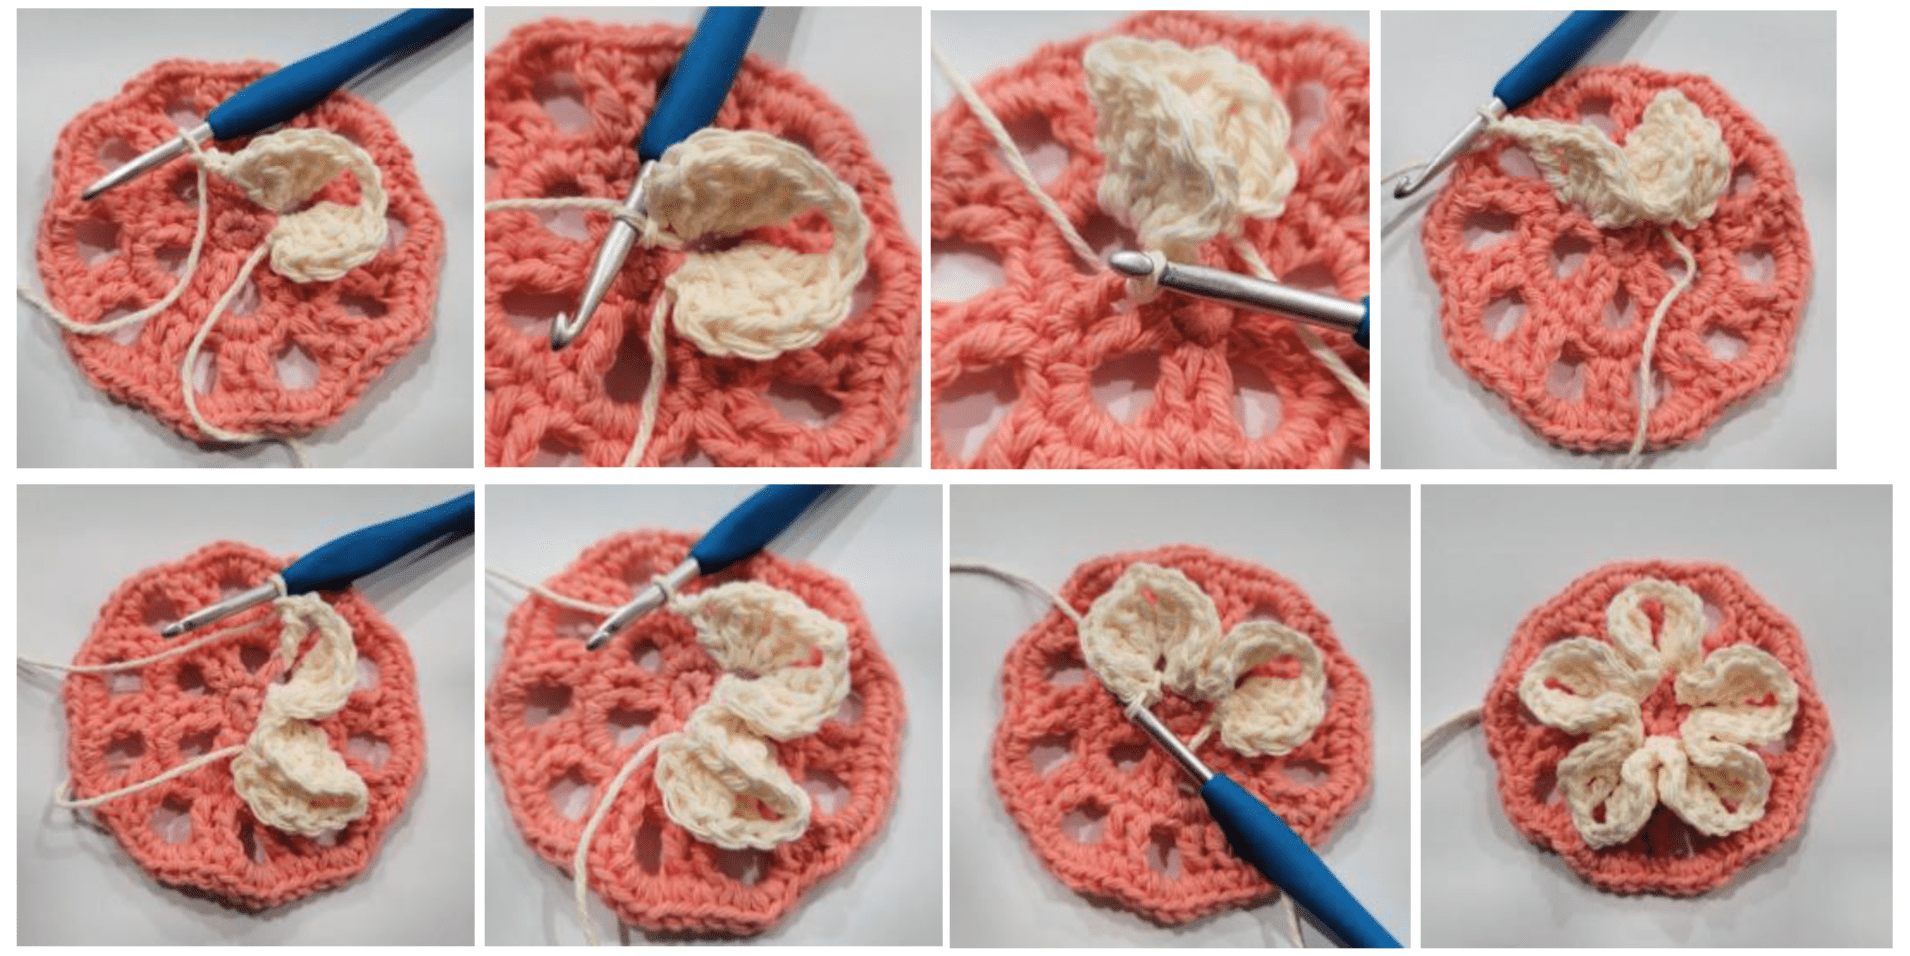
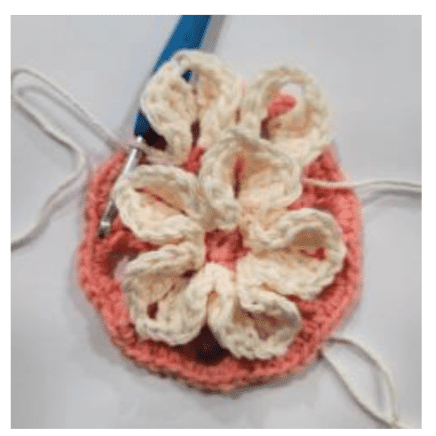
Petals worked around Round 4 dc’s
• Using MC & and 5.00mm crochet hook, join yarn with a sl st around the base of the post of the first dc of rnd 4, ch 2, work 1 dc & 4 tr around the post of the same dc, ch 2, turn to work sts around the post of the next dc, work 4 tr & 1 dc around the post of the next dc, ch 2, sl st around the post of the same dc, sl st into the next sc, (sl st around the base of the post of the next dc, ch 2, work 1 dc & 4 tr around the post of the same dc, ch 2, turn to work sts around the post of the next dc, work 4 tr & 1 dc around the post of the next dc, ch 2, sl st around the post of the same dc, sl st into the next sc) rep from ( to ) until you have 10 petals. Fasten off. Weave in ends. Continue on to the Optional Edging, if desired.
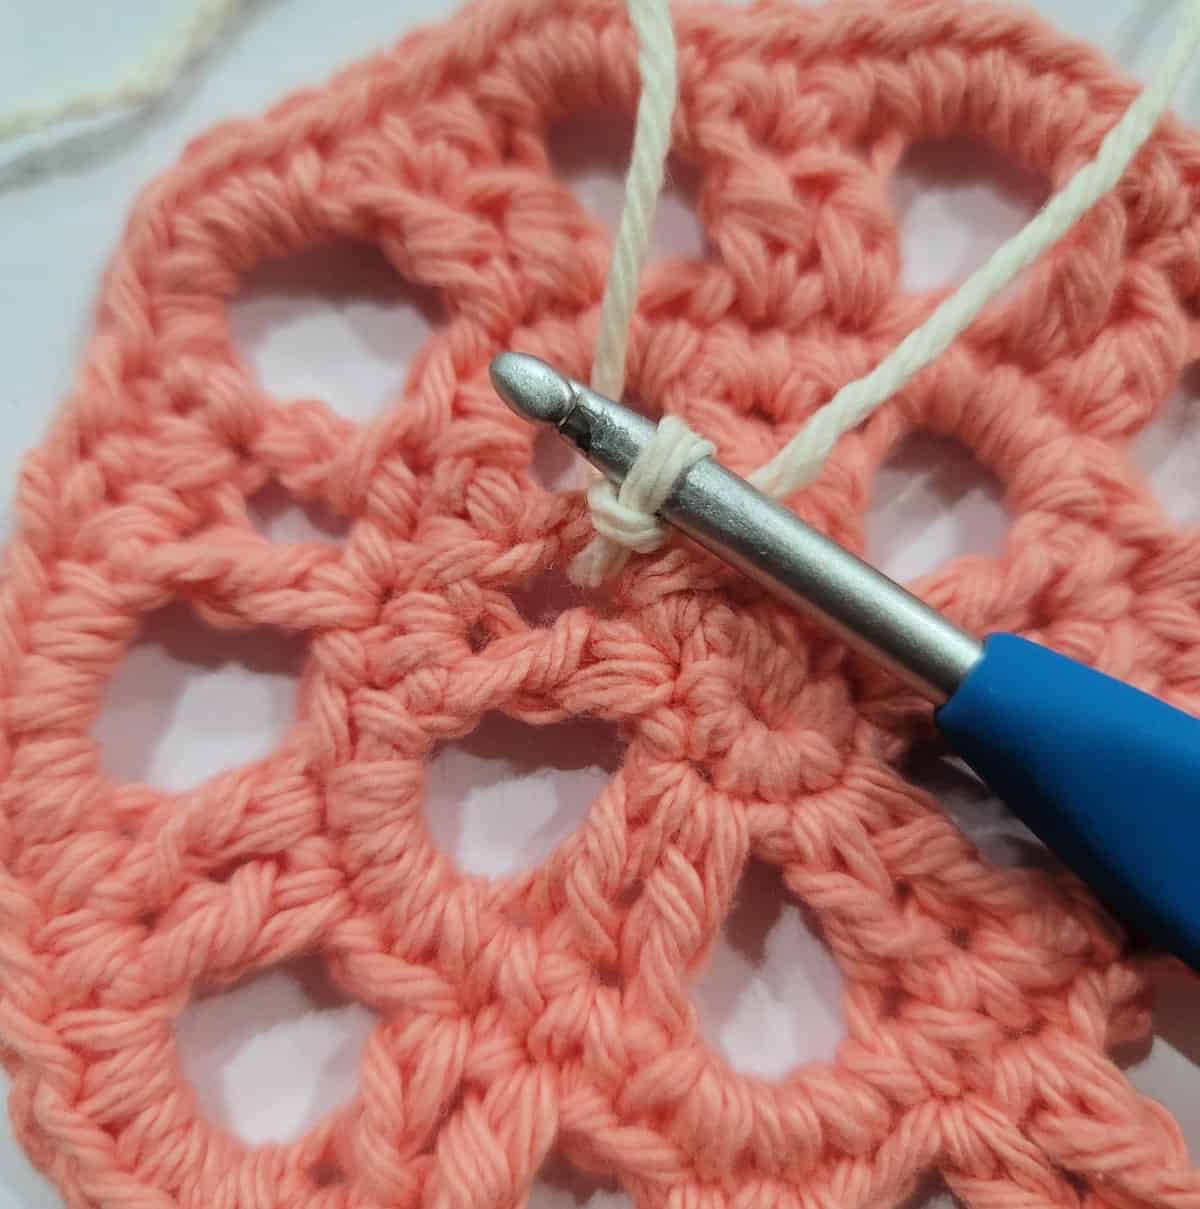
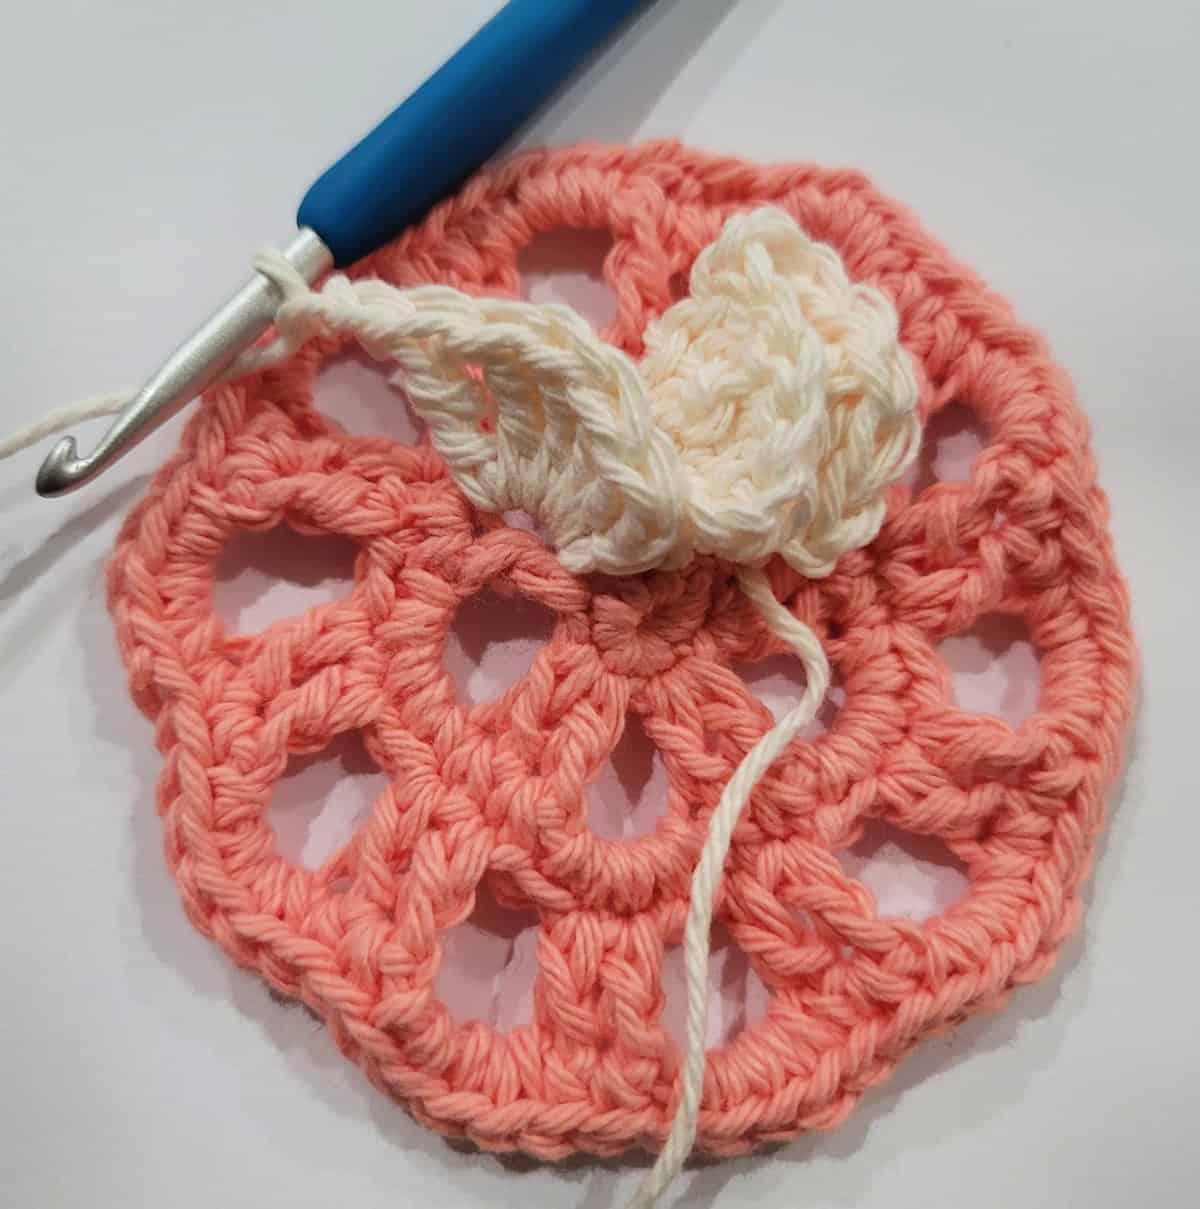
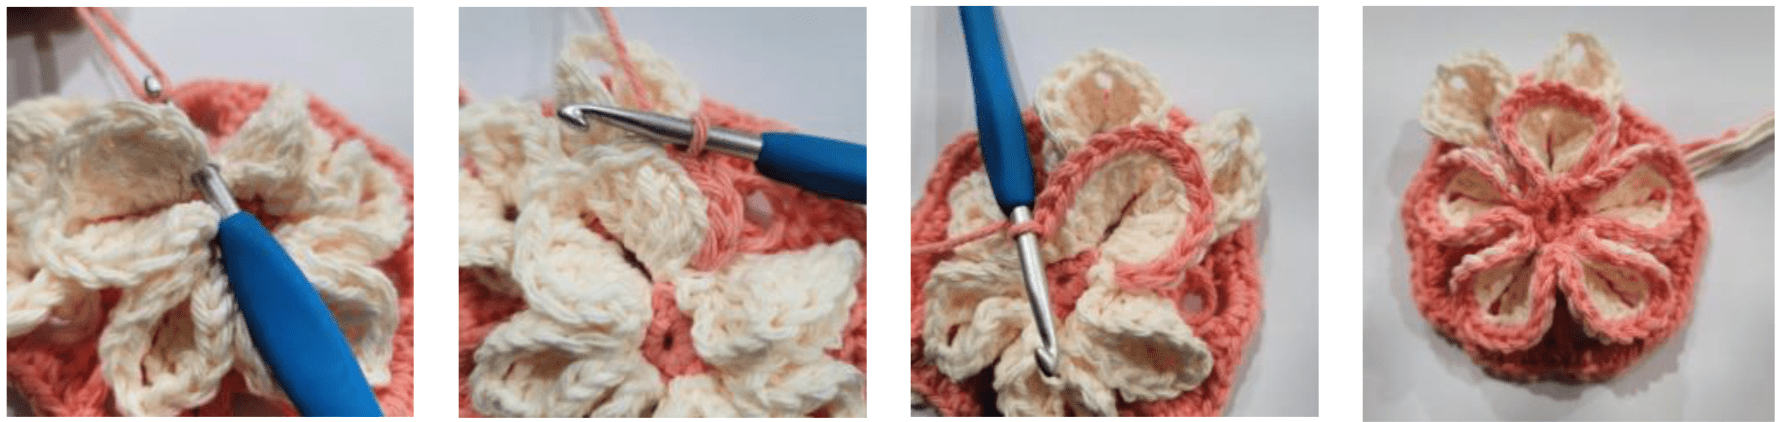
Optional: Outlining the Edges of the Petals
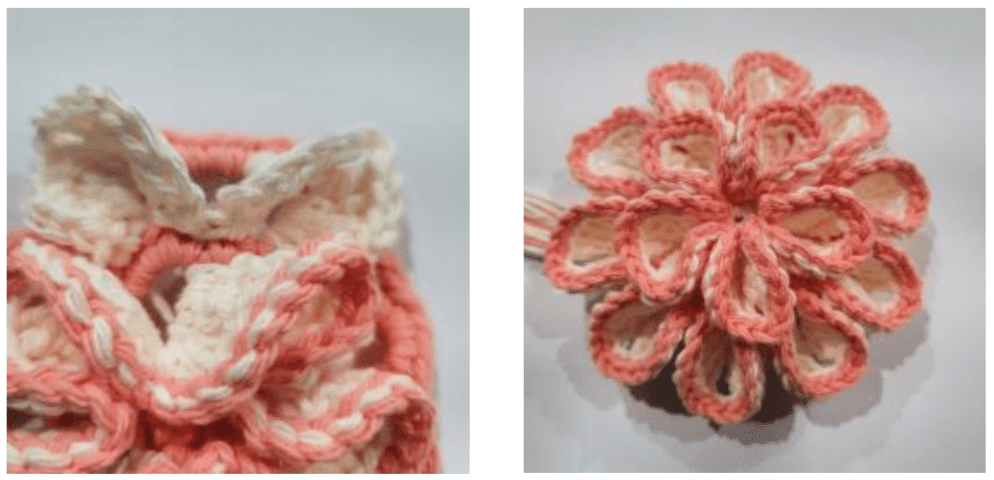
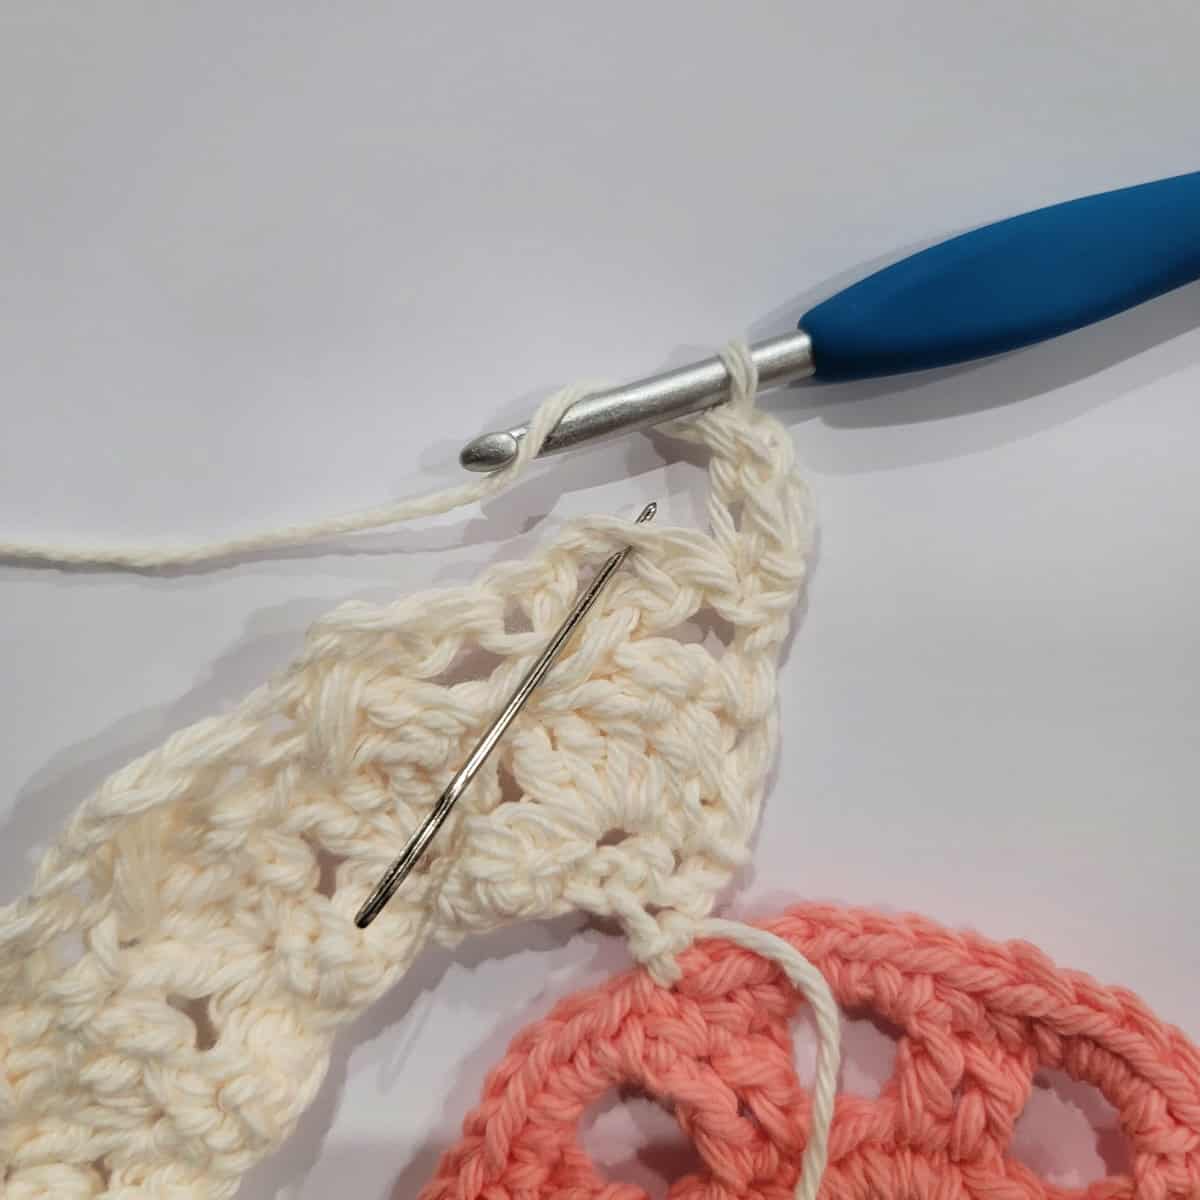
- Using CC and a 5.00mm crochet hook, join yarn with a sl st in the BLO of any st of any petal (see photos), working in BLO, sl st in each st and ch around each petal. Join with a sl st to the first st when you reach the end of the rnd. Fasten off. Weave in ends. Stitch count isn’t crucial. Repeat for the petals of the next round.
Body of Towel
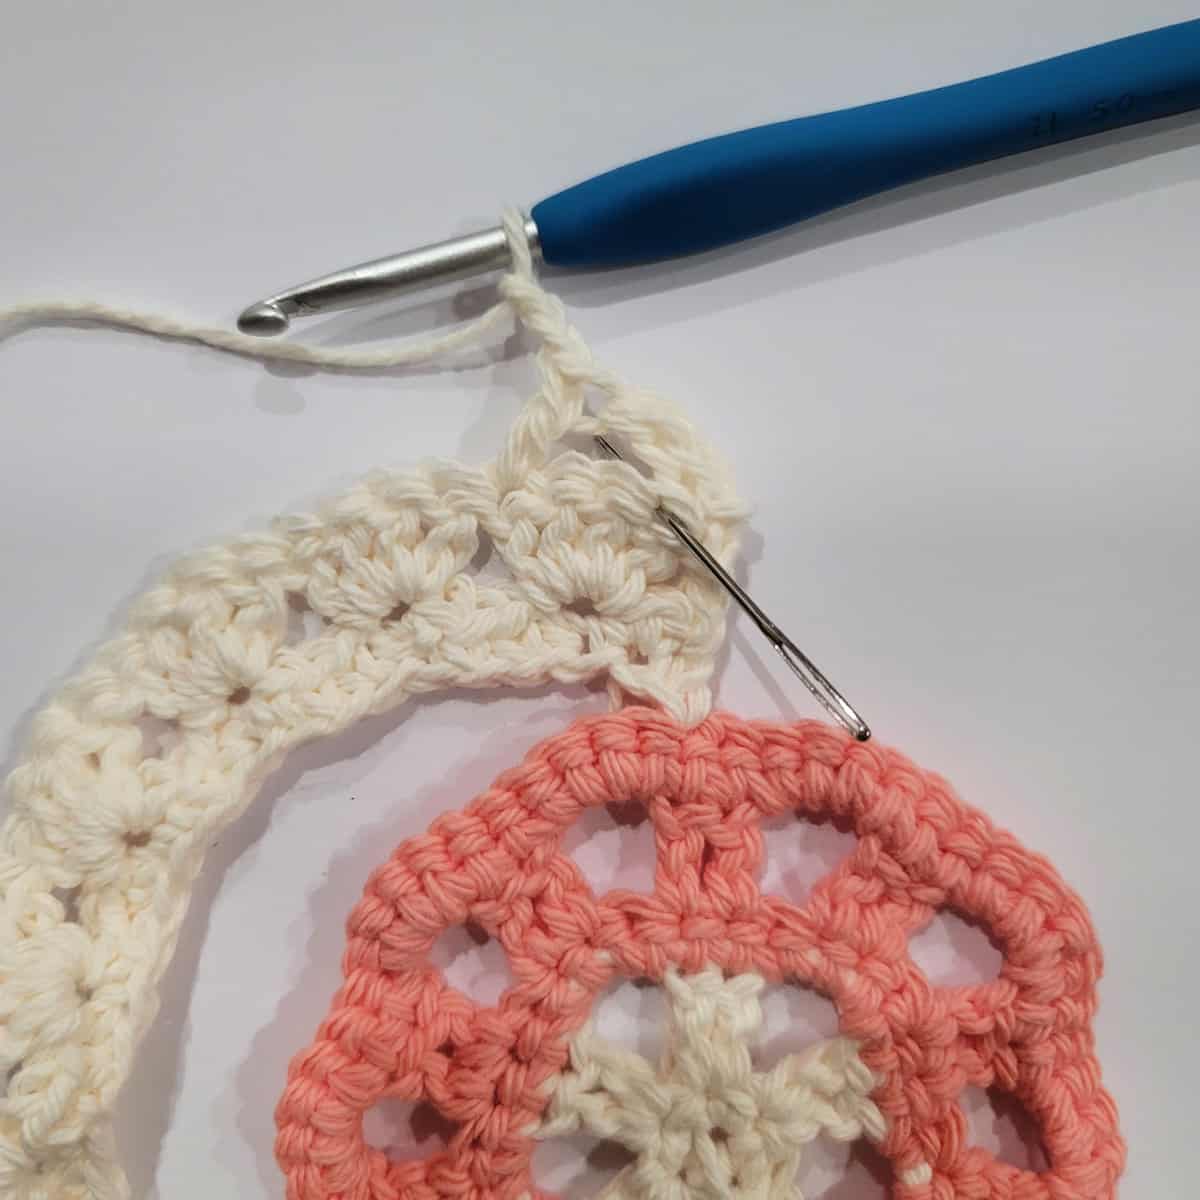
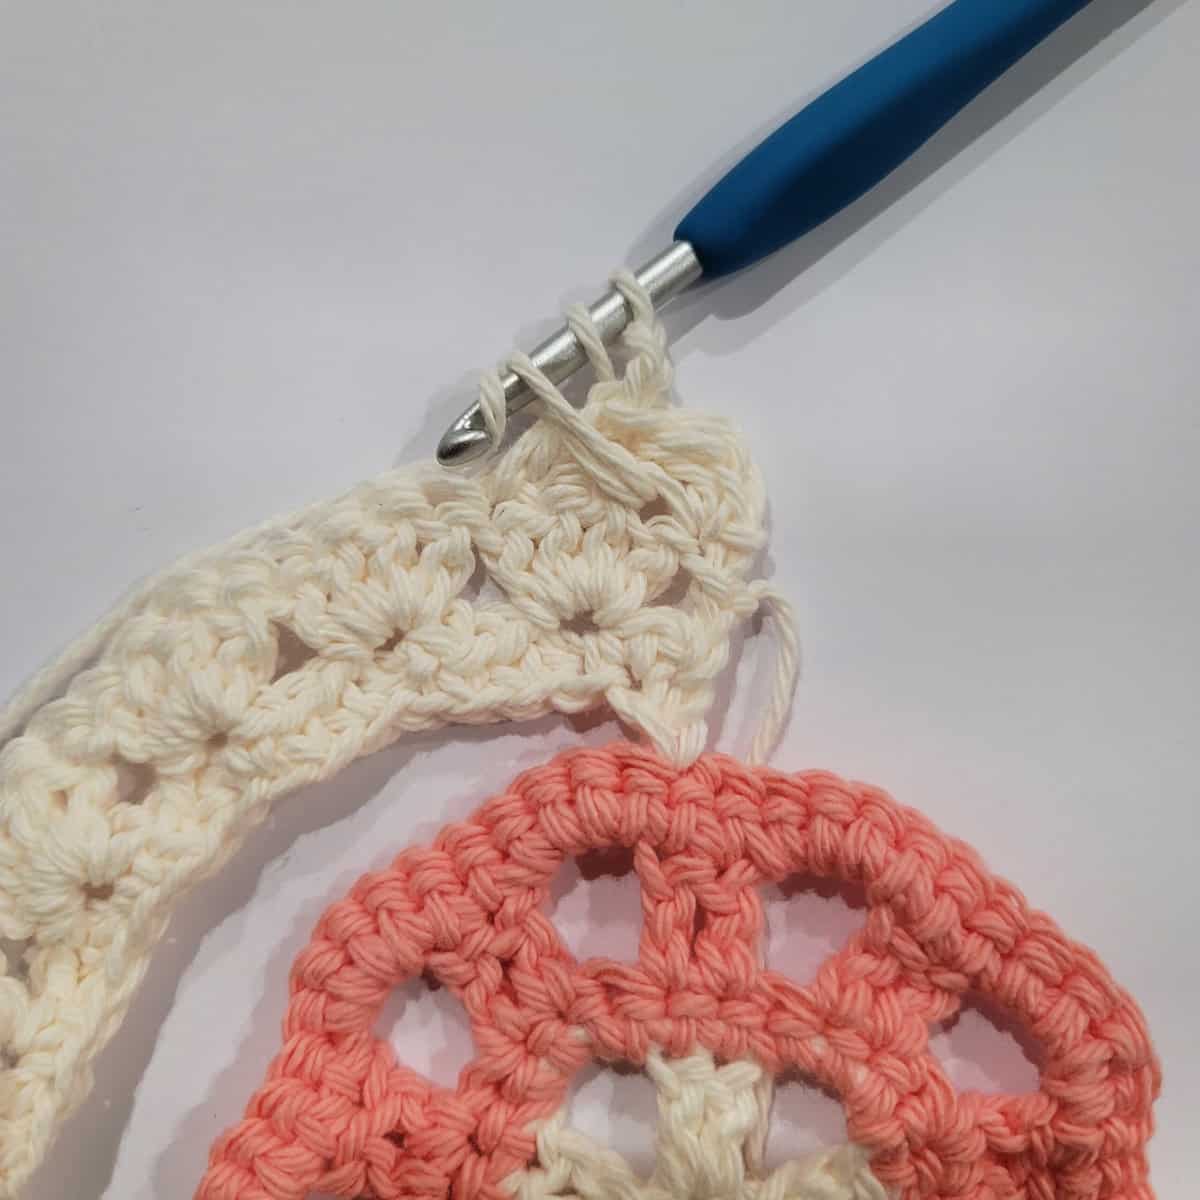
Row 1: With the RS of the flower facing you, use a 5.00 mm crochet hook & MC, join yarn with a sl st in a sc from Rnd 5 of the Flower Base, ch 32, skip each of the next 22 sts along Rnd 5 of the Flower Base, sl st into the next st. Turn. (32 chs)
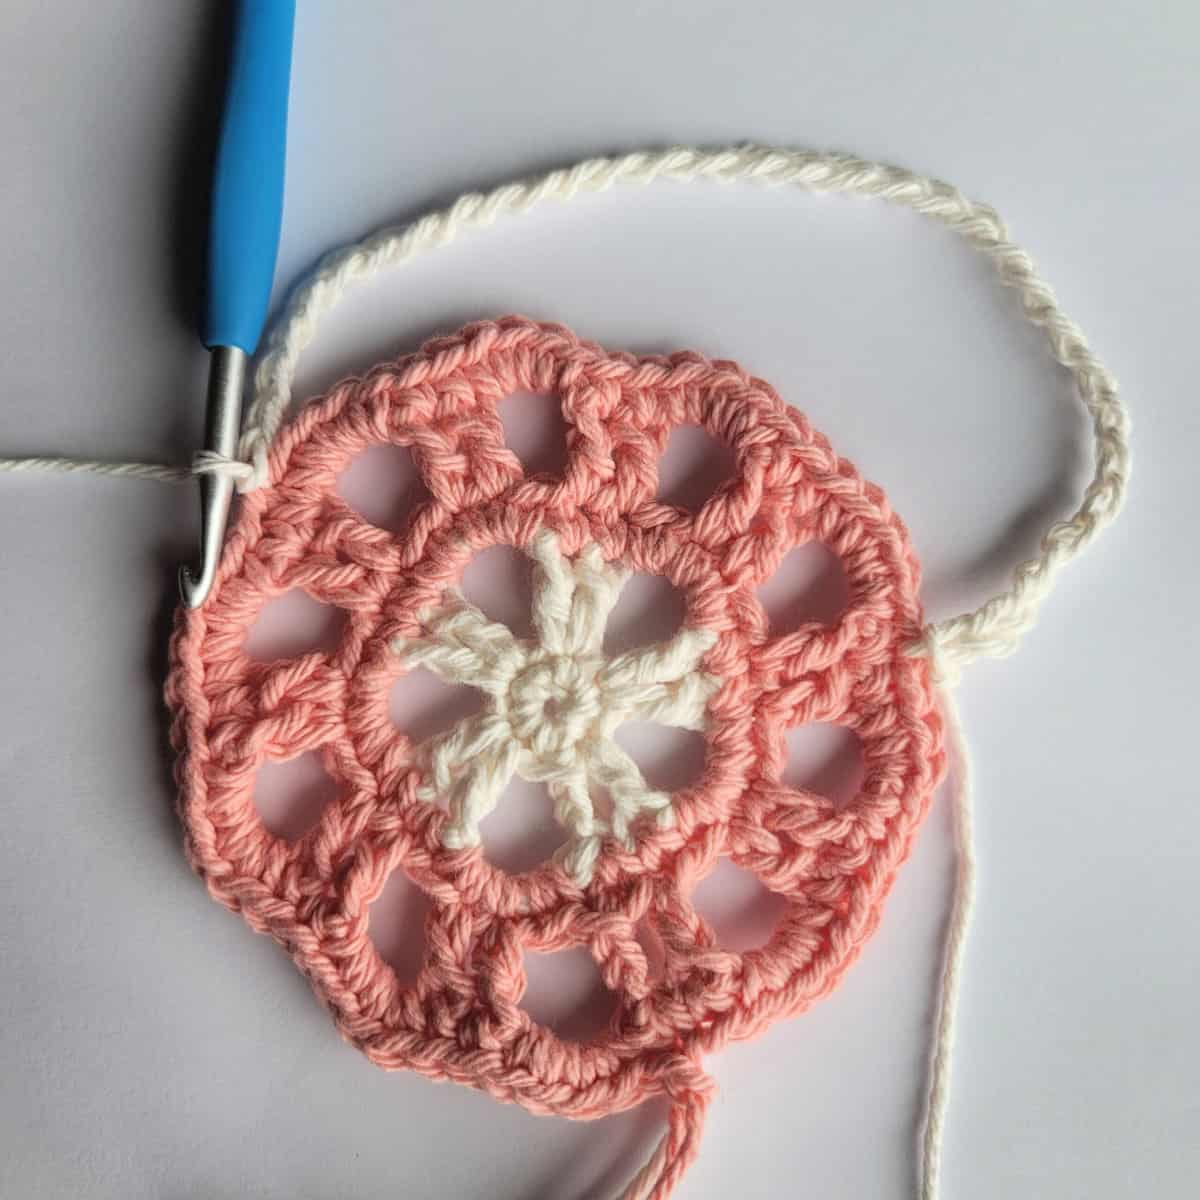
Row 2: Ch 1, 2 sc in the first ch, sc in each of the next 3 chs, (2 sc in the next ch, sc in each of the next 3 chs) rep from ( to ) across. Turn. (40 sts)
Row 3: Alt-dc in the first st, 4 dc in the next st, (skip each of the next 3 sts, 4 dc in the next st) rep from ( to ) until there are 2 sts remaining, skip the next st, dc in the last st. Turn. (42 sts)
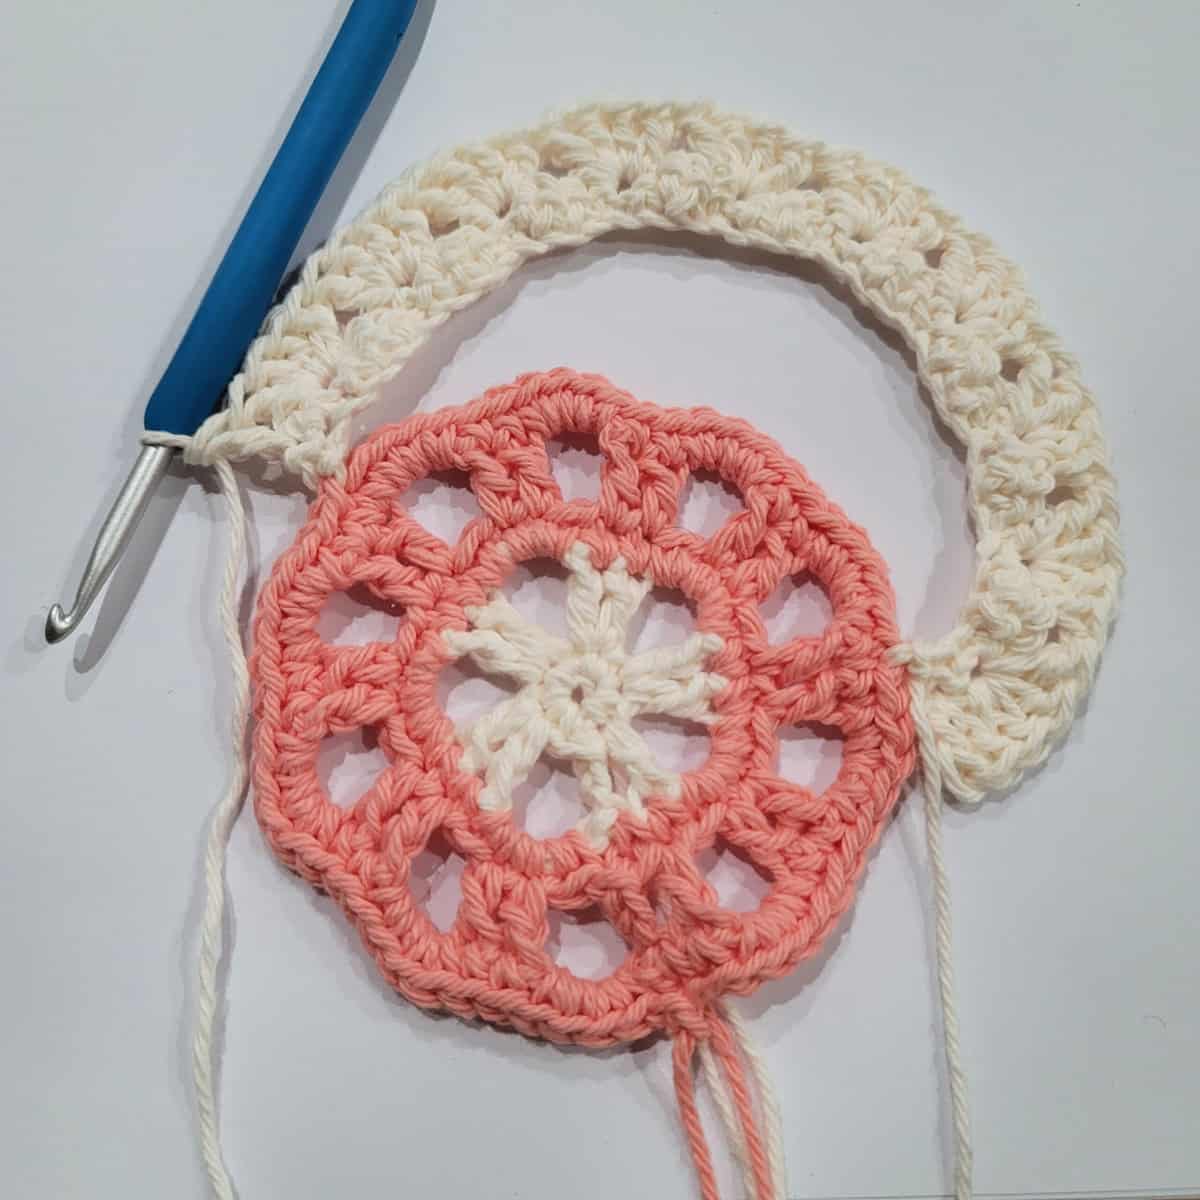
Row 4: Alt-dc in the first st, (skip each of the next 3 sts, dc in the next st, ch 2, work a dc in the first of the 3 skipped sts) rep from ( to ) across to the last st, dc in the last st. Turn. (22 sts + 10 ch-2’s)
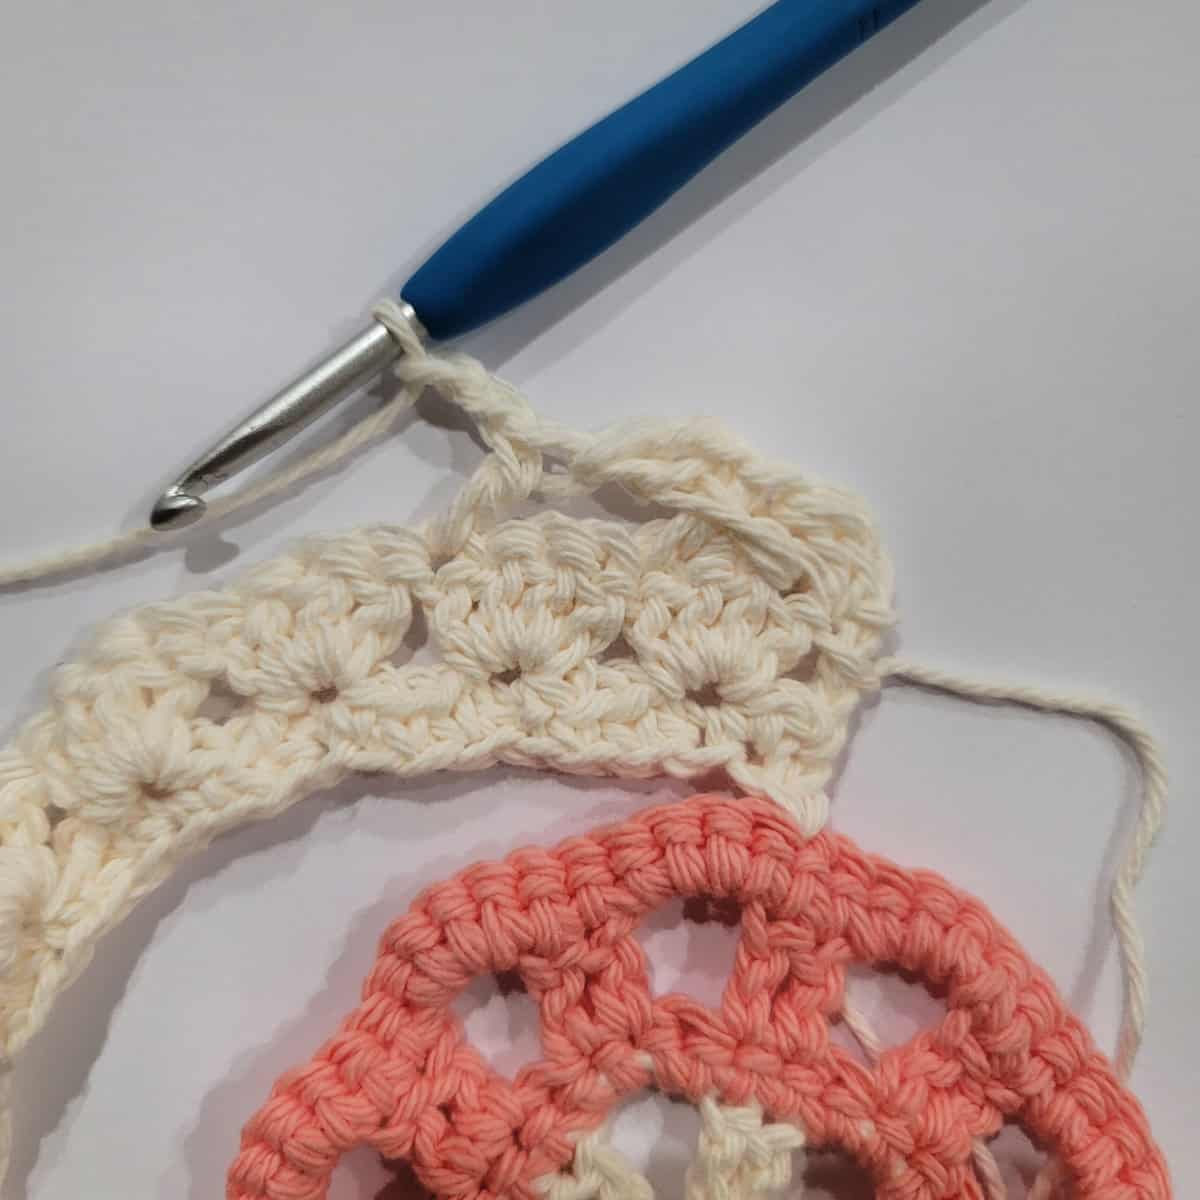

Row 5: Alt-dc in the first st, (4 dc in the next ch-2 sp) rep from ( to ) across to the last st st, dc in the last st. Turn. (42 sts)
Rep Rows 4 – 5 until it reaches 18″ long from Row 1 of Body of Towel.
Fasten off. Weave in ends. See the Gingerbread Man below for instructions on how to hang your Floral Blooms Hand Towel.
MORE FREE CROCHET PATTERNS FROM A CROCHETED SIMPLICITY
If you enjoy this crochet pattern for your home, you may enjoy these other projects as well. And if you just want to browse, you can find all of our free crochet patterns HERE.

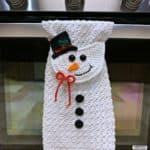
- Snowman Kitchen Towel
- Farmhouse Striped Kitchen Towel

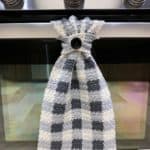
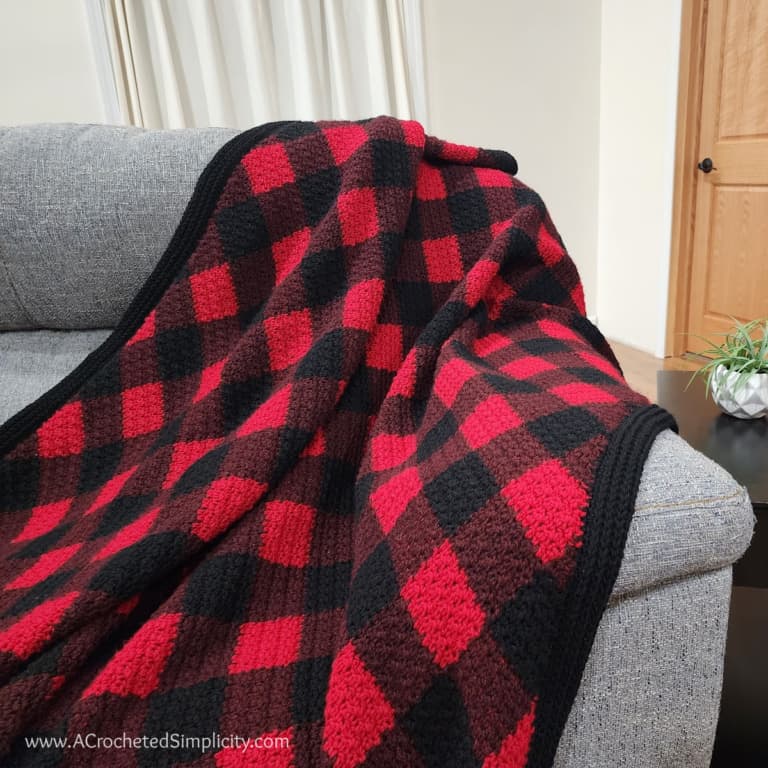
- Buffalo Plaid Kitchen Towel
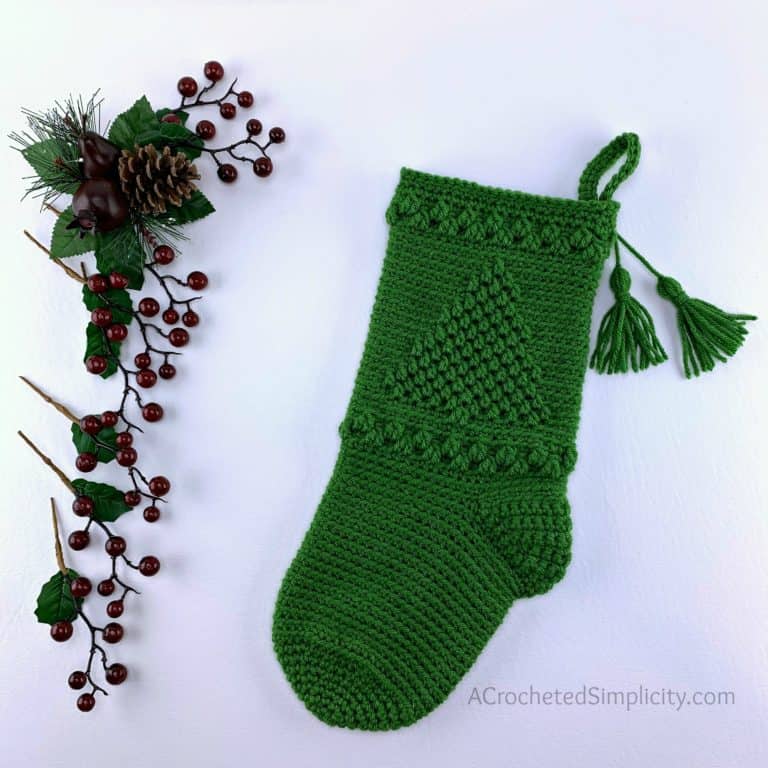
- Retro Christmas Tree Towel

- The Sun’s Out! Dish Scrubby


Are you intimidated by knit-look crochet? Would you love to learn my tips & tricks? Take an Annies Video Class with me and let me ease your fears and help you increase your skills! Click on the photo below to watch a free preview. You can also see the other 4 video classes I have available!

Please share your finished ACS projects with us in the A Crocheted Simplicity Crochet Community Group on Facebook! Use hashtag #ACrochetedSimplicity when sharing on social media so I can find your posts!
Hope to see you there!


So pretty! I really like the 3D floral topper.
Thanks!
This one will be for me. Change the color of the towel and maybe the flower and add color to top of the flower for popping effect. Thank you for the visual steps. Already have the Farmhouse style saved.
Great design! Would you be able to provide the stitch count to increase the width from 9 1/4 to 12 inches, since the cotton shrinks.
Thank you,
Hi Becky,
If you’d like to increase the width of your towel, do so in multiples of 4 sts.
Jennifer