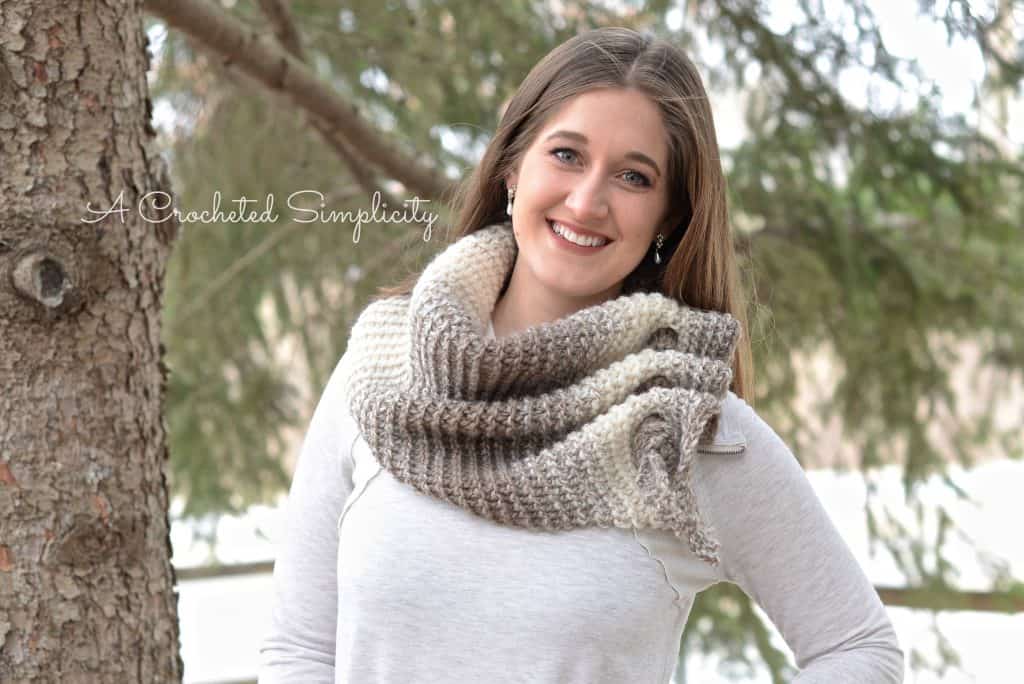
Free Crochet Pattern – Aveline Reversible Crochet Scarf
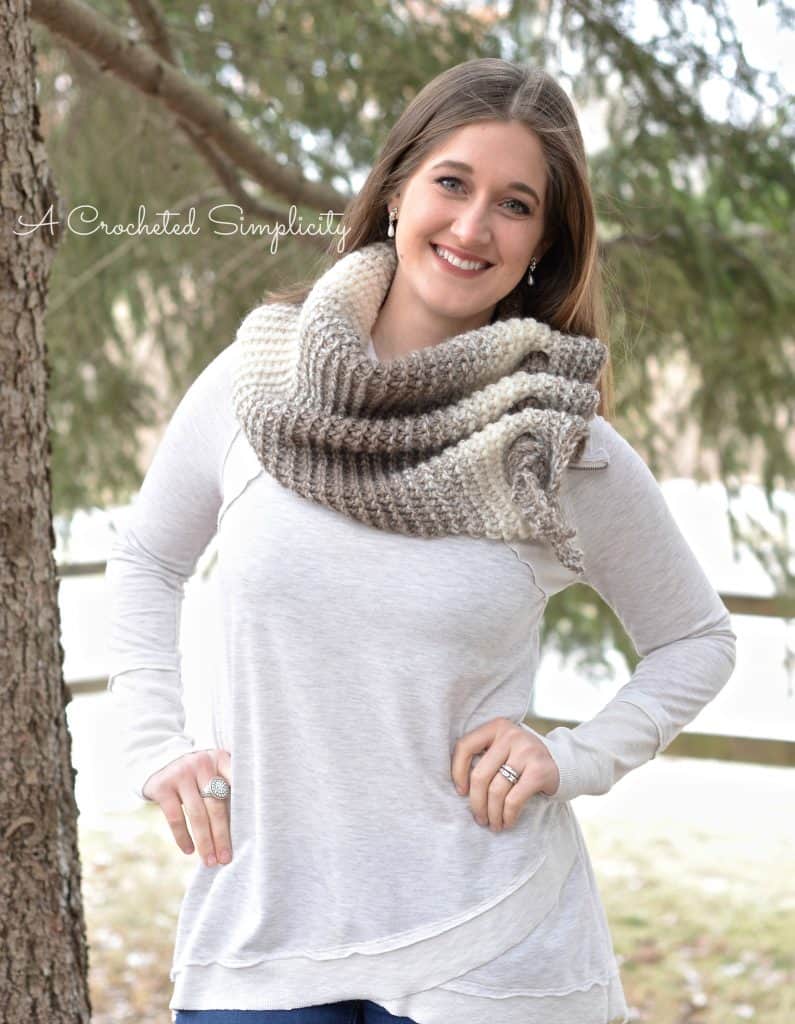
Designed for Elk Studio’s 2017 Make It For Me Event, the Aveline Reversible Crochet Scarf is not only stylish and REVERSIBLE, but it’s also a great (mostly mindless) project that you can crochet when you’re needing to decompress from the busy holiday season or just a long stressful day at work.
I’ve had a ball of Lion Brand Yarn’s Scarfie calling my name for a while now. It has been patiently waiting for just the right design and this was it! I realize not everyone has access to all yarns so I also wanted to make sure this design was something you could make using a yarn you can find locally or your favorite yarn & yarn weight so I’ve included instructions for using whichever yarn weight you’d like to use!
~Click HERE to sign-up to receive our weekly newsletter!~
~Don’t lose it, add It To Your Ravelry Favorites or Queue.~
~Don’t forget to Pin It too!~
*Purchase an ad-free PDF of this pattern (including all photos) on Craftsy or Ravelry*
This post contains affiliate links.

Materials
- Yarn: Yarn used for the sample shown above is Lion Brand Yarn Scarfie in Cream/Taupe; 5 / Bulky Weight Yarn; 1 ball (280 yards)
- Note: Although the yarn used in the sample is a bulky weight yarn, instructions are given so you can use any weight yarn you’d like.
- Crochet Hook: L/8.00mm (my favorite hooks are Clover Amour Hooks, I’ve never had an ache in my hand since switching)
- Locking Stitch Markers (12)
- Scissors
- Tapestry Needle
Many of the materials are available for purchase through our affiliates:
 Scarfie Bulky Yarn, Cream/Taupe, 936 Foot (Pack of 1)") Lion Brand Yarn (1 Skein) S...Shop on Amazon
Lion Brand Yarn (1 Skein) S...Shop on Amazon  Clover 1055/L Amour Crochet...Shop on Amazon
  Clover Lock Ring Markers, 2...Shop on Amazon
  Fiskars 154110-1001 Non-sti...Shop on Amazon
Stitch Abbreviations
- ch(s): chain
- st(s): stitch(es)
- sl st(s): slip stitch
- sc: single crochet
- FLO: front loop only
- BLO: back loop only
- RS: right side
- SM: stitch marker
- Rep: repeat
Finished Size
- One Size / Asymmetrical Triangle: 38-1/2″ longest side x 21-1/2″ shortest side x 44″ long angled side
- Finished size can be easily adjusted to suit your own individual taste.
Notes
- Beginning chains are not counted as a stitch or included in stitch count.
- The first stitch of each row is worked into the same stitch as the turning chain, unless stated otherwise.
- See Yarn Notes below for instructions on using another weight of yarn.
Yarn Notes
- Although I used Lion Brand Scarfie (a bulky/5 weight yarn) for my scarf, you can use your favorite weight yarn by following these notes:
- Choose your favorite yarn, check the yarn label to see what crochet hook size the manufacturer suggests and then grab a hook that is 2 sizes larger than what’s suggested. This is the rule of thumb I like to use to achieve the drape desired for this project (you can use a larger hook if you’d like more drape). For example, Lion Brand Wool Ease is a favorite light worsted/4 weight yarn of mine. The yarn label suggests a J/10/6.00mm crochet hook so I used a 7.00mm crochet hook instead.
If you’re looking for a great new crochet hook case, click here to check out this one from our affiliates!

Click HERE to read my blog post & watch a Video Tutorial on this technique
Aveline Reversible Crochet Scarf Instructions
Row 1 (RS): Ch 2, work 2 sl sts into the FLO of the 1st ch. (2 sts) See photos below.
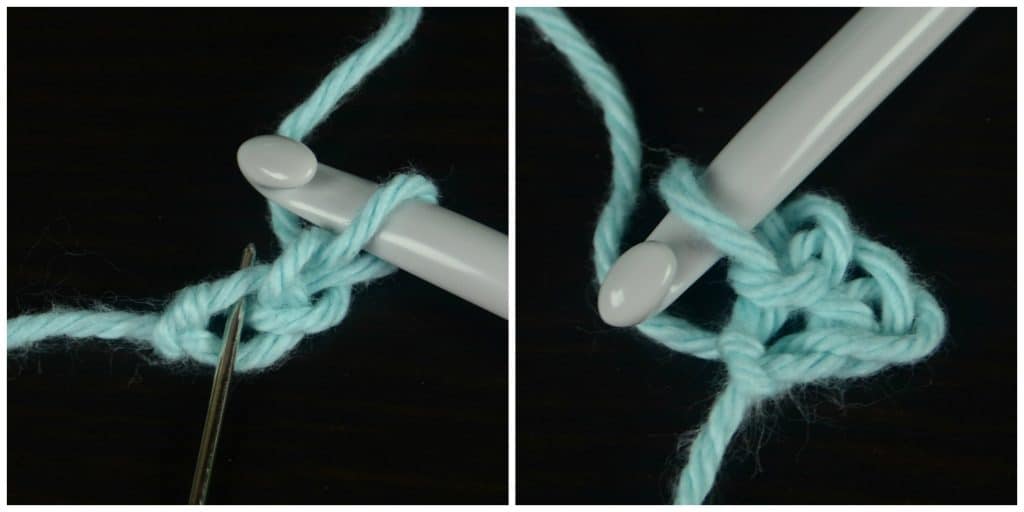
Row 2: Ch 1, Turn, BLO sl st in each st across. (2 sts)
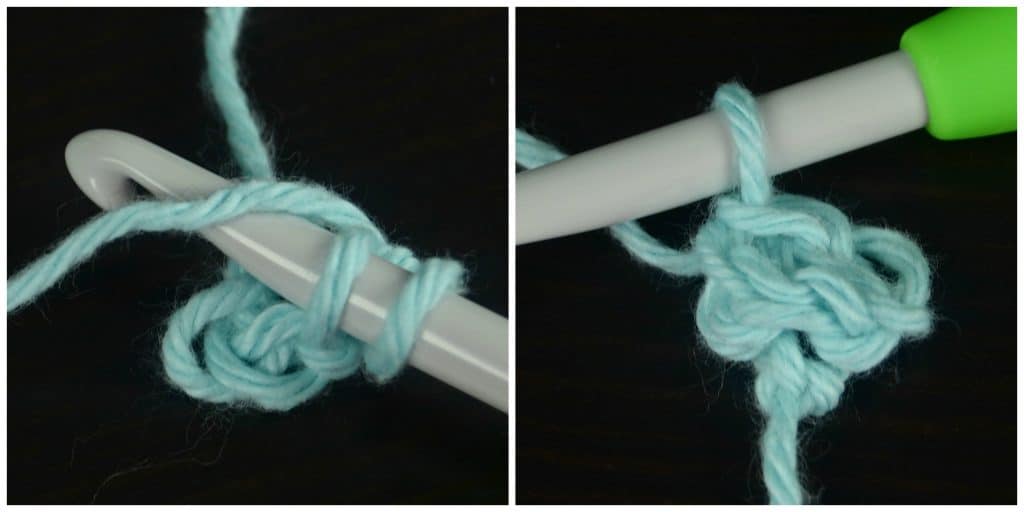
Row 3: Ch 2, Turn, FLO sl st in the 2nd ch from your hook, FLO sl st in each st across. (3 sts) *Each Row 3 rep increases your st count by 1. Tip: Place a SM in the last st of every odd row rep to help keep that last st from hiding after you turn. This will take the guess work out of where you need to work the first st in each even numbered rows. Sometimes in sl st crochet the last st of the row likes to hide. 😉

Row 4: Ch 1, Turn, BLO sl st in each st across. (3 sts)
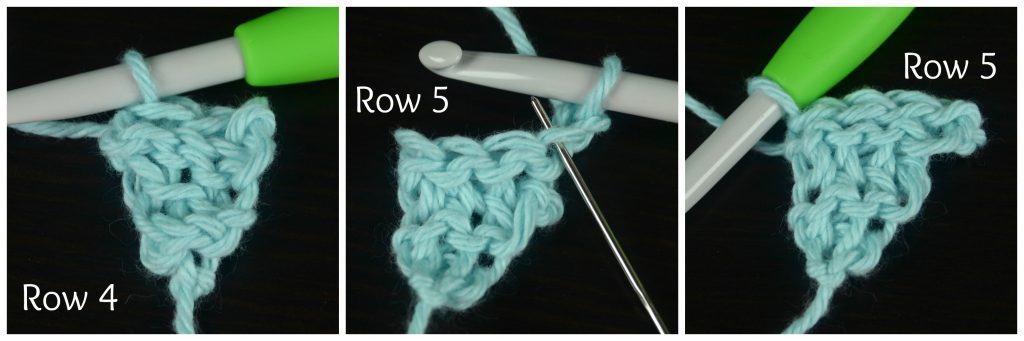
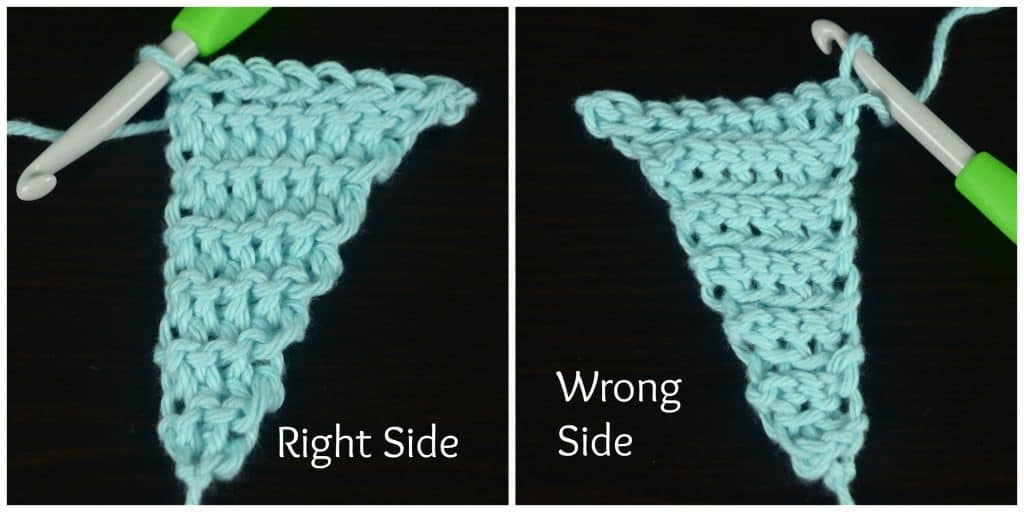
Rep Rows 3 – 4 until scarf measures at least 36″ from Row 1. Make sure to end with a Row 4 rep. The short edge of my scarf measures approximately 20-1/2″ at this point. Continue on to creating holes for scarf tail. The photos below show what your work should look like after a few rows. Notice one edge is straight and the opposite edge is angled. If desired, you can create a longer scarf (or even a wrap) simply by continuing to repeat Rows 3 – 4 until it’s the length you’d like.
Creating Holes for Scarf Tail
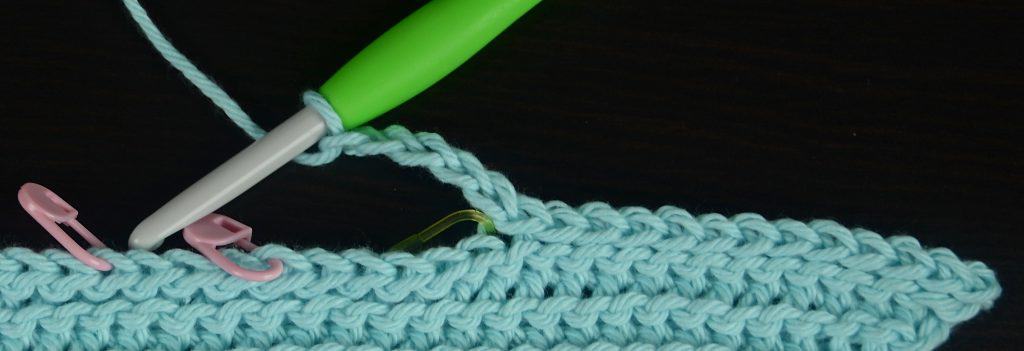
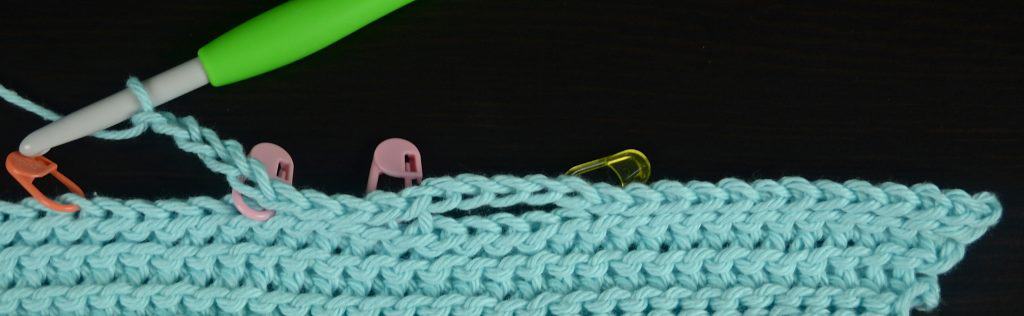
- You will need to create (6) 1-1/2″ holes across the short edge of your scarf to weave the tail of your scarf through.
- Turn your scarf so that the RS is facing up and the angled edge is on your right. Place the first SM 2.5″ from the angled edge. Place the remaining SM 1.5″ to the left of the previous SM. You will place 12 SM.
- The exact size of the holes isn’t critical. If they differ in size by + or – 1 st, it’s okay. If the distance from the angled edge to the 1st SM isn’t 2.5″, that’s okay too. This is a scarf and not a sweater so you have a little wiggle room for measurements.
- See the photo below for help placing your SM.

- Once all SM are in place, work the row below:
Row to create holes for scarf tail: Ch 2, FLO sl st in the 2nd ch from your hook, FLO sl st in each st across to first SM, [ ch 1 ch for each st between SM, skip sts between SM, FLO sl st in next st w/ SM and in each st to next SM ] repeat across. (6 holes created) See the photos below for help working this row.

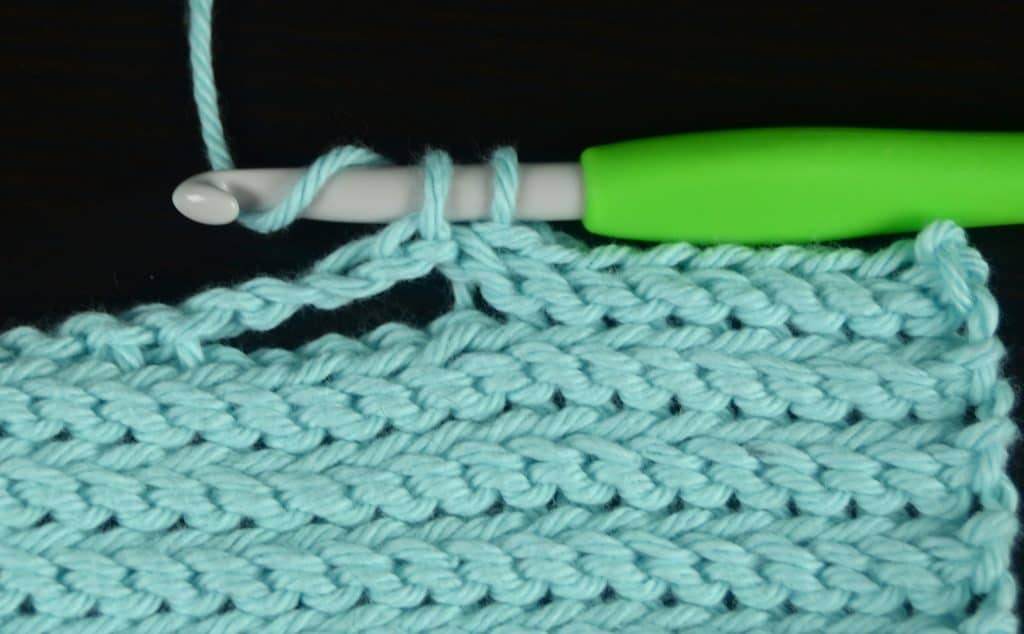
Remaining Rows: Rep Rows 2 – 3 until your scarf measures at least 38-1/2″ from Row 1. *See photo below for the first Row 2 rep after working the holes. Work into the BLO of the chs.
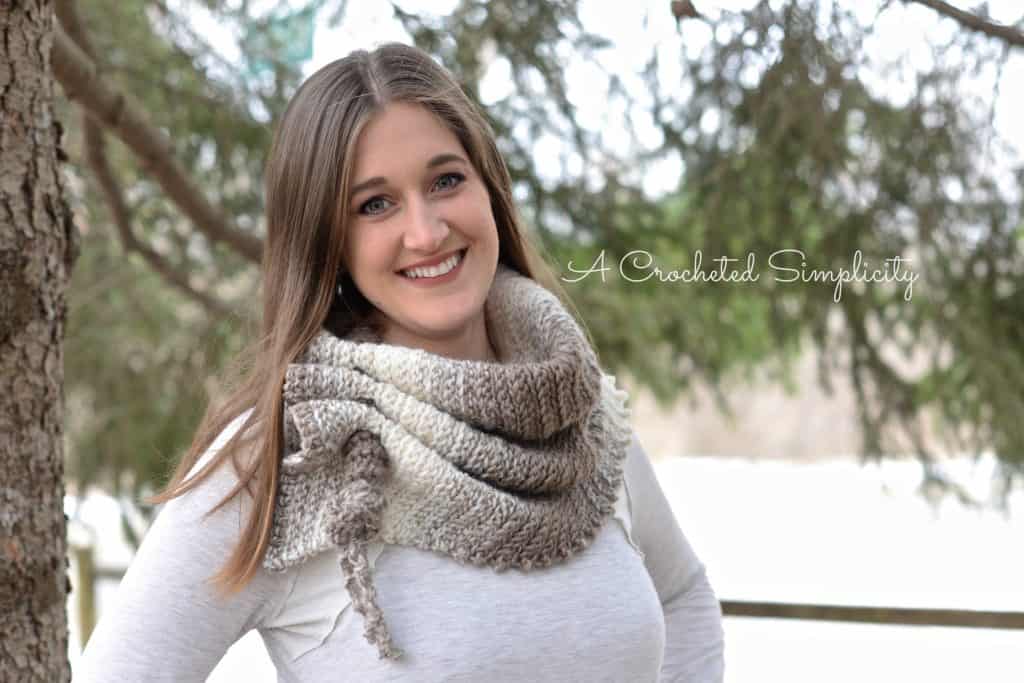
Fasten off. Weave in ends. To wear, wrap the scarf around your neck (with your favorite side facing out) and weave the skinny tail thru the 6 holes you created. In the photos above, I have knotted the skinny end of the tail after weaving it thru the holes.
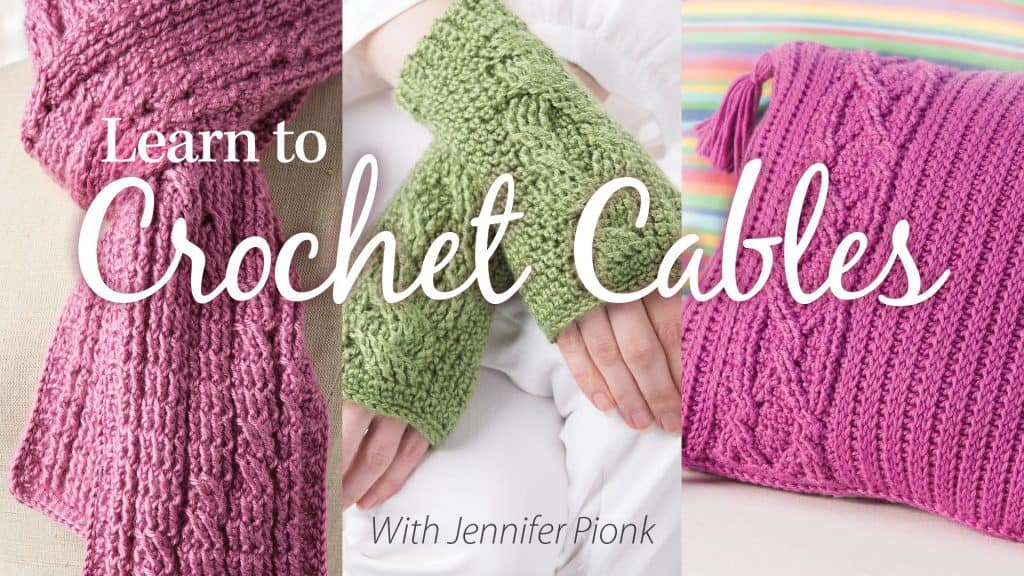
Are you intimidated by crocheted cables? Would you love to learn? Take an Annies Video Class with me and let me ease your fears of crocheted cables! Click on the photo below to watch a free preview. You can also see the other 2 classes I have available! (affiliate link)
I hope you’ve enjoyed this free crochet pattern! Check out my Ravelry shop to see all of my designs!
I LOVE seeing your finished projects! Please feel free to share them in the A Crocheted Simplicity Crochet Community group on Facebook!
Happy Crocheting!
What a wonderfully simoly instructive page! Thanks!?
This is stunning! Love it!
Thank you, Megan!
Aveline is my daughter’s name! I’d love to know how you decided on it for the name of this scarf. 🙂
A friend suggested that it needed a French name so I googled French baby names and this one stuck out to me. 🙂
wish u had shown a picture of it finished not wrapped around neck. Is this just a triangle or what shape is it finished?
It is a 90 degree triangle.
I’m confused about the tail. In the pic it looks like a curly tail but I don’t see instructions for that here. Maybe I need to buy the ad-free PDF. It would be a shame to have such a cool scarf, and just the tail end of yarn weaved through to hold it. Would really love to make this, are there instructions I’m missing?
The scarf that my daughter is wearing just has a knot near the end of the skinny tail that was woven thru the openings. Nothing fancy. 🙂 You could easily sewn on a button and add a chain loop to the skinny tail for something different. 🙂 There’s nothing missing from the free instructions that is in the ad-free pdf. 😉
How do you think this would come out using single crochets instead?
It would have a different texture and look to it. It may also affect the overall drape. I would suggest working a few rows to see if you like it. 🙂
Lovely. Love the color of the Scarfie, as well. Thank you for putting up the photos…they’re very helpful. I can’t wait to make it.
I love this scarf!!!…I may have to finally make something for myself…
I love the look of this scarf! I have been meaning to make myself one of these for a while.
This scarf looks so cute! I l am adding it to my list of future projects. Thanks so much for including instructions for any yarn weight. That really helps with using up stash yarn, which is one of my goals moving into the new year. I also love that this pattern can be made into a wrap!